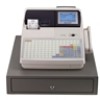
Sharp UP-700 Instruction Manual - Page 22
Prior to Entries - register
 |
View all Sharp UP-700 manuals
Add to My Manuals
Save this manual to your list of manuals |
Page 22 highlights
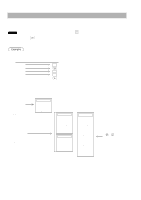
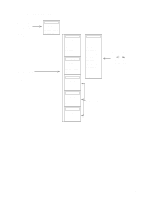
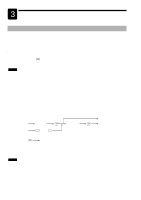
3 Prior to Entries Preparations for Entries s Receipt and journal paper rolls If the receipt and journal paper rolls are not set in the machine or there are low rolls, install new ones according to section "Installing and Removing the Paper Roll" under "Operator Maintenance." s Receipt ON/OFF function You can disable receipt printing in the REG mode to save paper using the receipt function. To disable M receipt printing, press the key and select RCP SW. from the menu to select an option, OFF. When the function is in the OFF status, the receipt off indicator "R" is highlighted. NOTE Your register will print reports regardless of the receipt state. This means that the receipt roll must be installed even when the receipt state is "OFF". s Clerk assignment Prior to any item entries, a clerk must enter his/her clerk codes into the POS terminal. On your POS terminal, you have three options to enter your clerk code. You can use any of the following systems to assign your clerk code. Real clerk key system Just insert your clerk key in the clerk switch to sign on. To sign off, just withdraw the key. Clerk code entry system (option) Flow the procedure shown below. To sign on: Clerk code (In case of secret code is 0000) ˚ Secret code ˚ CLK 1 through CLK 10 To sign off: ˚ VMF clerk key system (option) If you need this system, please consult your authorized SHARP dealer. NOTE • Real clerk key system has the priority over the clerk code entry system, that is, during a clerk is signed on by the clerk code entry system, the other clerk can sign on by the real clerk key system (the former clerk is signed off). • During a clerk is signed on by the real clerk key system, the other clerk can not sign on by the clerk code entry system. • In the clerk code entry system, if another clerk is signed on while a clerk is signed on, the latter will automatically be signed off. • If you want to enter a clerk code before every transaction, consult your authorized SHARP dealer. 20
-
 1
1 -
2
-
3
-
4
-
5
-
6
-
7
-
8
-
9
-
10
-
11
-
12
-
13
-
14
-
15
-
16
-
 17
17 -
 18
18 -
 19
19 -
 20
20 -
 21
21 -
 22
22 -
 23
23 -
 24
24 -
 25
25 -
 26
26 -
 27
27 -
28
-
29
-
30
-
31
-
32
-
33
-
34
-
35
-
36
-
37
-
38
-
39
-
40
-
41
-
42
-
43
-
44
-
45
-
46
-
47
-
48
-
49
-
50
-
51
-
52
-
53
-
54
-
55
-
56
-
57
-
58
-
59
-
60
-
61
-
62
-
63
-
64
-
65
-
66
-
67
-
68
-
69
-
70
-
71
-
72
-
73
-
74
-
75
-
76
-
77
-
78
-
79
-
80
-
81
-
82
-
83
-
84
-
85
-
86
-
87
-
88
-
89
-
90
-
91
-
92
-
93
-
94
-
95
-
96
-
97
-
98
-
99
-
100
-
101
-
102
-
103
-
104
-
105
-
106
-
107
-
108
-
109
-
110
-
111
-
112
-
113
-
114
-
115
-
116
-
117
-
118
-
119
-
120
-
121
-
122
-
123
-
124
-
125
-
126
-
127
-
128
-
129
-
130
-
131
-
132
-
133
-
134
-
135
-
136
-
137
-
138
-
139
-
140
-
141
-
142
-
143
-
144
-
145
-
146
-
147
-
148
-
149
-
150
-
151
-
152
-
153
-
154
-
155
-
156
-
157
-
158
-
159
-
160
-
161
-
162
-
163
-
164
-
165
-
166
-
167
-
168
-
169
-
170
-
171
-
172
-
173
-
174
-
175
-
176
-
177
-
178
-
179
-
180
-
181
-
182
-
183
-
184
-
185
-
186
-
187
-
188
-
189
-
190
-
191
-
192
-
193
-
194
-
195
-
196
-
197
-
198
-
199
-
200
-
201
 |
 |
