Sharp XL-DV60 XL-DV60 Operation Manual - Page 51
Enhancing your system
 |
UPC - 074000366084
View all Sharp XL-DV60 manuals
Add to My Manuals
Save this manual to your list of manuals |
Page 51 highlights
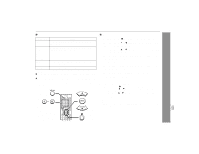
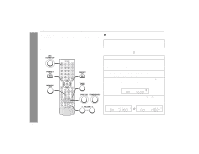
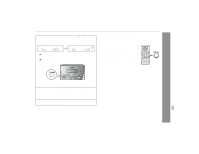
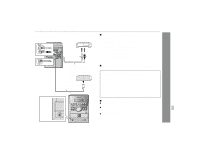
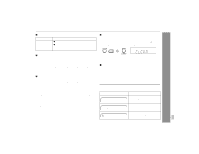
Enhancing your system The connection cord is not included. Purchase a commercially available cord as shown below. VCR, DVD, etc. White Red White To the line output jacks Red Audio cable (commercially available) Dolby Digital/DTS amplifier or Digital audio recorder etc. Optical digital cable (commercially available) To the optical line input jack " Listening to the playback sounds from VCR, DVD, etc. 1 Use a connection cord to connect the VCR, DVD, etc. to the VIDEO/AUX IN jacks. When using video equipment, connect the audio output to this unit and the video output to a television. 2 Press the ON/STAND-BY button to turn the power on. 3 Press the VIDEO/AUX button. 4 Play the connected equipment. Note: To prevent noise interference, place the unit away from the television. " Digital connection to a surround amplifier or a digital audio recorder, etc. Selecting a sound signal type When connecting other equipment to the digital audio output, adjust the audio output setting accordingly (see page 43). BitStream Choose this when connecting the unit to a Dolby Digital/DTS (5.1ch) surround amplifier. When playing a DVD recorded in Dolby Digital or DTS, bitstream output allows you to enjoy the 5.1ch surround sound. LPCM Choose this for PCM output. When playing a DVD recorded in Dolby Digital, the output converts to 2 channel PCM. When a DVD recorded in DTS is played back, signals are sent in bitstream. " Headphones ! Before plugging in or unplugging the headphones, reduce the volume. ! Be sure your headphones have a 1/8" (3.5 mm) diameter plug and impedance between 16 and 50 ohms. The recommended impedance is 32 ohms. ! Plugging in the headphones disconnects the speakers automatically. Adjust the volume using the VOLUME control. Advanced Features XL-DV60 51
-
 1
1 -
2
-
3
-
4
-
5
-
6
-
7
-
8
-
9
-
10
-
11
-
12
-
13
-
14
-
15
-
16
-
17
-
18
-
19
-
20
-
21
-
22
-
23
-
24
-
25
-
26
-
27
-
28
-
29
-
30
-
31
-
32
-
33
-
34
-
35
-
36
-
37
-
38
-
39
-
40
-
41
-
42
-
43
-
44
-
45
-
 46
46 -
 47
47 -
 48
48 -
 49
49 -
 50
50 -
 51
51 -
 52
52 -
 53
53 -
 54
54 -
 55
55 -
 56
56
 |
 |
