Sony Ericsson P910a User Guide - Page 161
Email tab, To create a new email account
 |
View all Sony Ericsson P910a manuals
Add to My Manuals
Save this manual to your list of manuals |
Page 161 highlights
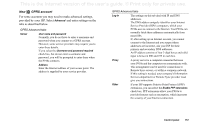
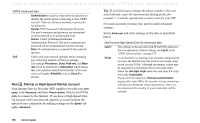
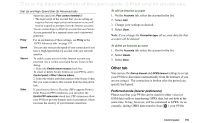
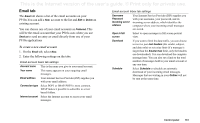
This is the Internet version of the user's guide. © Print only for private use. Email tab The Email tab shows a list of the email accounts on your P910a.You can add a New account to the list and Edit or Delete an existing account. You can choose one of your email accounts as Preferred. This will be the email account that your P910a uses when you use Send as to send an entry as email directly from one of your P910a applications To create a new email account 1. On the Email tab, select New. 2. Enter the following settings on the tabs: Email account basic tab settings Account name This is the name you give to your email account. Your name This name appears on your outgoing email messages. Email address Your Internet Service Provider (ISP) supplies you with your email address. Connection type Select POP3 or IMAP. POP3 is most common. IMAP makes it possible to subscribe to server based folders. Internet account Select the Internet account to access your email messages. Email account Inbox tab settings Username Password Incoming server address Your Internet Service Provider (ISP) supplies you with your username, your password, and its incoming server address, which identifies the computer where your incoming email messages are stored. Open in full screen Select to open messages in full screen portrait view. Download If you want to limit the data traffic, you can choose to receive just Just headers (the sender, subject, and date only) or set a size limit (if a message is larger than the Smaller than limit, only the headers are downloaded). You can download the complete message later. You can also set a limit to the total number of messages held in your email account at any one time. Schedule Select Schedule to schedule an automatic download of your incoming email messages. Messages that are waiting in your Outbox will not be sent at the same time. Control panel 161
-
 1
1 -
2
-
3
-
4
-
5
-
6
-
7
-
8
-
9
-
10
-
11
-
12
-
13
-
14
-
15
-
16
-
17
-
18
-
19
-
20
-
21
-
22
-
23
-
24
-
25
-
26
-
27
-
28
-
29
-
30
-
31
-
32
-
33
-
34
-
35
-
36
-
37
-
38
-
39
-
40
-
41
-
42
-
43
-
44
-
45
-
46
-
47
-
48
-
49
-
50
-
51
-
52
-
53
-
54
-
55
-
56
-
57
-
58
-
59
-
60
-
61
-
62
-
63
-
64
-
65
-
66
-
67
-
68
-
69
-
70
-
71
-
72
-
73
-
74
-
75
-
76
-
77
-
78
-
79
-
80
-
81
-
82
-
83
-
84
-
85
-
86
-
87
-
88
-
89
-
90
-
91
-
92
-
93
-
94
-
95
-
96
-
97
-
98
-
99
-
100
-
101
-
102
-
103
-
104
-
105
-
106
-
107
-
108
-
109
-
110
-
111
-
112
-
113
-
114
-
115
-
116
-
117
-
118
-
119
-
120
-
121
-
122
-
123
-
124
-
125
-
126
-
127
-
128
-
129
-
130
-
131
-
132
-
133
-
134
-
135
-
136
-
137
-
138
-
139
-
140
-
141
-
142
-
143
-
144
-
145
-
146
-
147
-
148
-
149
-
150
-
151
-
152
-
153
-
154
-
155
-
 156
156 -
 157
157 -
 158
158 -
 159
159 -
 160
160 -
 161
161 -
 162
162 -
 163
163 -
 164
164 -
 165
165 -
 166
166 -
167
-
168
-
169
-
170
-
171
-
172
-
173
-
174
-
175
-
176
-
177
-
178
-
179
-
180
-
181
-
182
-
183
-
184
-
185
-
186
-
187
-
188
-
189
-
190
-
191
-
192
-
193
-
194
-
195
-
196
-
197
-
198
-
199
-
200
-
201
-
202
-
203
-
204
-
205
 |
 |
