Sony Ericsson Xperia XA Dual SIM User Guide - Page 32
Battery and Maintenance, Charging Your Device
 |
View all Sony Ericsson Xperia XA Dual SIM manuals
Add to My Manuals
Save this manual to your list of manuals |
Page 32 highlights
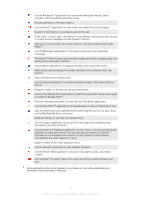
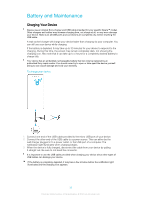
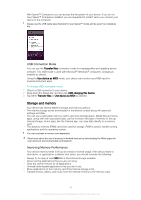
Battery and Maintenance Charging Your Device Always use an original Sony charger and USB cable intended for your specific Xperia™ model. Other chargers and cables may increase charging time, not charge at all, or may even damage your device. Make sure all USB ports and connectors are completely dry, before inserting the USB cable. A wall socket charger will charge your device faster than charging via your computer. You can still use your device while charging. If the battery is depleted, it may take up to 30 minutes for your device to respond to the charging. During this time, the screen may remain completely dark, not showing the charging icon. Also note that it can take up to 4 hours for a completely drained battery to charge fully. Your device has an embedded, rechargeable battery that can only be replaced by an authorized Sony repair center. You should never try to open or take apart the device yourself. Doing so can cause damage and void your warranty. To charge your device 1 Connect one end of the USB cable provided to the micro USB port of your device. 2 Connect the other end of the USB cable to a power source. This can either be the wall charger plugged in to a power outlet, or the USB port of a computer. The notification light illuminates when charging begins. 3 When the device is fully charged, disconnect the cable from your device by pulling it straight out. Be sure to not bend the connector. It is important to use the USB cable provided when charging your device since other types of USB cables can damage your device. If the battery is completely depleted, it may take a few minutes before the notification light illuminates and the charging icon appears. 32 This is an internet version of this publication. © Print only for private use.
-
 1
1 -
2
-
3
-
4
-
5
-
6
-
7
-
8
-
9
-
10
-
11
-
12
-
13
-
14
-
15
-
16
-
17
-
18
-
19
-
20
-
21
-
22
-
23
-
24
-
25
-
26
-
 27
27 -
 28
28 -
 29
29 -
 30
30 -
 31
31 -
 32
32 -
 33
33 -
 34
34 -
 35
35 -
 36
36 -
 37
37 -
38
-
39
-
40
-
41
-
42
-
43
-
44
-
45
-
46
-
47
-
48
-
49
-
50
-
51
-
52
-
53
-
54
-
55
-
56
-
57
-
58
-
59
-
60
-
61
-
62
-
63
-
64
-
65
-
66
-
67
-
68
-
69
-
70
-
71
-
72
-
73
-
74
-
75
-
76
-
77
-
78
-
79
-
80
-
81
-
82
-
83
-
84
-
85
-
86
-
87
-
88
-
89
-
90
-
91
-
92
-
93
-
94
-
95
-
96
-
97
-
98
-
99
-
100
-
101
-
102
-
103
-
104
-
105
-
106
-
107
-
108
-
109
-
110
-
111
-
112
-
113
-
114
-
115
-
116
-
117
-
118
-
119
-
120
-
121
-
122
-
123
-
124
-
125
-
126
-
127
-
128
-
129
-
130
-
131
-
132
-
133
 |
 |
