Sony DCRTRV900 Operating Instructions - Page 104
Recording still images on PC cards not supplied - memory photo, recording
 |
UPC - 027242547025
View all Sony DCRTRV900 manuals
Add to My Manuals
Save this manual to your list of manuals |
Page 104 highlights
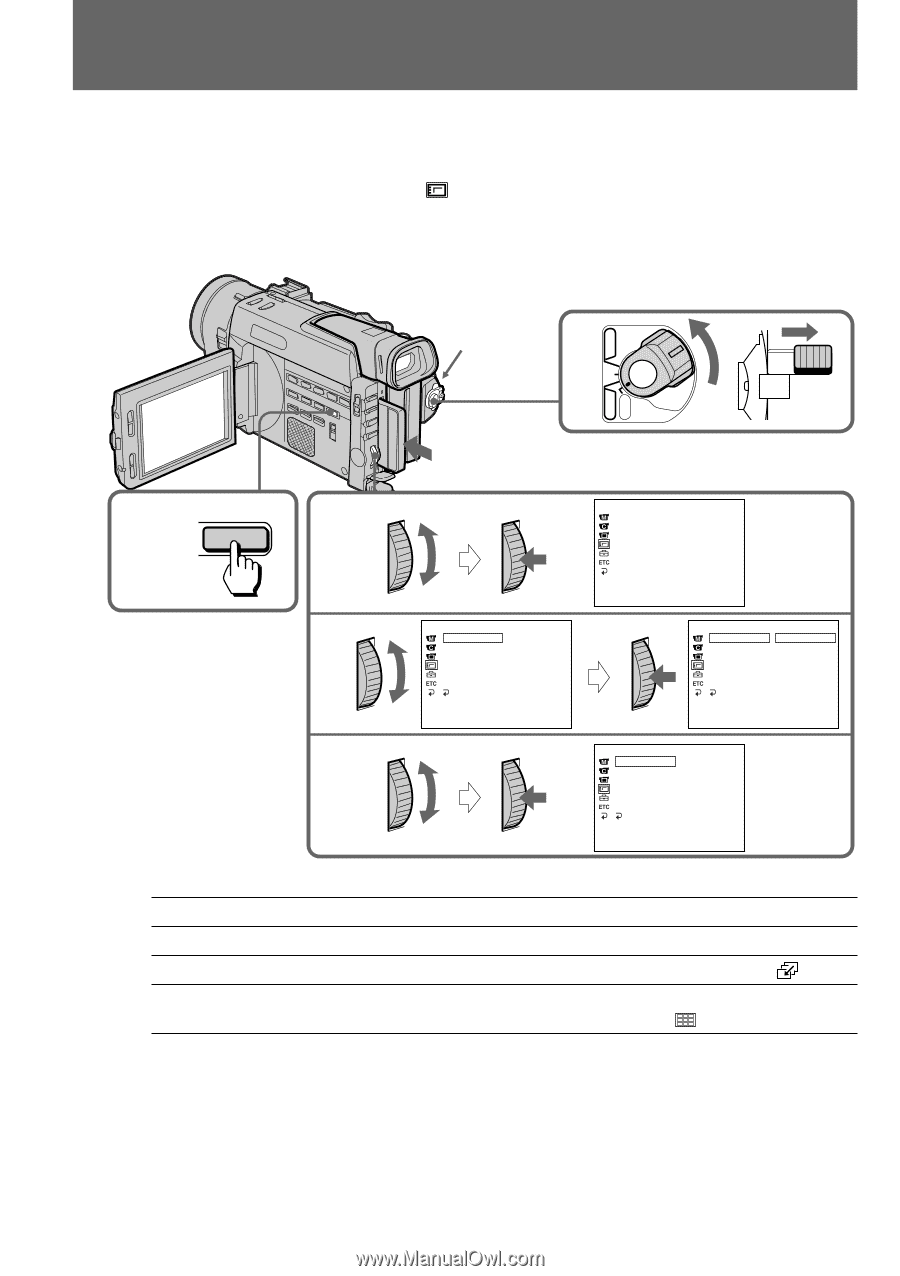
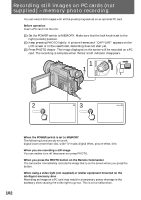
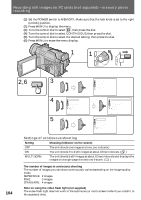
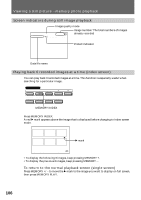
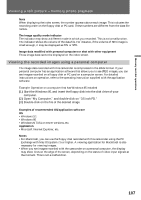
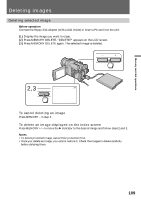
Recording still images on PC cards (not supplied) - memory photo recording (1) Set the POWER switch to MEMORY. Make sure that the lock knob is set to the right (unlock) position. (2) Press MENU to display the menu. (3) Turn the control dial to select , then press the dial. (4) Turn the control dial to select CONTINUOUS, then press the dial. (5) Turn the control dial to select the desired setting, then press the dial. (6) Press MENU to erase the menu display. 11 POWER VTR MEMORY OFF CAMERA 104 2,6 MENU 3 MEMORY S E T CONT I NUOUS QUA L I TY P RO T E C T S L I D E S HOW DELETE AL L FORMA T 4 5 MEMORY S E T CONT I NUOUS OF F QUA L I TY P RO T E C T S L I D E S HOW DELETE AL L FORMA T RETURN [ MENU ] : END [ MENU ] : END MEMORY S E T CONT I NUOUS OF F QUA L I TY ON P RO T E C T MU L T I S L I D E S HOW DELETE AL L FORMA T RETURN SCRN [ MENU ] : END MEMORY S E T CONT I NUOUS ON QUA L I TY P RO T E C T S L I D E S HOW DELETE AL L FORMA T RETURN [ MENU ] : END Settings of continuous shooting Setting Meaning (indicator on the screen) OFF The unit shoots one image at a time. (no indicator) ON The unit shoots 2 to 4 still images at about 0.8 sec intervals. ( ) MULTI SCRN The unit shoots 9 still images at about 0.3 sec intervals and displays the images on a single page divided into 9 boxes. ( ) The number of images in continuous shooting The number of images you can shoot continuously varies depending on the image quality mode. SUPER FINE: 2 images FINE: 3 images STANDARD: 4 images Note on using the video flash light (not supplied) The video flash light does not work in the continuous or multi screen mode if you install it to the accessory shoe.
-
 1
1 -
2
-
3
-
4
-
5
-
6
-
7
-
8
-
9
-
10
-
11
-
12
-
13
-
14
-
15
-
16
-
17
-
18
-
19
-
20
-
21
-
22
-
23
-
24
-
25
-
26
-
27
-
28
-
29
-
30
-
31
-
32
-
33
-
34
-
35
-
36
-
37
-
38
-
39
-
40
-
41
-
42
-
43
-
44
-
45
-
46
-
47
-
48
-
49
-
50
-
51
-
52
-
53
-
54
-
55
-
56
-
57
-
58
-
59
-
60
-
61
-
62
-
63
-
64
-
65
-
66
-
67
-
68
-
69
-
70
-
71
-
72
-
73
-
74
-
75
-
76
-
77
-
78
-
79
-
80
-
81
-
82
-
83
-
84
-
85
-
86
-
87
-
88
-
89
-
90
-
91
-
92
-
93
-
94
-
95
-
96
-
97
-
98
-
 99
99 -
 100
100 -
 101
101 -
 102
102 -
 103
103 -
 104
104 -
 105
105 -
 106
106 -
 107
107 -
 108
108 -
 109
109 -
110
-
111
-
112
-
113
-
114
-
115
-
116
-
117
-
118
-
119
-
120
-
121
-
122
-
123
-
124
-
125
-
126
-
127
-
128
-
129
-
130
-
131
-
132
-
133
-
134
-
135
-
136
-
137
-
138
-
139
-
140
-
141
-
142
-
143
-
144
-
145
-
146
-
147
-
148
 |
 |