Sony DCRTRV900 Operating Instructions - Page 90
To play back the new recorded sound, If an i.LINK cable DV connecting cable is connected to this unit
 |
UPC - 027242547025
View all Sony DCRTRV900 manuals
Add to My Manuals
Save this manual to your list of manuals |
Page 90 highlights
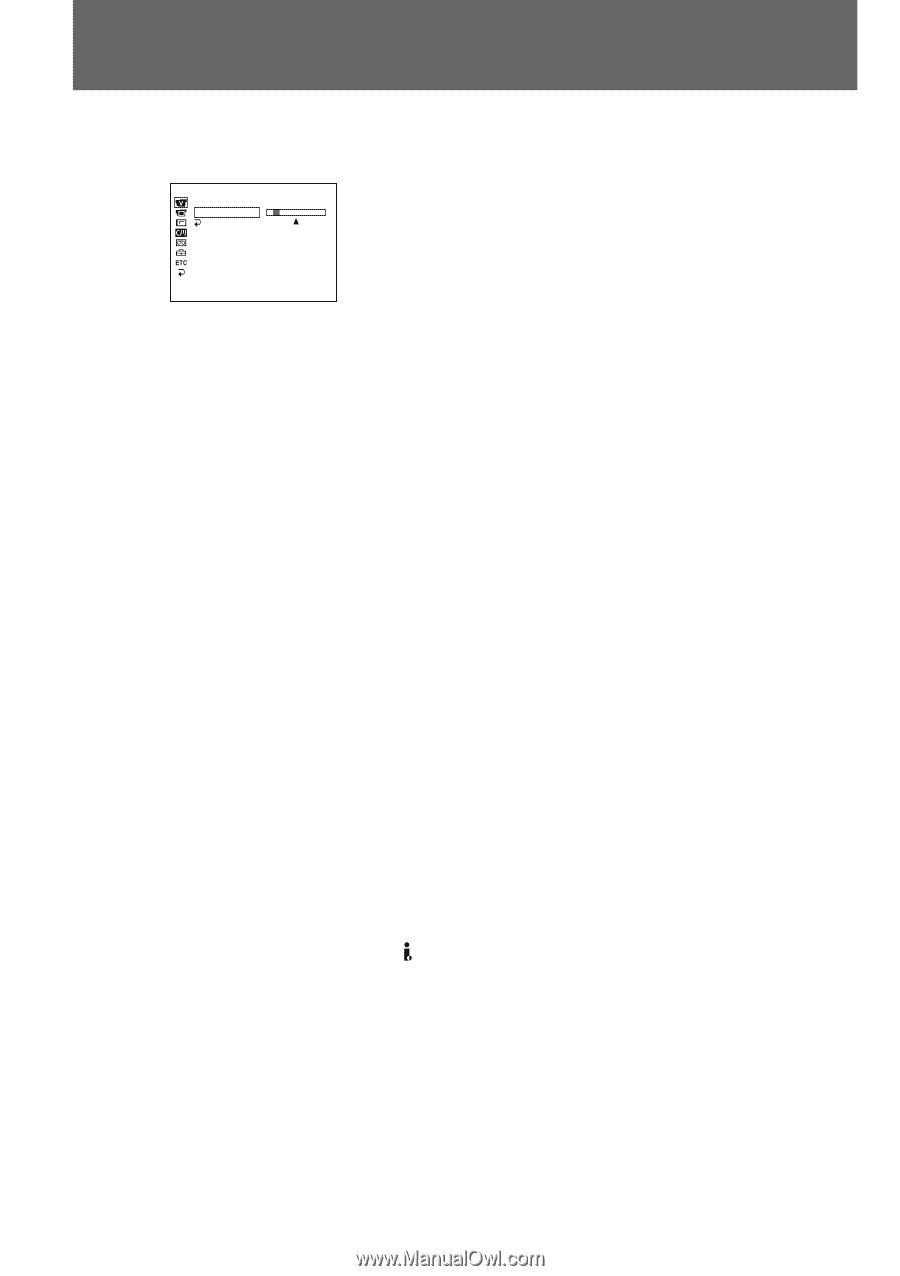
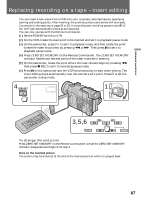
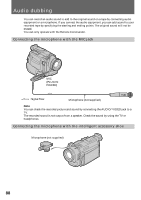
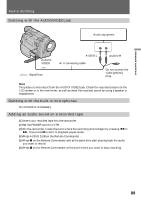
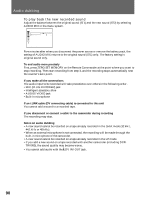
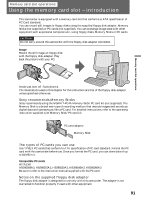
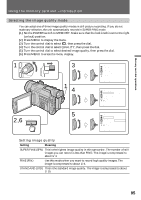
Audio dubbing To play back the new recorded sound Adjust the balance between the original sound (ST1) and the new sound (ST2) by selecting AUDIO MIX in the menu system. VTR SET H i F i SOUND AUD I O M I X R E T U R N ST1 ST2 [ MENU ] : END Five minutes after when you disconnect the power source or remove the battery pack, the setting of AUDIO MIX returns to the original sound (ST1) only. The factory setting is original sound only. To end audio more precisely First, press ZERO SET MEMORY on the Remote Commander at the point where you want to stop recording. Then start recording from step 3, and the recording stops automatically near the counter's zero point. If you make all the connections The audio input to be recorded will take precedence over others in the following order. •MIC (PLUG IN POWER) jack •Intelligent accessory shoe •AUDIO/VIDEO jack •Built-in microphone If an i.LINK cable (DV connecting cable) is connected to this unit You cannot add a sound to a recorded tape. If you disconnect or connect a cable to the camcorder during recording The recording may stop. Notes on audio dubbing •A new sound cannot be recorded on a tape already recorded in the 16-bit mode (32 kHz, 44.1 kHz or 48 kHz). •When an external microphone is not connected, the recording will be made through the built-in microphone of the camcorder. •A new sound cannot be recorded on a tape already recorded in the LP mode. •If you add a new sound on a tape recorded with another camcorder (including DCR- TRV900), the sound quality may become worse. •You cannot add audio with the DV IN/OUT jack. 90
-
 1
1 -
2
-
3
-
4
-
5
-
6
-
7
-
8
-
9
-
10
-
11
-
12
-
13
-
14
-
15
-
16
-
17
-
18
-
19
-
20
-
21
-
22
-
23
-
24
-
25
-
26
-
27
-
28
-
29
-
30
-
31
-
32
-
33
-
34
-
35
-
36
-
37
-
38
-
39
-
40
-
41
-
42
-
43
-
44
-
45
-
46
-
47
-
48
-
49
-
50
-
51
-
52
-
53
-
54
-
55
-
56
-
57
-
58
-
59
-
60
-
61
-
62
-
63
-
64
-
65
-
66
-
67
-
68
-
69
-
70
-
71
-
72
-
73
-
74
-
75
-
76
-
77
-
78
-
79
-
80
-
81
-
82
-
83
-
84
-
 85
85 -
 86
86 -
 87
87 -
 88
88 -
 89
89 -
 90
90 -
 91
91 -
 92
92 -
 93
93 -
 94
94 -
 95
95 -
96
-
97
-
98
-
99
-
100
-
101
-
102
-
103
-
104
-
105
-
106
-
107
-
108
-
109
-
110
-
111
-
112
-
113
-
114
-
115
-
116
-
117
-
118
-
119
-
120
-
121
-
122
-
123
-
124
-
125
-
126
-
127
-
128
-
129
-
130
-
131
-
132
-
133
-
134
-
135
-
136
-
137
-
138
-
139
-
140
-
141
-
142
-
143
-
144
-
145
-
146
-
147
-
148
 |
 |