Sony DCRTRV900 Operating Instructions - Page 46
Adjusting the white balance, Display, Shooting conditions
 |
UPC - 027242547025
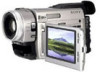
View all Sony DCRTRV900 manuals
Add to My Manuals
Save this manual to your list of manuals |
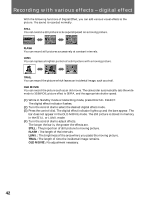
Page 46 highlights
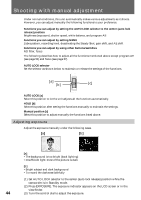
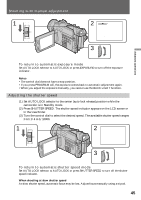
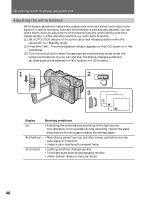
Shooting with manual adjustment Adjusting the white balance White balance adjustment makes white subjects look white and allows more natural color balance for camera recording. Normally white balance is automatically adjusted. You can obtain better results by adjusting the white balance manually when lighting conditions change quickly or when recording outdoors: e.g., neon signs, fireworks. (1) Set AUTO LOCK selector to the center (auto lock release) position while the camcorder is in Standby mode. (2) Press WHT BAL. The white balance indicator appears on the LCD screen or in the viewfinder. (3) Turn the control dial to select the appropriate white balance mode under the following conditions. As you turn the dial, the display changes as follows: ∑ (One-push white balance) ˜ w (Outdoor) ˜ e (Indoor). 1 AUTO LOCK 2 WHT BAL HOLD 3 Display ∑ w (Outdoor) e (Indoor) Shooting conditions •Adjusting the white balance according to the light source. This operation is not available during recording. Follow the steps described on the next page to adjust the settings again. •Recording a sunset/sunrise, just after sunset, just before sunrise, neon signs, or fireworks •Under a color matching fluorescent lamp •Lighting condition changes quickly •Too bright place such as photography studios •Under sodium lamps or mercury lamps 46
-
 1
1 -
2
-
3
-
4
-
5
-
6
-
7
-
8
-
9
-
10
-
11
-
12
-
13
-
14
-
15
-
16
-
17
-
18
-
19
-
20
-
21
-
22
-
23
-
24
-
25
-
26
-
27
-
28
-
29
-
30
-
31
-
32
-
33
-
34
-
35
-
36
-
37
-
38
-
39
-
40
-
 41
41 -
 42
42 -
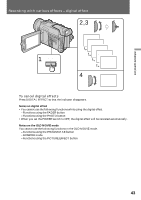 43
43 -
 44
44 -
 45
45 -
 46
46 -
 47
47 -
 48
48 -
 49
49 -
 50
50 -
 51
51 -
52
-
53
-
54
-
55
-
56
-
57
-
58
-
59
-
60
-
61
-
62
-
63
-
64
-
65
-
66
-
67
-
68
-
69
-
70
-
71
-
72
-
73
-
74
-
75
-
76
-
77
-
78
-
79
-
80
-
81
-
82
-
83
-
84
-
85
-
86
-
87
-
88
-
89
-
90
-
91
-
92
-
93
-
94
-
95
-
96
-
97
-
98
-
99
-
100
-
101
-
102
-
103
-
104
-
105
-
106
-
107
-
108
-
109
-
110
-
111
-
112
-
113
-
114
-
115
-
116
-
117
-
118
-
119
-
120
-
121
-
122
-
123
-
124
-
125
-
126
-
127
-
128
-
129
-
130
-
131
-
132
-
133
-
134
-
135
-
136
-
137
-
138
-
139
-
140
-
141
-
142
-
143
-
144
-
145
-
146
-
147
-
148
 |
 |
