Sony DPF D72N Operating Instructions - Page 16
To display the photo frame on the wall - 7 inch
 |
UPC - 027242778108
View all Sony DPF D72N manuals
Add to My Manuals
Save this manual to your list of manuals |
Page 16 highlights
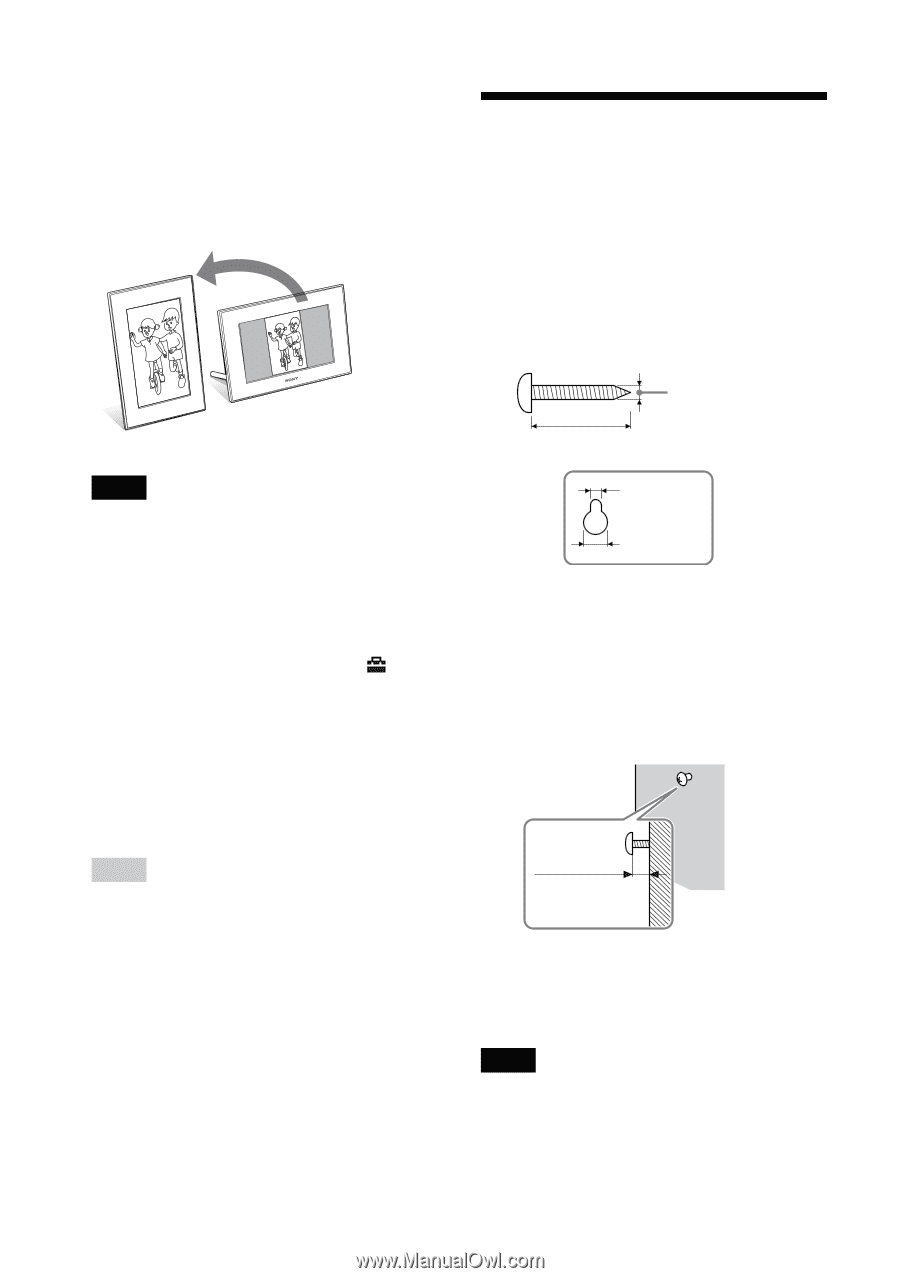
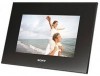
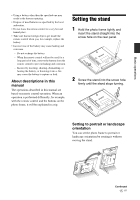
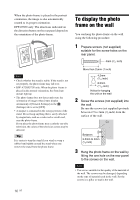
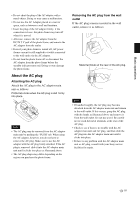
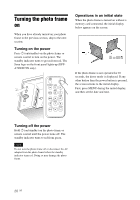
When the photo frame is placed in the portrait orientation, the image is also automatically rotated to its proper orientation. DPF-D72N only: The directions indicated on the direction button on the rear panel depend on the orientation of the photo frame. Notes • Check whether the stand is stable. If the stand is not set properly, the photo frame may fall over. • DPF-A72N/D72N only: When the photo frame is placed in the portrait orientation, the Sony logo doesn't light up. • The photo frame does not detect and rotate the orientation of images when [Auto display orientation] of [General Settings] on the (Settings) tab is set to [OFF]. • A magnet is contained in the storage portion of the stand. Do not keep anything that is easily affected by magnetism, such as a cash card or credit card, near the photo frame. If you place the photo frame near a cathode-ray tube television, the colors of the television screen may be affected. Tip It is easier to turn the stand if you wind or wrap a rubber band tightly around the stand when you remove the stand from the photo frame. To display the photo frame on the wall You can hang the photo frame on the wall using the following procedure. 1 Prepare screws (not supplied) suitable for the screw holes on the rear panel. 4mm (3/16 inch) More than 25mm (1 inch) 4.2mm (3/16 inch) 8.6mm (11/32 inch) Holes for hanging the unit on the wall 2 Screw the screws (not supplied) into the wall. Be sure the screws (not supplied) protrude between 2.5 to 3mm (1/8 inch) from the surface of the wall. Between 2.5mm to 3mm (1/8 inch) 3 Hang the photo frame on the wall by fitting the one hole on the rear panel to the screws on the wall. Notes • Use screws suitable for the quality of the material of the wall. The screws may be damaged, depending on the type of material used in the wall. Set the screws in a pillar or stud in the wall. 16 GB
-
 1
1 -
2
-
3
-
4
-
5
-
6
-
7
-
8
-
9
-
10
-
 11
11 -
 12
12 -
 13
13 -
 14
14 -
 15
15 -
 16
16 -
 17
17 -
 18
18 -
 19
19 -
 20
20 -
 21
21 -
22
-
23
-
24
-
25
-
26
-
27
-
28
-
29
-
30
-
31
-
32
-
33
-
34
-
35
-
36
-
37
-
38
-
39
-
40
-
41
-
42
-
43
-
44
-
45
-
46
-
47
-
48
-
49
-
50
-
51
-
52
-
53
-
54
-
55
-
56
-
57
-
58
-
59
-
60
-
61
-
62
-
63
-
64
 |
 |