Sony DPF D72N Operating Instructions - Page 43
Changing the settings, Setting procedure
 |
UPC - 027242778108
View all Sony DPF D72N manuals
Add to My Manuals
Save this manual to your list of manuals |
Page 43 highlights
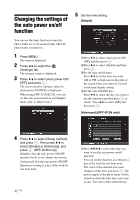
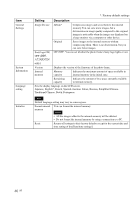
zone changes to gray, after you select the blue time zone and then press . The power supply of the photo frame is turned off while it is in the gray time zone. Tip The power is turned off automatically at the time you set for [Auto power OFF] when you are using the photo frame. The power is turned on automatically at the time you set for [Auto power ON] during the standby mode. 2Press B/b/v/V to select [OK]. Changing the settings You can change the following settings. • Slideshow Settings • Auto power ON/OFF • Date/time settings • General Settings (Listing Order, Sony logo ON/OFF etc,.) • Language setting • Initialize Setting procedure 1 Press MENU. The menu is displayed. 2 Press B/b to select the (Settings) tab. The settings screen is displayed. Advanced operations Continued 43 GB
-
 1
1 -
2
-
3
-
4
-
5
-
6
-
7
-
8
-
9
-
10
-
11
-
12
-
13
-
14
-
15
-
16
-
17
-
18
-
19
-
20
-
21
-
22
-
23
-
24
-
25
-
26
-
27
-
28
-
29
-
30
-
31
-
32
-
33
-
34
-
35
-
36
-
37
-
 38
38 -
 39
39 -
 40
40 -
 41
41 -
 42
42 -
 43
43 -
 44
44 -
 45
45 -
 46
46 -
 47
47 -
 48
48 -
49
-
50
-
51
-
52
-
53
-
54
-
55
-
56
-
57
-
58
-
59
-
60
-
61
-
62
-
63
-
64
 |
 |