Sony DSCP51 Operating Instructions
Sony DSCP51 - Cyber-shot 2MP Digital Camera Manual
 |
UPC - 027242606500
View all Sony DSCP51 manuals
Add to My Manuals
Save this manual to your list of manuals |
Sony DSCP51 manual content summary:
- Sony DSCP51 | Operating Instructions - Page 1
Digital Still Camera Operating Instructions Before operating the unit, please read this manual thoroughly, and retain it for future reference. Owner's Record The model and serial numbers are located on the bottom. Record the serial number in the space provided below. Refer to these numbers whenever - Sony DSCP51 | Operating Instructions - Page 2
instructions in the literature accompanying the appliance. If you have any questions about this product, you may call: Sony Customer Information Services Center 1-800-222-SONY (7669) The number below is for the FCC related matters only. Declaration of Conformity Trade Name: SONY Model No.: DSC - Sony DSCP51 | Operating Instructions - Page 3
the instructions, may off and on, the user is encouraged to try cable must be used with the equipment in order to comply with the limits for a digital or leaking Nickel Metal Hydride batteries. CAUTION TO PREVENT ELECTRIC cover, please contact your nearest Sony service station. For the Customers in - Sony DSCP51 | Operating Instructions - Page 4
camera. "Memory Stick" Notice If static electricity or electromagnetism causes data transfer to discontinue midway (fail), restart the application or disconnect and connect the USB cable again. Trademarks • "Memory Stick," , "MagicGate Memory Stick," and , are trademarks of Sony Corporation - Sony DSCP51 | Operating Instructions - Page 5
the provision of the copyright laws. Do not shake or strike the camera In addition to malfunctions and inability to record images, this may render the "Memory Stick" unusable or image data breakdown, damage or loss may occur. LCD screen, LCD finder (only models with a LCD finder) and lens • The LCD - Sony DSCP51 | Operating Instructions - Page 6
40 Deleting on the Index (triple-image) screen 41 Formatting a "Memory Stick 43 Copying still images to your computer Copying still images to your computer ...44 1 Installing the USB driver 45 2 Preparing your camera 46 3 Connecting your camera to your computer 47 4 Copying images 48 When - Sony DSCP51 | Operating Instructions - Page 7
For Macintosh users 81 Troubleshooting Troubleshooting 82 Warnings and messages 89 Self-Diagnostics Display 90 Additional information The number of images that can be saved/ shooting time 91 Menu items 92 SET UP items 97 Precautions 99 The "Memory Stick 100 The nickel hydride batteries 100 - Sony DSCP51 | Operating Instructions - Page 8
(26) D Flash (30) E Self-timer lamp (29)/ AF illuminator (31, 97) F Finder window G Lens H Tripod receptacle (bottom surface) 1 2 3 6 4 5 7 8 • Use a tripod with a screw length of less than 5.5mm (7/32 inch). You will be unable to firmly secure the camera to tripods having longer screws, and - Sony DSCP51 | Operating Instructions - Page 9
USB jack (47) qs qd qf qg qh qj qk G Control button (Menu on) (v/V/b/B/z) (20)/ (Menu off) ( / /7/ ) (27, 29, 30) H RESET button (bottom surface) (82) I LCD screen J DC IN jack cover (19) K DC IN jack (19) L Mode dial (21) : To shoot still Battery cover Q "Memory Stick" cover R Access lamp (23) 9 - Sony DSCP51 | Operating Instructions - Page 10
Identifying the parts (continued) (DSC-P51) 1 2 3 6 Attaching the strap 4 5 7 8 A POWER ON/OFF lamp (20) B POWER button (20) C Shutter button (26) D Flash (30) E Self-timer lamp (29)/ AF illuminator (31, 97) F Finder window G Lens H Tripod receptacle (bottom surface) • Use a tripod with - Sony DSCP51 | Operating Instructions - Page 11
UP items SCN: To shoot in the SCENE SELECTION mode M Zoom button (for shooting) (28)/ Index button (for viewing) (37) N Wrist strap hook O Open lever P Battery cover Q "Memory Stick" cover R Access lamp (23) S DC IN jack (19) 11 - Sony DSCP51 | Operating Instructions - Page 12
) C Shutter button (26) D Flash (30) E Self-timer lamp (29)/ AF illuminator (31, 97) F Finder window G Lens H Tripod receptacle (bottom surface) • Use a tripod with a screw length of less than 5.5mm (7/32 inch). You will be unable to firmly secure the camera to tripods having longer screws, and may - Sony DSCP51 | Operating Instructions - Page 13
UP items SCN: To shoot in the SCENE SELECTION mode M Zoom button (for shooting) (28)/ Index button (for viewing) (37) N Wrist strap hook O Open lever P Battery cover Q "Memory Stick" cover R Access lamp (23) S DC IN jack (19) 13 - Sony DSCP51 | Operating Instructions - Page 14
shorter than desired operating time. (only in the DSC-P51/P31) When alkaline batteries are used, take note of the following information. • Turn POWER SAVE to ON, shut the LCD screen off, and use the Finder to shoot your images. This will lengthen battery life (page 16). • There is a big difference - Sony DSCP51 | Operating Instructions - Page 15
the slide show mode and leave it that way until the batteries are used up (page 67). Precautions to be observed when charging the batteries • Do not charge any other batteries except Sony Nickel-Metal Hydride batteries in the charger supplied with your camera. If you try to charge any other type of - Sony DSCP51 | Operating Instructions - Page 16
2 to [ON]. The factory setting of the camera is set to [ON] (page 98). DSC-P51/P31 Set the POWER SAVE switch to ON. When the camera is shipped from the factory, this switch is set to ON. When the POWER SAVE function is ON • The LCD screen will be darker than it is when - Sony DSCP51 | Operating Instructions - Page 17
the Battery cover. Close the Battery cover while holding the batteries in. The cover is closed when it clicks. To remove the batteries Stand the camera on end, open the Battery cover upward, then remove the batteries. • Make sure you don't drop the batteries when opening or closing the Battery cover - Sony DSCP51 | Operating Instructions - Page 18
back allow for changing the "Memory Stick" as necessary. Actual results may differ slightly from these, depending on the conditions of use. Shooting* still images Model Image size DSC-P71 DSC-P51 DSC-P31 2048×1536 640×480 1600×1200 640×480 1600×1200 640×480 LCD screen ON OFF ON OFF ON OFF - Sony DSCP51 | Operating Instructions - Page 19
not supplied) to the DC IN jack of the camera. Connect the cable with the v mark DC IN jack of the camera. • To use power from an automobile, use a DC adaptor/Charger (not supplied). • If you insert or remove the DC plug while you are using the batteries, the power may shut off. Using your camera - Sony DSCP51 | Operating Instructions - Page 20
the camera, bring up the menu or SET UP on the LCD screen (page 55), and use the control button to make the changes. For each item, press v/V/b/B to select the desired value, then press the center z or b/B to make the setting. • (SPOT METER) is not displayed on the menu of the DSC-P51 - Sony DSCP51 | Operating Instructions - Page 21
You can choose from [Y/M/D] (year/ month/day), [M/D/Y], and [D/M/Y]. • If the rechargeable button battery, which provides the power for saving the time data, ever loses its charge (page 99), the CLOCK SET screen automatically reappears. If this happens, reset the date and time by following the above - Sony DSCP51 | Operating Instructions - Page 22
Setting the date and time (continued) CLOCK SET Y/M/D M/D/Y D/M/Y 2002 / 1 / 1 12 : 00 OK AM CANCEL OK CLOCK SET Y/M/D M/D/Y D/M/Y 2002 / 7 / 1 OK 12 : 00 OK AM CANCEL CLOCK SET Y/M/D M/D/Y D/M/Y 2002 / 7 / 4 10 : 30 OK PM CANCEL OK 4 , Choose the year, month, day, hour, and minute items - Sony DSCP51 | Operating Instructions - Page 23
it correctly, a message such as "MEMORY STICK ERROR" appears on the LCD screen. 3 , Close the "Memory Stick" cover. To remove the "Memory Stick" Open the "Memory Stick" cover, then push the "Memory Stick" to pop it out. • Whenever the Access lamp is lit, the camera is recording or reading out an - Sony DSCP51 | Operating Instructions - Page 24
still is not displayed on the menu of the DSC-P51/P31 (page 61). 2048x1536 2048 (3 : 2) 1600x1200 1280 x : 2) 1280 x 960 640 x 480 SO IMAGE SIZE DSC-P71 DSC-P51/ 2 P31 , Select (Image size) using b/ B on the MENU button. The menu disappears from the screen. • For image quality, you can choose - Sony DSCP51 | Operating Instructions - Page 25
number of images* that can be saved in a "Memory Stick" The number of images that can be saved in FINE (STANDARD) mode are shown below. (Units: number of images) Capacity Image size 2048×1536 (DSC-P71) 2048(3:2) (DSC-P71) 1600×1200 1600 (3:2) (DSC-P51/P31) 1280×960 640×480 8MB 5 (9) 5 (9) 8 (15 - Sony DSCP51 | Operating Instructions - Page 26
indicator stops flashing and remains on, the camera is ready for shooting. • If you remove your finger from the shutter, shooting will be canceled. • The minimum focal distance to a subject is 50cm (19 11/16 inches) for the DSC-P71; 8cm (3 1/4 inches) for the DSC-P51 with the Zoom button set to the - Sony DSCP51 | Operating Instructions - Page 27
still image is saved in the "Memory Stick." When the Recording lamp (page 9) goes out, you can shoot the next image. • When you are shooting with the battery, if no tasks are performed for a while* with the camera subject Checking the last shot image (Quick Review) on the LCD screen 1 Press MENU - Sony DSCP51 | Operating Instructions - Page 28
only). Be very careful not to touch the lens. • The zoom feature cannot be used when shooting 28 movies (page 74) (DSC-P71/P31 only). Digital zoom DSC-P71/P51 When the Zoom exceeds 3x for the DSC-P71 and 2x for the DSC-P51, the digital zoom feature enlarges the image up to a maximum of 6x using - Sony DSCP51 | Operating Instructions - Page 29
Shooting still images 2048 4 Using the self-timer 2048 2048 4 1 , Set the mode dial to , and press B ( ) on the control button. (Macro) appears on the LCD screen. • If the menu is currently displayed, press the MENU button first and the menu disappears. • You can perform this operation even - Sony DSCP51 | Operating Instructions - Page 30
DSC-P51, page 12 for the DSC-P31) will blink in orange, and you will hear a beeping sound. The image will be shot within approximately 10 seconds. To cancel the self-timer during the operation Press V ( ) on the control button one more time. • If you stand in front of the camera the LCD screen in a - Sony DSCP51 | Operating Instructions - Page 31
Shooting still images To reduce "red-eye" when shooting live subjects When the flash begins to strobe before the image is shot, the red-eye phenomenon is reduced. In SET UP, set [RED EYE REDUCTION] to [ON] (page 97). appears on the LCD screen. m Shooting with the AF illuminator This is additional - Sony DSCP51 | Operating Instructions - Page 32
(Flash mode)/ (Self-timer)/ (Macro, DSC-P71) or (SPOT METER, DSC-P51/P31), the image will be displayed on the screen for approximately 2 seconds so you can check or change the setting. Shooting with the date and time inserted CAMERA MOVING IMAGE : DATE/TIME : DIGITAL ZOOM : RED EYE REDUCTION - Sony DSCP51 | Operating Instructions - Page 33
RED EYE REDUCTION : AF ILLUMINATOR : DAY&TIME DATE OFF OK CAMERA MOVING IMAGE : DATE/TIME : DIGITAL ZOOM : RED EYE REDUCTION : AF ILLUMINATOR : MPEG MOVIE DAY&TIME ON OFF AUTO PAGE SELECT Shooting still images 2 , Select (CAMERA) using v/V on the control button and press B. Select [DATE/TIME - Sony DSCP51 | Operating Instructions - Page 34
mode Landscape mode 0EV 0EV SCN EV WB Ordinarily shoot with the camera set to Auto (mode dial: ), but when shooting scenes or Under dark lighting conditions, you can shoot using the Twilight mode, and still get good images. However, because the shutter speed is slower under these conditions - Sony DSCP51 | Operating Instructions - Page 35
DSC-P51/P31 (page 61). 3 , Select the desired mode using v/V on the control button. The mode will be set to your choice. When the setting is completed, press the MENU button. The menu disappears from the screen , and the camera automatically changes to screen turns CAPTURING black. r - Sony DSCP51 | Operating Instructions - Page 36
see the images you shoot with this camera almost immediately on the LCD screen. This camera offers the following three methods for viewing still images Viewing single images 640 11/18 100-0028 2002 7 4 10:30PM FILE BACK/NEXT 1 , Set the mode dial to , and turn on the power. The last image you shot - Sony DSCP51 | Operating Instructions - Page 37
: 100 100-0028 2002 7 4 10:30PM • SINGLE DISPLAY 2 , Select Still Image using b/B on the control button. b : Displays the previous image. B once. The display switches to the Index (nineimage) screen. To display the previous (next) Index screen Press v/V/b/B on the control button to move the - Sony DSCP51 | Operating Instructions - Page 38
Viewing images on a TV screen VIDEO OUT jack 640 11/18 100-0028 2002 7 4 10:30PM FILE BACK/NEXT 1 Video connecting cable (supplied) , Using the video connecting cable, connect the VIDEO OUT jack of the camera to the Image of the TV set. • Connect the video cable to the camera and the TV set - Sony DSCP51 | Operating Instructions - Page 39
view the playback picture on a TV, you need a TV having a video input jack and a video connecting cable. The color system of the TV must be the same as that of your digital still camera. Check the following list: NTSC system Bahama Islands, Bolivia, Canada, Central America, Chile, Colombia, Ecuador - Sony DSCP51 | Operating Instructions - Page 40
2048 11/18 DELETE O K CANCEL OK 3 , Select [OK] using v on the control button, then press the center z. "MEMORY STICK ACCESS" appears on the screen. When this message disappears, the image has been deleted. To cancel the deletion Using V on the control button, choose [CANCEL], then press the - Sony DSCP51 | Operating Instructions - Page 41
Deleting still images Deleting on the Index (tripleimage) screen • SET MENU TO NEXT DELETE EXIT OK APERTURE VALUE : F2.8 select [OK] using b/B on the control button, then press the center z. When "MEMORY STICK ACCESS" disappears, the images have been deleted. To cancel the deletion Using b on - Sony DSCP51 | Operating Instructions - Page 42
Deleting on the Index (tripleimage) screen (continued) PRINT PROTECT DELETE 100-0028 2002 7 4 10:30PM • OK 3 , Select [OK] using v on the control button, then press the center z. When "MEMORY STICK ACCESS" disappears, the image has been deleted. To cancel the deletion Use V on the control button to - Sony DSCP51 | Operating Instructions - Page 43
Deleting still images Formatting a " Memory Stick" SETUP 1 FORMAT : FILE NUMBER : /LANGUAGE : CLOCK SET : O K CANCEL OK FORMAT ALL DATA WILL BE ERASED READY? O K CANCEL OK 1 , Insert the "Memory Stick" you want to format into the camera. Set the mode dial to SET UP, and turn on the power. • - Sony DSCP51 | Operating Instructions - Page 44
mode, communication between your camera and your computer may not recover at the same time. When a USB connector is not provided on your computer When neither a USB connector nor a "Memory Stick" slot is provided, you can copy images using an additional device. See the Sony Website for details. - Sony DSCP51 | Operating Instructions - Page 45
1 Installing the USB driver Opening window Click here Copying still images to your computer 1 , Turn on your computer, and insert the supplied CD-ROM into the CD-ROM drive. Do not connect your camera to your computer at this time. The opening window appears. If it does not appear, double-click ( - Sony DSCP51 | Operating Instructions - Page 46
"PIXELA ImageMixer for Sony" software. Click [DirectX] and follow instructions on each succeeding window. Your computer restarts when the installation is completed. AC power 2 1 adaptor , Insert the "Memory Stick" with the images you want to copy into the camera. Connect the camera and the AC - Sony DSCP51 | Operating Instructions - Page 47
NORMAL] in the SET UP settings (page 98). Removing the USB cable from your computer or the "Memory Stick" from your camera during a USB connection For Windows 2000, Me, or XP users 1 Double-click on the tasktray. 2 Click (Sony DSC), then click [Stop]. 3 Confirm the device on the confirmation window - Sony DSCP51 | Operating Instructions - Page 48
"Memory Stick" inserted in your camera appear Sony" software to copy images to your computer. For details, see the software's help files. 2 , Double-click [DCIM], then double-click [100MSDCF]. The "100MSDCF" folder opens. • The "100MSDCF" folder contains the image files you shot using your camera - Sony DSCP51 | Operating Instructions - Page 49
Sony DSC] or " Sony Handycam." 2 Click [Delete]. The "Device deletion confirmation" window appears. 3 Click [OK]. The device is deleted. Try the USB driver on my computer using Microsoft Scanner and Camera Wizard] window, then click [OK]. The "Scanner and Camera Wizard" window appears. • When - Sony DSCP51 | Operating Instructions - Page 50
Options" window appears. • Copy images into the "My Documents" folder. 5 2 , Click [Nothing. I'm finished working with these pictures], then click [Next]. The "Completing the Scanner and Camera Wizard" window appears. 50 - Sony DSCP51 | Operating Instructions - Page 51
recorded with your camera are grouped as folders in the "Memory Stick," depending on the recording modes. Example: when viewing folders on Windows Me 6 Click here , Click [Finish]. The wizard window closes. • When you want to continue copying other images, disconnect the USB cable once and - Sony DSCP51 | Operating Instructions - Page 52
CLP0ssss.GIF CLP0ssss.THM MBL0ssss.GIF MBL0ssss.THM DSC0ssss.JPG MOV0ssss.MPG File meaning • Still image files shot normally • Still image files shot in - E-MAIL mode (page 65) - Multi Burst mode (page 64) • Clip Motion files shot in NORMAL mode (page 62) • Index image files of Clip Motion files - Sony DSCP51 | Operating Instructions - Page 53
5 Viewing the images on your computer Copying still images to your computer 1 , Double-click [My Windows XP, click [Start]t[My Documents] in that order. • You can use the "PIXELA ImageMixer for Sony" software to view images on your computer. For details, see the software's help files. 2 , - Sony DSCP51 | Operating Instructions - Page 54
the USB driver (For Mac OS 8.5.1, 8.6, or 9.0 users only USB cable from your computer or the "Memory Stick" from your camera during a USB connection. Drag and drop the drive icon of the "Memory Stick" to the "Trash" icon, then remove the USB cable or "Memory Stick ImageMixer for Sony" software to - Sony DSCP51 | Operating Instructions - Page 55
) is not displayed on the menu of the DSC-P51/P31 (page 61). To turn off the menu display Press the MENU button. Changing items in the SET UP screen a Set the mode dial to SET UP, and the SET UP screen appears. CAMERA MOVING IMAGE : DATE/TIME : DIGITAL ZOOM : RED EYE REDUCTION : AF ILLUMINATOR - Sony DSCP51 | Operating Instructions - Page 56
menu of the DSC-P51/P31 (page 61). • When the subject is at the brightest or darkest ends of the range, or when you are using the flash, the adjustment value set may not actually be used. Advanced still image shooting Shooting techniques In normal shooting, the camera makes automatic exposure - Sony DSCP51 | Operating Instructions - Page 57
differences from the actual color. • When the flash is triggered, the manual setting is cancelled, and the shooting of the image is done in "AUTO correct color almost instantly. However, digital still cameras are greatly influenced by light. Normally, this camera adjusts automatically, but if you - Sony DSCP51 | Operating Instructions - Page 58
(MPEG MOVIE) and you choose Multipoint AF, the distance to the center of the screen is estimated as an average, so the AF works even with a certain amount of you want to focus only on what you aim at. • When you use Digital zoom or AF illuminator, priority AF movement is given to subjects in or near - Sony DSCP51 | Operating Instructions - Page 59
shooting two human subjects, and there is a gap between them, the camera may focus on the background visible in the gap. In a case 125 AF range finder AE/AF lock indicator b Return to the fully composed shot, and press the shutter down again. When you hear a beeping sound, still image shooting 59 - Sony DSCP51 | Operating Instructions - Page 60
SPOT METER) is not displayed on the menu of the DSC-P51/P31 (page 61). • The focus distance settings include DSC-P71 only). Adding special effects - PICTURE EFFECT Mode dial: /SCN/ You can add special effects to bring out the contrast in your images. SOLARIZE B&W Like an illustration In black - Sony DSCP51 | Operating Instructions - Page 61
the same, it recommended that you use Center AF (page 58). Control button MENU button Mode dial Shutter button For the DSC-P71 a Set the mode dial to or . , SCN, b Press the MENU button. The menu appears. c the spot you want to shoot, then shoot your image. Advanced still image shooting 61 - Sony DSCP51 | Operating Instructions - Page 62
aiming point disappears, and the camera returns to normal light-metering. For the DSC-P51/P31 a Set the mode camera returns to normal light-metering. Shooting multiple frames - CLIP MOTION Mode dial: You can shoot a number of still can shoot in one Clip Motion shot is ten. This is the best choice - Sony DSCP51 | Operating Instructions - Page 63
"Memory Stick." Up to that point, the image is saved temporarily in the camera. • In Clip Motion mode, the date and time will not be recorded. • When you view Clip Motion images using the Index screen, to 3 to delete the images in order, from the latest one shot. Advanced still image shooting 63 - Sony DSCP51 | Operating Instructions - Page 64
PAL, see page 95.) 1/7.5 • When Multi Burst images are played back on a camera without the Multi Burst feature, the 16 frames are all displayed at the same time size: 1280 × 960). • When you play back images recorded with this camera in Multi Burst mode, the 16 frames are played back in order, with - Sony DSCP51 | Operating Instructions - Page 65
shot Select [OK], and press the center z. All of the frames are deleted. Shooting still images for e-mail - E-MAIL Mode dial: /SCN You can shoot images and save To return to Normal mode In Step 3, select [NORMAL]. • For instructions on how to attach your images to an e-mail message, refer to - Sony DSCP51 | Operating Instructions - Page 66
image B: To view a portion of the right side of the image Advanced still image viewing e Press the T zoom button repeatedly, the portion of the image button when you are viewing images that have not been enlarged, the Index screen will appear (page 37). • The images displayed in Quick Review (page - Sony DSCP51 | Operating Instructions - Page 67
c Select the image size using v/ V, then press the center z. The image is recorded, and the screen image returns to the size it was before enlargement. • The trimmed image is recorded as the newest file, setting In Step 3, select [CANCEL], then press the center z. Advanced still image viewing 67 - Sony DSCP51 | Operating Instructions - Page 68
settings are just guidelines. The actual intervals differ, based on factors like the size of the image. Rotating still images - ROTATE Mode dial: Images shot when holding the camera vertically can be rotated and displayed horizontally. a Set the mode dial to , and display the image you want - Sony DSCP51 | Operating Instructions - Page 69
the protection In Step 4, press the center z again. The - (Protect) mark disappears. Still image editting For Index (nine-image) screen a Set the mode dial to , press the W zoom button once, the Index (nine-image) screen appears. b Press the MENU button. The menu appears. c Select [PROTECT] using - Sony DSCP51 | Operating Instructions - Page 70
[ALL], and press the center z. Then select [OFF], and press the center z. For Index (triple-image) screen a Set the mode dial to , press the W zoom button twice, the Index (triple-image) screen appears. b Move the image you want to protect to the center using b/ B. c Press the MENU button. The - Sony DSCP51 | Operating Instructions - Page 71
new files. You can change your images to the following sizes. 2048×1536 (DSC-P71 only), 1600×1200, 1280×960, 640×480 After the resizing is . • If you try to resize a 3:2-sized image, black bands appears at the top and bottom of the image. Still image editting a Set the mode dial to . b Select - Sony DSCP51 | Operating Instructions - Page 72
have images printed in shops that follow DPOF (Digital Print Order Format) specifications. • Print marks cannot • You can attach a print mark to images shot using Multi Burst mode; all the images will be button once to switch to the Index (nineimage) screen. b Press the MENU button. The menu appears. - Sony DSCP51 | Operating Instructions - Page 73
Step 8, then press the center z. For index (triple-image) screen a Set the mode dial to , press the W zoom button twice, and the Index (triple-image) screen appears. b Display the image you want to print in the Step 4, press the center z again. The (Print) mark disappears. Still image editting 73 - Sony DSCP51 | Operating Instructions - Page 74
RECORDING" appears on the screen and the camera starts recording the image. 140 160 ^ 0:01[ 5:28] • When the capacity of the "Memory Stick" is used up, recording close-ups (MACRO) (DSC-P71 only) Set the mode dial to and follow the procedure on page 28. To shoot with a self-timer Set the mode dial - Sony DSCP51 | Operating Instructions - Page 75
dial: You can view movies on the LCD screen of the camera. a Set the mode dial to . b Select the desired movie using b/B. Movies are displayed a size smaller than still images. 160 6/8 0:00 MOV00001 2002 7 4 10:30PM PLAY FILE BACK/NEXT c Press the center z. The movie is played back. B (PLAYBACK - Sony DSCP51 | Operating Instructions - Page 76
b/B and press the center z. The movie has not yet been deleted at this point. e Select [OK] using v and press the center z. "MEMORY STICK ACCESS" appears on the screen. The movie has been deleted when the message disappears. To cancel the deletion Select [CANCEL] in Step 5, and press the center - Sony DSCP51 | Operating Instructions - Page 77
] using b/B and press the center z. The movies are deleted when the "MEMORY STICK ACCESS" message disappears. To cancel the deletion Select [CANCEL] in Step 8, the Index (tripleimage) screen a Set the mode dial to and press the W zoom button twice to display an Index (tripleimage) screen. b Show the - Sony DSCP51 | Operating Instructions - Page 78
Mode dial: With the mode dial, you can cut movies, or delete unnecessary portions of movies. This is the recommended mode to use when the "Memory Stick" capacity is insufficient, or when you attach movies to your e-mail messages. The file numbers assigned when movies are cut The files saved after - Sony DSCP51 | Operating Instructions - Page 79
z. The movie is cut. To cancel cutting Select [EXIT] in Step 5. The movie appears on the screen again. • You cannot cut the following files. - Clip Motion files - Multi Burst files - Still image files - Files not long enough to cut - Protected movies files • You cannot restore files once you - Sony DSCP51 | Operating Instructions - Page 80
your computer Follow the steps below to copy movies you shot to your computer. Before starting 1 Install the USB driver. 2 Insert the "Memory Stick" on which the movies are stored, into your camera. Then, turn on the camera. 3 Connect the camera to your computer. • For details, see page 44. • Step - Sony DSCP51 | Operating Instructions - Page 81
USB cable once and reconnect it. Then, follow the process from Step 1. For Macintosh users 1 Double-click the newly recognized icon on the desktop. The contents of the "Memory Stick" inserted into your camera for Sony" software. The operation is the same as the operation used to copy still images. - Sony DSCP51 | Operating Instructions - Page 82
) on the bottom of the camera, then turn on the power again. (This will erase the date/time settings, etc.) RESET button Troubleshooting 3 Consult your Sony dealer or local authorized Sony service facility. Batteries and Power Symptom Cause Solution The battery remaining indicator is incorrect - Sony DSCP51 | Operating Instructions - Page 83
is too bright. • You cannot zoom while shooting a movie (MPEG MOVIE) (DSC-P71/P31 only). • You cannot zoom while shooting a movie (MPEG MOVIE). • [DIGITAL ZOOM] is set to [OFF] in SET UP (DSC-P71/P51 only). • The LCD screen is OFF. • You are shooting a subject with a light source behind the subject - Sony DSCP51 | Operating Instructions - Page 84
dial is not set to or SCN while shooting a still image. • The mode dial is not set to when shooting a moving picture. p Insert a "Memory Stick" (page 23). p Delete the images saved in the "Memory Stick," or format it. p Change the "Memory Stick." p Change the LOCK position (page 100). - p Set it to - Sony DSCP51 | Operating Instructions - Page 85
Editing an image Symptom Cause Solution Your camera cannot delete an image. • The image is protected. p Cancel the protection (page 69). • The write-protect tab on the "Memory Stick" is p Change the LOCK position print marks on Clip Motion - mark. images and MPEG movies. Troubleshooting 85 - Sony DSCP51 | Operating Instructions - Page 86
it again securely. Make sure that "USB MODE" is displayed on the LCD screen (page 47). p Set it to [NORMAL] (pages 55, 98). p Disconnect the USB cables except for those connected to the keyboard, the mouse, and your camera. p Install the USB driver (page 45). p Delete the erroneously recognized - Sony DSCP51 | Operating Instructions - Page 87
. Solution p Charge the battery (page 14). p Connect it securely to the DC IN jack of your camera and to a wall outlet (mains) (page 19). p Disconnect, and then, after one minute, reconnect all power sources. Then turn the power on and check that the camera works properly. Troubleshooting 87 - Sony DSCP51 | Operating Instructions - Page 88
-in microcomputer is not working properly. You cannot identify the indicator on the LCD screen. The lens does not move when you turn off the camera. (DSC-P71 only) The lens gets fogged. - • The battery pack is discharged. • Condensation is occurring. Solution p Remove, and then, after one minute - Sony DSCP51 | Operating Instructions - Page 89
LCD screen. Message Meaning/ Corrective Action NO MEMORY STICK • Insert a "Memory Stick" (page 23). SYSTEM ERROR MEMORY STICK ERROR FORMAT ERROR MEMORY STICK LOCKED NO MEMORY SPACE NO FILE • Turn the power off and on again (page 20). • The inserted "Memory Stick" cannot be used in your camera - Sony DSCP51 | Operating Instructions - Page 90
9, 11, 13) on the bottom of the camera, then turn the power on again. If your camera is not still functioning well after trying the countermeasure a couple of times, contact your nearest Sony service station and inform them of the 5-digit displayed code. Example: E:61:10 Self-diagnostics display - Sony DSCP51 | Operating Instructions - Page 91
Memory Stick," the image size, and the image quality. Refer to the following charts when you choose a "Memory Stick 64 128 (59) (118) (236) 1600 (3:2) 8 16 32 64 128 (DSC-P51/ (14) (28) (59) (118) (236) P31) 1280×960 12 When 10 frames are shot Mobile: When 2 frames are shot MPEG movies (Units: - Sony DSCP51 | Operating Instructions - Page 92
mode dial. The LCD screen shows only the items you / / / / xAUTO ON / x OFF 400 / 200 / 100 / xAUTO (IMAGE SIZE) (DSC-P71) (IMAGE SIZE) (DSC-P51/P31) x2048×1536 / 2048 (3:2)/ 1600×1200 / 1280×960 / 640×480 x1600×1200 / 1600 (3:2) still pictures (page 24). Selects the image size used when shooting - Sony DSCP51 | Operating Instructions - Page 93
mode dial is set to (MOVING IMAGE is set to MPEG MOVIE in the SET UP settings.) Item (EV) 9 (FOCUS) WB (WHITE BAL) (SPOT METER) (DSC-P71 only) (IMAGE SIZE) PFX (P.EFFECT) Setting +2.0EV / +1.7EV / +1.3EV / +1.0EV / +0.7EV / +0.3EV / x0EV / −0.3EV / −0.7EV / −1.0EV / −1.3EV / −1.7EV / −2.0EV - Sony DSCP51 | Operating Instructions - Page 94
the exposure (page 56). Chooses the auto focus method, set the focus preset distance (pages 58, 60). Sets the white balance (page 57). (SPOT METER) (DSC-P71 only) ON / x OFF To match the exposure to the subject you want to shoot (page 61). (IMAGE SIZE) ± (FLASH LEVEL) PFX (P.EFFECT) (SHARPNESS - Sony DSCP51 | Operating Instructions - Page 95
Adjusts the exposure (page 56). Chooses the auto focus method, set the prefocus distance (pages 58, 60). Sets the white balance (page 57). (SPOT METER) (DSC-P71 only) ON / x OFF To match the exposure to the subject you want to shoot (page 61). (INTERVAL) x1/30 / 1/15 / 1/7.5 (NTSC) x1/25 / 1/12 - Sony DSCP51 | Operating Instructions - Page 96
OK CANCEL - - INTERVAL REPEAT START CANCEL RESIZE ROTATE DIVIDE 2048×1536 (DSC-P71) / 1600×1200/1280×960/ 640×480/ CANCEL (counter-clockwise) deleting of the image. Protects images against accidental erasure (page 69). Selects still images you want to print. (page 72). - Sets the slide show - Sony DSCP51 | Operating Instructions - Page 97
screen is played back. Additional information CAMERA Item Setting Description MOVING IMAGE (page 32). DIGITAL ZOOM (DSC- xON / OFF P71/P51) Selects whether to use the digital zoom (page Memory Stick" is changed. - Resets the file numbering and starts from 0001 each time the "Memory Stick - Sony DSCP51 | Operating Instructions - Page 98
OUT USB CONNECT POWER SAVE (DSC-P71) SHUTTER x ON OFF x NTSC PAL PTP/xNORMAL x ON / OFF Description Selects the LCD brightness. This has no effect on the recorded images. Selects the brightness of the LCD backlight. Selecting "BRIGHT" makes the screen bright and easy to see when using the camera - Sony DSCP51 | Operating Instructions - Page 99
for about one month it becomes completely discharged. In this case, be sure to charge this rechargeable button battery before using the camera. Note that even if this rechargeable button battery is not charged, you can still use the camera as long as you do not record the date and time. Charging the - Sony DSCP51 | Operating Instructions - Page 100
are two types of "Memory Stick": an ordinary "Memory Stick" and a "MagicGate Memory Stick" that are equipped with the MagicGate copyright protection technology. You can use both types of "Memory Stick" with your camera. However, because your camera does not support the MagicGate standards, data - Sony DSCP51 | Operating Instructions - Page 101
, and is different for each battery pack. Specifications System Image device DSC-P71 8.93mm (1/1.8 type) color CCD Primary color filter DSC-P51 6.64 mm(1/2.7 type) color CCD Primary color filter DSC-P31 6.64 mm(1/2.7 type) color CCD Total pixels number of camera DSC-P71 Approx. 3 300 000 pixels - Sony DSCP51 | Operating Instructions - Page 102
• R6 (size AA) Ni-MH batteries (2) • Ni-MH Battery charger (1) • Power cord (mains lead) (1) • USB cable (1) • Wrist strap • "Memory Stick" (8MB for DSC-P31, 16MB for DSC-P71/P51) (1) • CD-ROM (USB driver: SPVD-008) (1) • Operating Instructions (1) Design and specifications are subject to change - Sony DSCP51 | Operating Instructions - Page 103
90) O Remaining "Memory Stick" capacity indicator (25) P Center AF indicator (58)/ Focus preset value (60) Q EV adjustment indicator (56) R Iris value indicator S Shutter speed indicator T Macro (DSC-P71) (28) U Self-timer display (29) V Vibration warning indicator (89) W Menu/Guide menu (55) • When - Sony DSCP51 | Operating Instructions - Page 104
qf A Recording mode indicator (74) B Remaining battery indicator display (16) C White balance indicator (57 Memory Stick" capacity indicator (25) 104 J Center AF indicator (58)/ Focus preset value (60) K EV adjustment indicator (56) L Macro (DSC-P71) (28) M Self-timer indicator (29) N Menu/Guide - Sony DSCP51 | Operating Instructions - Page 105
, 75) L Playback indicator (75) M Image number/Number of images recorded in the "Memory Stick" (75) N Remaining "Memory Stick" capacity (75) O Counter (75) P Playback screen (75) Q Playback bar (75) R Menu/Guide menu (55) The page numbers in parentheses indicate the location of additional important - Sony DSCP51 | Operating Instructions - Page 106
CD-ROM 45 Charging Charging the batteries 14 Charging time 15 Computer Copying images 48, 54 Copying movies to your computer 80 USB cable 47 USB driver 45 Control button 20 Copying images 48, 54 106 D DC plug 19 Deleting images 39 DIVIDE 78 E Editing still images Print mark 72 Protect - Sony DSCP51 | Operating Instructions - Page 107
that can be shot ...... 18 Using auto adjustment mode 26 Using the self-timer 29 WHITE BALANCE 57 Zoom 28 T Trimming 67 TV set 38 U USB 45, 47 Using your camera abroad 19 V Video connecting cable 38 Viewing single images 36 W Warnings and messages 89 Z Zoom Digital zoom 28 Playback - Sony DSCP51 | Operating Instructions - Page 108
307435113 Printed on recycled paper using VOC (Volatile Organic Compound)-free vegetable oil based ink. Sony Corporation Printed in Japan
-
 1
1 -
 2
2 -
 3
3 -
 4
4 -
 5
5 -
 6
6 -
 7
7 -
8
-
9
-
10
-
11
-
12
-
13
-
14
-
15
-
16
-
17
-
18
-
19
-
20
-
21
-
22
-
23
-
24
-
25
-
26
-
27
-
28
-
29
-
30
-
31
-
32
-
33
-
34
-
35
-
36
-
37
-
38
-
39
-
40
-
41
-
42
-
43
-
44
-
45
-
46
-
47
-
48
-
49
-
50
-
51
-
52
-
53
-
54
-
55
-
56
-
57
-
58
-
59
-
60
-
61
-
62
-
63
-
64
-
65
-
66
-
67
-
68
-
69
-
70
-
71
-
72
-
73
-
74
-
75
-
76
-
77
-
78
-
79
-
80
-
81
-
82
-
83
-
84
-
85
-
86
-
87
-
88
-
89
-
90
-
91
-
92
-
93
-
94
-
95
-
96
-
97
-
98
-
99
-
100
-
101
-
102
-
103
-
104
-
105
-
106
-
107
-
108
 |
 |

3-074-351-
13
(1)
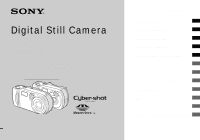
Digital Still Camera
Operating Instructions
Before operating the unit, please read this manual thoroughly, and
retain it for future reference.
Owner’s Record
The model and serial numbers are located on the bottom. Record the
serial number in the space provided below. Refer to these numbers
whenever you call upon your Sony dealer regarding this product.
Model No. DSC-P71/P51/P31
Serial No.
DSC-P71/P51/P31
© 2002 Sony Corporation
Getting started
________________________
Shooting still images
__________________
Viewing still images
___________________
Deleting still images
___________________
Copying still images to your computer
_________
Before advanced operations
_____________
Advanced still image shooting
____________
Advanced still image viewing
_____________
Still image editting ____________________
Enjoying movies
________________________
Troubleshooting
________________________
Additional information
___________________
Index