Sony HDR CX12 Operating Guide - Page 19
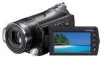
Connecting to the devices, A/V Remote Connector/A/V OUT - accessories
 |
UPC - 027242732438
View all Sony HDR CX12 manuals
Add to My Manuals
Save this manual to your list of manuals |
Page 19 highlights
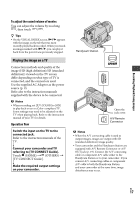
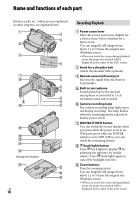
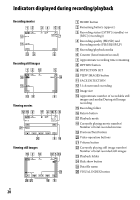
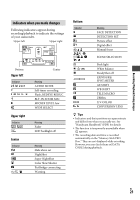
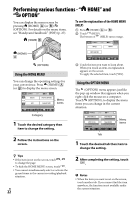
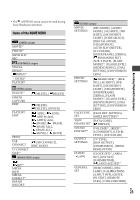
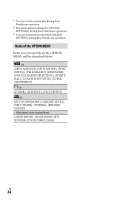
Access lamp When the Access lamp is lit or flashing, your camcorder is writing/reading data. EASY button Press EASY to display and most of the settings are set automatically for easy recording/playback. To cancel, press EASY again. RESET button Press RESET to initialize all the settings including the clock setting. QUICK ON button/QUICK ON lamp When you press QUICK ON, the camcorder goes to sleep mode (power saving mode) instead of turning off. The QUICK ON lamp keeps flashing during sleep mode. Press QUICK ON again to start recording next time. Your camcorder returns to recording standby in approximately 1 second. The power turns off automatically if you do not operate your camcorder for a certain period during sleep mode. Speaker NIGHTSHOT switch Set the NIGHTSHOT switch to ON ( appears) to record in dark places. Flash The flash will flash automatically depending on recording conditions in the default setting. Touch (HOME) (SETTINGS) [PHOTO SETTINGS] [FLASH MODE] to change the setting. MANUAL button You can display the [DIAL SETTING] screen with pressing and holding the manual button. CAMERA CONTROL dial You can use the menu item assigned on the [DIAL SETTING] screen. Tripod receptacle (Bottom surface) Attach a tripod (optional) to the tripod receptacle using a tripod screw (optional: the length of the screw must be less than 5.5 mm (7/32 in.)). Connecting to the devices Active Interface Shoe The Active Interface Shoe supplies power to optional accessories such as a video light, a flash, or a microphone. The accessory can be turned on or off as you operate the POWER switch on your camcorder. HDMI OUT (mini) jack Connect with the HDMI cable (optional). A/V Remote Connector/A/V OUT jack Connect with the component A/V cable or A/V connecting cable. Interface connector Connect your camcorder and the Handycam Station. (DISC BURN) button Create a disc by connecting the camcorder to a computer. For details, see "PMB Guide" (p. 29). (USB) jack Connect with the USB cable. US 19 Recording/Playback/Saving images
-
 1
1 -
2
-
3
-
4
-
5
-
6
-
7
-
8
-
9
-
10
-
11
-
12
-
13
-
 14
14 -
 15
15 -
 16
16 -
 17
17 -
 18
18 -
 19
19 -
 20
20 -
 21
21 -
 22
22 -
 23
23 -
 24
24 -
25
-
26
-
27
-
28
-
29
-
30
-
31
-
32
-
33
-
34
-
35
-
36
-
37
-
38
-
39
-
40
-
41
-
42
-
43
-
44
-
45
-
46
-
47
-
48
-
49
-
50
-
51
-
52
-
53
-
54
-
55
-
56
-
57
-
58
-
59
-
60
-
61
-
62
-
63
-
64
-
65
-
66
-
67
-
68
-
69
-
70
-
71
-
72
 |
 |
