Sony HXRNX80 Operating Instructions - Page 80
Registering an access point manually
 |
View all Sony HXRNX80 manuals
Add to My Manuals
Save this manual to your list of manuals |
Page 80 highlights
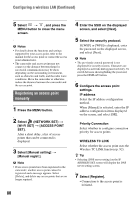
Configuring a wireless LAN (Continued) 5 Select t , and press the MENU button to close the menu screen. b Notes • For details about the functions and settings supported by your access point, refer to the manual for the access point or contact the access point administrator. • The camcorder and access point may not connect or the distance between them for successful communication may be short, depending on the surrounding environment, such as obstacles and walls, and the radio wave conditions. Move the camcorder or otherwise reduce the distance between the camcorder and the access point. Registering an access point manually 1 Press the MENU button. 2 Select (NETWORK SET) t [Wi-Fi SET] t [ACCESS POINT SET]. After a short delay, a list of access points that can be connected is displayed. 3 Select [Manual setting] t [Manual regist.]. b Note • If ten access points have been registered in the camcorder, another access point cannot be registered and a message appears. Select [Delete], and delete any access points that are no longer required. 80 4 Enter the SSID on the displayed screen, and select [Next]. 5 Select the security protocol. If [WEP] or [WPS] is displayed, enter the password on the displayed screen, and select [Next]. b Note • The previously entered password is not displayed for security reasons. Characters are displayed as asterisks during password entry. To switch between showing/hiding the password, press the DISPLAY button. 6 Configure the access point settings. IP address Select the IP address configuration method. When [Manual] is selected, enter the IP address configuration items displayed on the screen, and select [OK]. Priority Connection Select whether to configure connection priority for access points. WIRELESS TC LINK Select whether the access point uses the Wireless TC LINK function (p. 92). z Tip • Selecting [DNS server setting] on the IP ADDRESS SET screen will display the DNS server setting screen. 7 Select [Register]. • Connection to the access point is initiated.
-
 1
1 -
2
-
3
-
4
-
5
-
6
-
7
-
8
-
9
-
10
-
11
-
12
-
13
-
14
-
15
-
16
-
17
-
18
-
19
-
20
-
21
-
22
-
23
-
24
-
25
-
26
-
27
-
28
-
29
-
30
-
31
-
32
-
33
-
34
-
35
-
36
-
37
-
38
-
39
-
40
-
41
-
42
-
43
-
44
-
45
-
46
-
47
-
48
-
49
-
50
-
51
-
52
-
53
-
54
-
55
-
56
-
57
-
58
-
59
-
60
-
61
-
62
-
63
-
64
-
65
-
66
-
67
-
68
-
69
-
70
-
71
-
72
-
73
-
74
-
 75
75 -
 76
76 -
 77
77 -
 78
78 -
 79
79 -
 80
80 -
 81
81 -
 82
82 -
 83
83 -
 84
84 -
 85
85 -
86
-
87
-
88
-
89
-
90
-
91
-
92
-
93
-
94
-
95
-
96
-
97
-
98
-
99
-
100
-
101
-
102
-
103
-
104
-
105
-
106
-
107
-
108
-
109
-
110
-
111
-
112
-
113
-
114
-
115
-
116
-
117
-
118
-
119
-
120
-
121
-
122
-
123
-
124
-
125
-
126
-
127
-
128
-
129
-
130
-
131
-
132
-
133
-
134
-
135
-
136
-
137
-
138
-
139
-
140
-
141
-
142
-
143
-
144
-
145
-
146
-
147
-
148
-
149
-
150
-
151
-
152
-
153
-
154
-
155
-
156
-
157
-
158
-
159
-
160
-
161
-
162
-
163
-
164
-
165
-
166
-
167
-
168
-
169
-
170
-
171
 |
 |