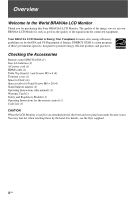
Sony KLV-40ZX1M Operating Instructions - Page 7
Preparation for Wall-Mount Bracket, When Installing the Unit Against a Wall or Enclosed Area - accessories
 |
UPC - 027242748101
View all Sony KLV-40ZX1M manuals
Add to My Manuals
Save this manual to your list of manuals |
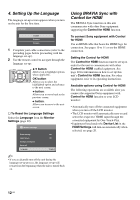
Page 7 highlights
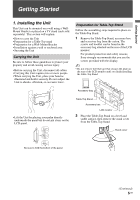
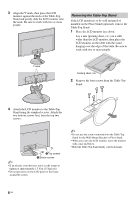
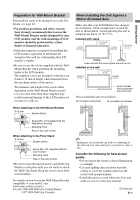
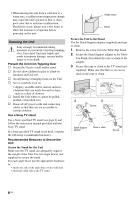
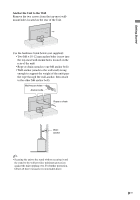
Preparation for Wall-Mount Bracket This model is ready to be mounted on a wall. For details, see page 22. • For product protection and safety reasons, Sony strongly recommends that you use the Wall-Mount Bracket model designed for your LCD monitor and the wall-mounting of LCD monitor should be performed by a Sony dealer or licensed contractor. • Sufficient expertise is required in installing this LCD monitor, especially to determine the strength of the wall for withstanding the LCD monitor's weight. • Be sure to use the screws supplied with the WallMount Bracket when attaching the mounting hooks to the LCD monitor. The supplied screws are designed so that they are 8 mm to 12 mm in length when measured from the attaching surface of the spacer. The diameter and length of the screws differ depending on the Wall-Mount Bracket model. Use of screws other than those supplied may result in internal damage to the LCD monitor set or cause it to fall, etc. When attaching to the Wall-Mount Bracket 8-12 mm Spacer (black) Screw M6 × 16 (supplied with the Wall-Mount Bracket) Mounting Hook Rear of the LCD monitor When attaching to the Floor Stand 8-12 mm Spacer (silver) Screw M6 × 20 (supplied with the LCD monitor) Mounting Hook Rear of the LCD monitor • Be sure to store the unused screws and Table-Top Stand in a safe place until you are ready to attach the Table-Top Stand. Keep the screws away from small children. For details on how to use the Wall-Mount Bracket compatible to your model, visit www.sony.com/accessories Or call 1-800-488-7669 (for United States) 1-877-899-7669 (for Canada) When Installing the Unit Against a Wall or Enclosed Area Make sure that your LCD Monitor has adequate air circulation. Allow enough space around the unit as shown below. Avoid operating the unit at temperatures below 41 °F (5 °C). Installed with stand 11 7/8 inches (30 cm) 4 inches (10 cm) 4 inches (10 cm) 2 3/8 inches (6 cm) Leave at least this much space around the set. Installed on the wall 11 7/8 inches (30 cm) 4 inches (10 cm) 4 inches (10 cm) 4 inches (10 cm) Leave at least this much space around the set. Never install the unit set as follows: Air circulation is blocked. Air circulation is blocked. Wall Wall ~ • Inadequate air circulation can lead to overheating of the unit and may cause damage to your unit or cause a fire. Consider the following for best picture quality • Do not expose the screen to direct illumination or sunlight. • Use spot lighting directed down from the ceiling or cover the windows that face the screen with opaque drapery. • Install the unit in a room where the floor and walls are not of a reflective material. (Continued) 7 US Getting Started
-
 1
1 -
 2
2 -
 3
3 -
 4
4 -
 5
5 -
 6
6 -
 7
7 -
 8
8 -
 9
9 -
 10
10 -
 11
11 -
 12
12 -
13
-
14
-
15
-
16
-
17
-
18
-
19
-
20
-
21
-
22
-
23
-
24
-
25
-
26
-
27
-
28
-
29
-
30
-
31
-
32
-
33
-
34
-
35
-
36
-
37
-
38
-
39
-
40
-
41
-
42
-
43
-
44
-
45
-
46
-
47
-
48
-
49
-
50
-
51
-
52
-
53
-
54
-
55
-
56
-
57
-
58
-
59
-
60
-
61
-
62
-
63
-
64
-
65
-
66
-
67
-
68
-
69
-
70
-
71
-
72
-
73
-
74
-
75
-
76
-
77
-
78
-
79
-
80
-
81
-
82
-
83
-
84
-
85
-
86
-
87
 |
 |