Sony RDR-GX360 Operating Instructions - Page 71
USB Dubbing (USB t DVD), Before USB Dubbing, Connecting to the USB jack, USB Dubbing USB, Notes
 |
UPC - 027242735507
View all Sony RDR-GX360 manuals
Add to My Manuals
Save this manual to your list of manuals |
Page 71 highlights
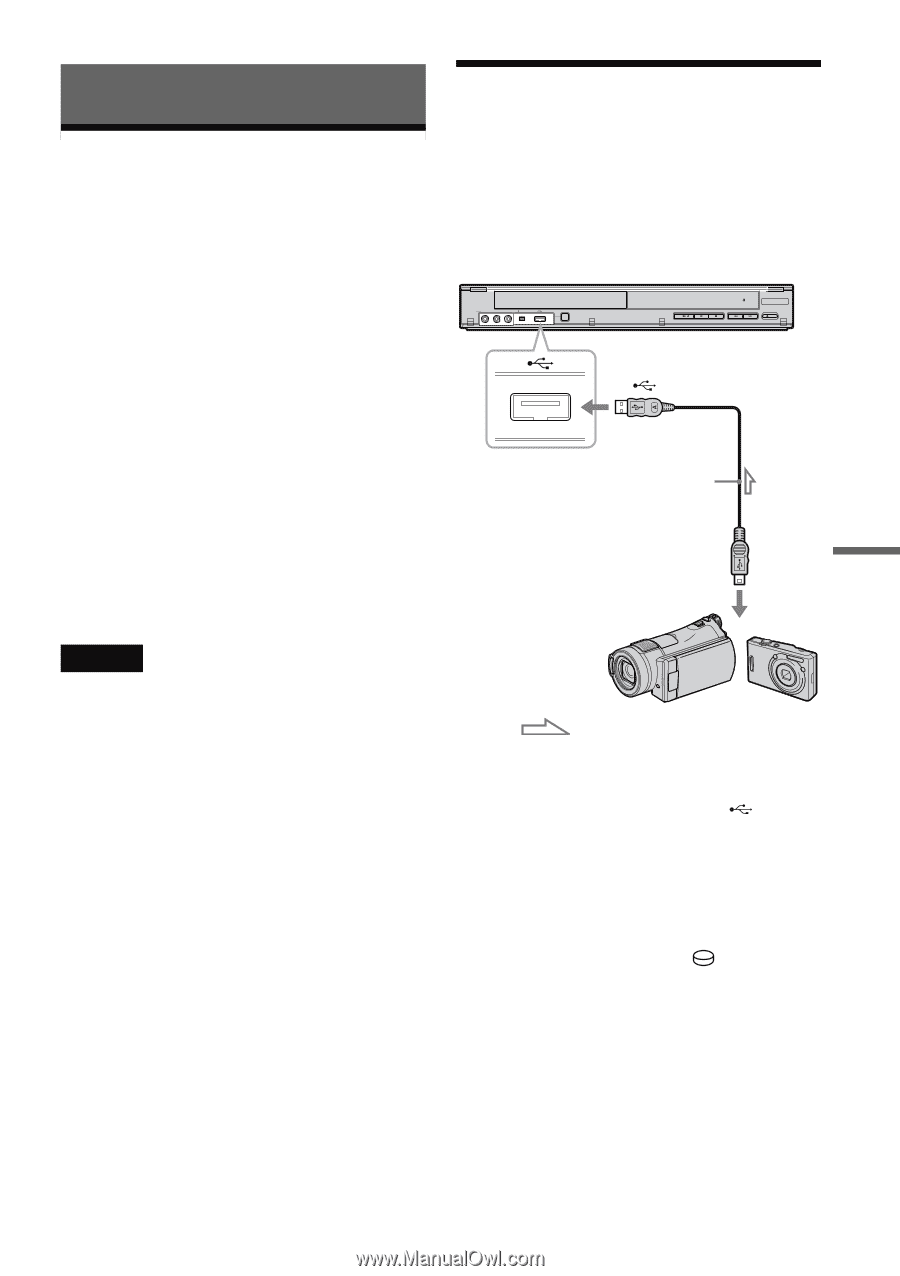
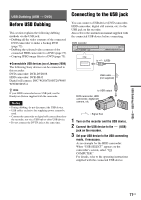
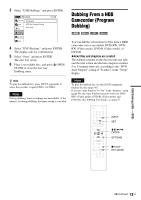
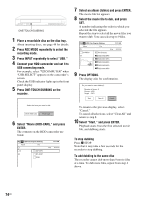
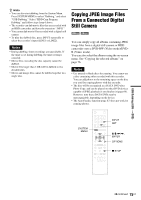
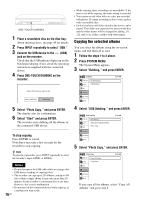
USB Dubbing (USB t DVD) Before USB Dubbing This section explains the following dubbing methods via the USB jack: • Dubbing all the video contents of the connected DVD camcorder to make a backup DVD (page 72). • Dubbing the selected video contents of the connected HDD camcorder to a DVD (page 73). • Copying JPEG image files to a DVD (page 75). ◆Connectable USB devices (as of January 2008) The following Sony devices can be connected to this recorder: DVD camcorder: DCR-DVD108 HDD camcorder: DCR-SR42 Digital still camera: DSC-W200/T100/T20/W80/ W90/H7/H9/G1 z Hint If your HDD camcorder has no USB jack, use the Handycam Station supplied with the camcorder. Notes • During dubbing, do not disconnect the USB device. • USB cables exclusive for supplying power cannot be used. • Connect the camcorder or digital still camera directly to the recorder, not via a USB hub or other USB device. • Do not connect the DV IN jack at the same time. Connecting to the USB jack You can connect a USB device (DVD camcorder, HDD camcorder, digital still camera, etc.) to the USB jack on the recorder. Also refer to the instruction manual supplied with the connected USB device before connecting. DVD recorder LINE 2 IN VIDEO L(MONO) AUDIO R DV IN ONE-TOUCH DUBBING REC to (USB) USB cable (not supplied) to USB output DVD camcorder, HDD camcorder, digital still camera, etc. : Signal flow 1 Turn on the recorder and the USB device. 2 Connect the USB device to the (USB) jack on the recorder. 3 Set your USB device to the USB connecting mode, if necessary. As an example for the HDD camcorder: When "USB SELECT" appears on the camcorder's screen, select " COMPUTER." For details, refer to the operating instructions supplied with the connected USB device. USB Dubbing (USB t DVD) 71US
-
 1
1 -
2
-
3
-
4
-
5
-
6
-
7
-
8
-
9
-
10
-
11
-
12
-
13
-
14
-
15
-
16
-
17
-
18
-
19
-
20
-
21
-
22
-
23
-
24
-
25
-
26
-
27
-
28
-
29
-
30
-
31
-
32
-
33
-
34
-
35
-
36
-
37
-
38
-
39
-
40
-
41
-
42
-
43
-
44
-
45
-
46
-
47
-
48
-
49
-
50
-
51
-
52
-
53
-
54
-
55
-
56
-
57
-
58
-
59
-
60
-
61
-
62
-
63
-
64
-
65
-
 66
66 -
 67
67 -
 68
68 -
 69
69 -
 70
70 -
 71
71 -
 72
72 -
 73
73 -
 74
74 -
 75
75 -
 76
76 -
77
-
78
-
79
-
80
-
81
-
82
-
83
-
84
-
85
-
86
-
87
-
88
-
89
-
90
-
91
-
92
-
93
-
94
-
95
-
96
-
97
-
98
-
99
-
100
-
101
-
102
-
103
-
104
-
105
-
106
-
107
-
108
-
109
-
110
-
111
-
112
-
113
-
114
-
115
-
116
-
117
-
118
-
119
-
120
-
121
-
122
-
123
-
124
-
125
-
126
-
127
-
128
 |
 |