Sony STR-DG800 Operating Instructions - Page 36
Press AUTO CAL., Performing Auto Calibration - test
 |
UPC - 027242683075
View all Sony STR-DG800 manuals
Add to My Manuals
Save this manual to your list of manuals |
Page 36 highlights
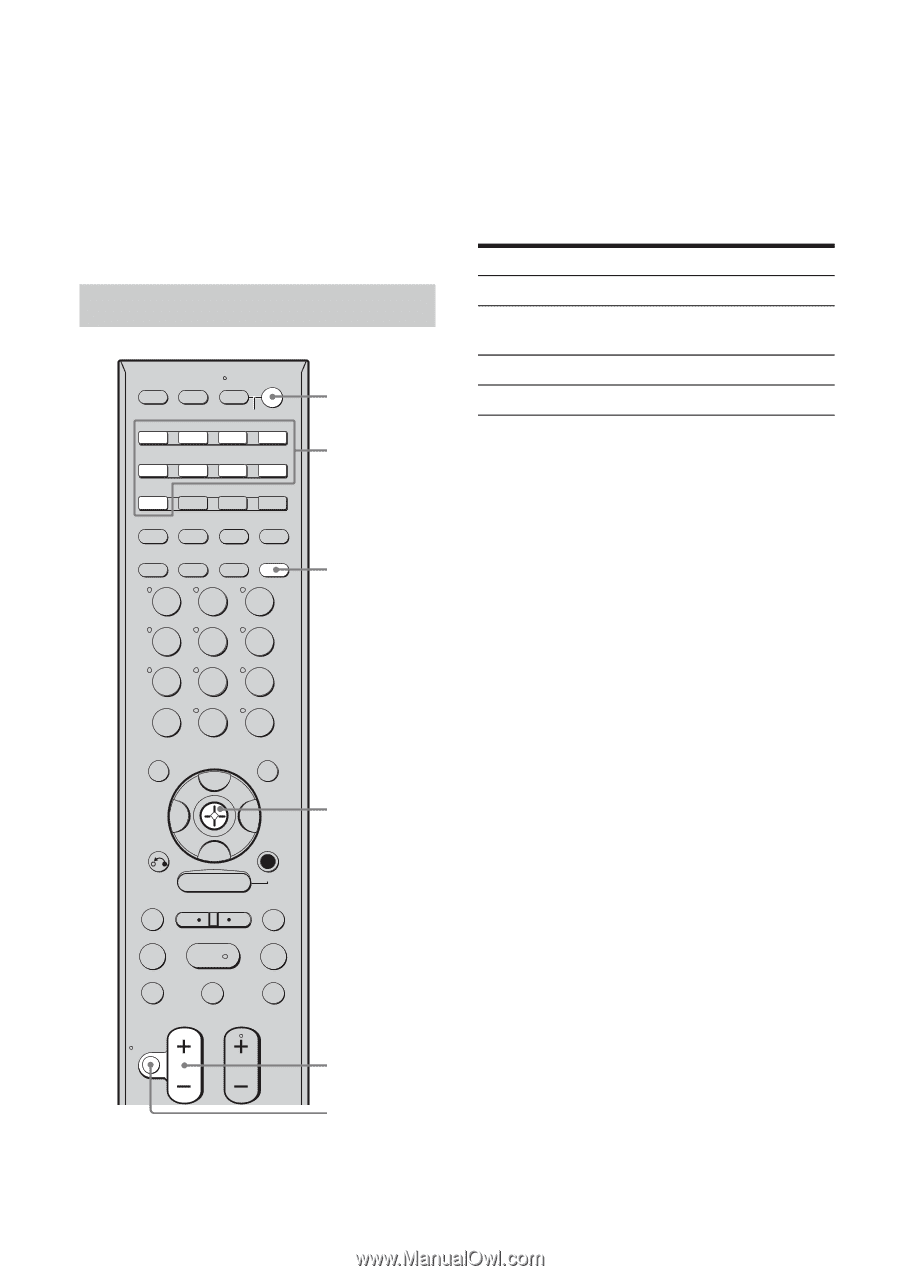
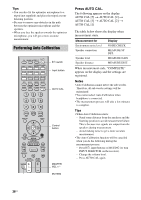
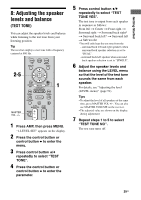
Tips • You can also fix the optimizer microphone to a tripod (not supplied) and place the tripod at your listening position. • Be sure to remove any obstacles in the path between the optimizer microphone and the speakers. • When you face the speaker towards the optimizer microphone, you will get a more accurate measurement. Performing Auto Calibration TV RM SET UP AV ?/1 ?/1 SYSTEM STANDBY VIDEO 1 VIDEO 2 VIDEO 3 DVD TV/SAT MD/TAPE SA-CD/CD TUNER PHONO MULTI CH SOURCE 2ND ZONE 2CH A.F.D. MOVIE MUSIC CATEGORY SLEEP MODE D. TUNING AUTO CAL 123 4 >10/ 7 - /- - CLEAR >10 DISPLAY 56 89 0/10 ENTER MEMORY TOOLS V < B B v RETURN/ EXIT MENU - CATEGORY + REPLAY ADVANCE .< AMP > TUNING - TUNING + m H M DISC SKIP X x TV VOL TV CH MASTER VOL PRESET MUTING ?/1 switch Input button AUTO CAL Control button MASTER VOL +/- MUTING Press AUTO CAL. The following appears on the display. AUTO CAL [5] t AUTO CAL [4] t AUTO CAL [3] t AUTO CAL [2] t AUTO CAL [1] The table below shows the display when measurement starts. Measurement for Environment noise level Speaker connection Speaker level Speaker distance Display NOISE CHECK MEASURE SP DET. MEASURE GAIN MEASURE DIST. When measurement ends, "COMPLETE" appears on the display and the settings are registered. Notes • Auto Calibration cannot detect the sub woofer. Therefore, all sub woofer settings will be maintained. • You cannot select Auto Calibration when headphone is connected. • The measurement process will take a few minutes to complete. Tips • When Auto Calibration starts: - Stand some distance from the speakers and the listening position to avoid measurement failure. This is because test signals are output from the speakers during measurement. - Avoid making noise to get a more accurate measurement. • The Auto Calibration function will be canceled when you do the following during the measurement process: - Press ?/1, input buttons or MUTING (or turn INPUT SELECTOR on the receiver). - Change the volume level. - Press AUTO CAL again. 36US
-
 1
1 -
2
-
3
-
4
-
5
-
6
-
7
-
8
-
9
-
10
-
11
-
12
-
13
-
14
-
15
-
16
-
17
-
18
-
19
-
20
-
21
-
22
-
23
-
24
-
25
-
26
-
27
-
28
-
29
-
30
-
 31
31 -
 32
32 -
 33
33 -
 34
34 -
 35
35 -
 36
36 -
 37
37 -
 38
38 -
 39
39 -
 40
40 -
 41
41 -
42
-
43
-
44
-
45
-
46
-
47
-
48
-
49
-
50
-
51
-
52
-
53
-
54
-
55
-
56
-
57
-
58
-
59
-
60
-
61
-
62
-
63
-
64
-
65
-
66
-
67
-
68
-
69
-
70
-
71
-
72
-
73
-
74
-
75
-
76
-
77
-
78
-
79
-
80
-
81
-
82
-
83
-
84
-
85
-
86
-
87
-
88
-
89
-
90
-
91
-
92
-
93
-
94
-
95
-
96
-
97
-
98
-
99
-
100
 |
 |