Sony UP-897MD User Instructions - Page 42
Printing the Menu List, Printing, Starting a Print Job
 |
View all Sony UP-897MD manuals
Add to My Manuals
Save this manual to your list of manuals |
Page 42 highlights
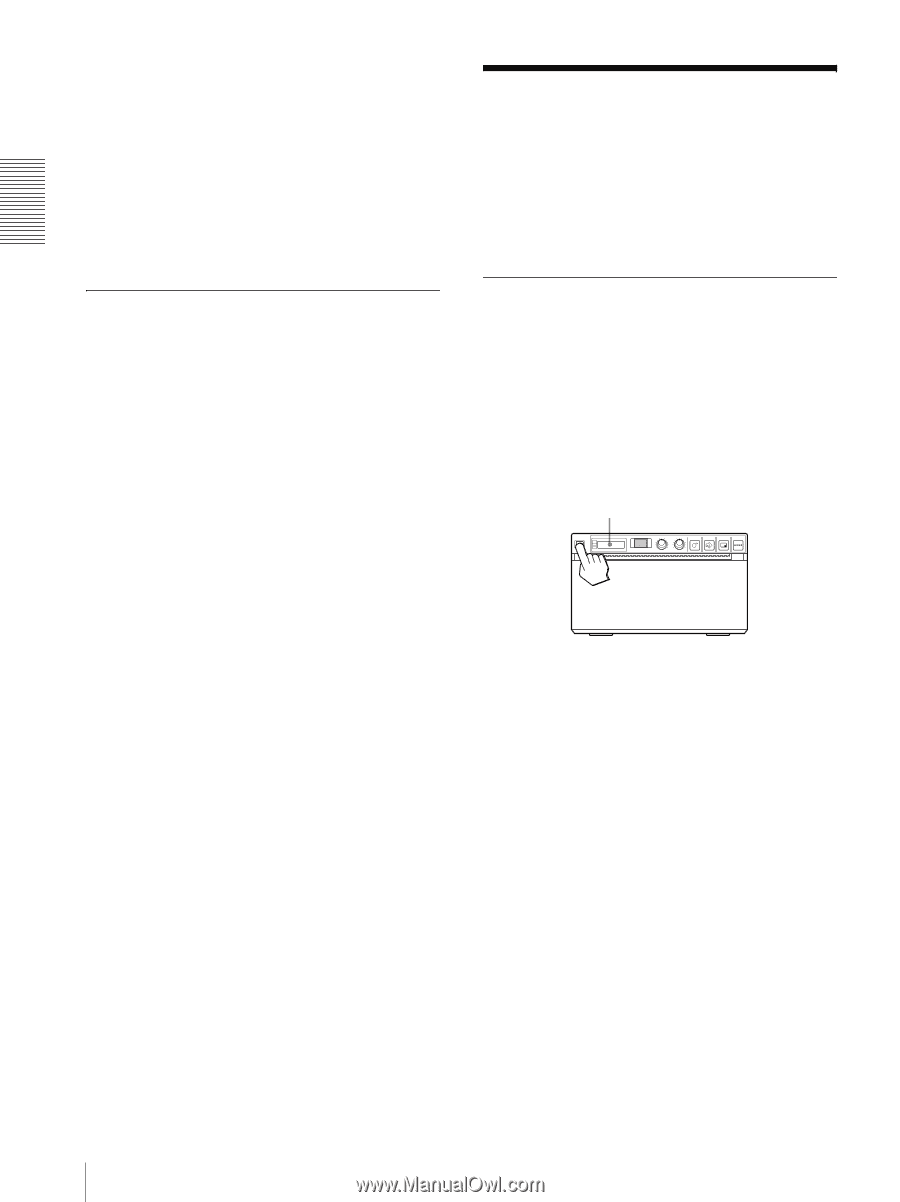
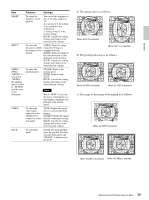
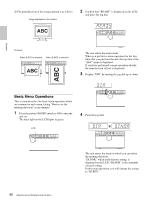
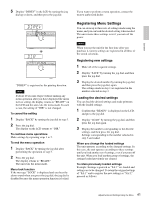
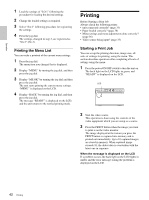
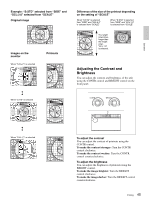
Operation 1 Load the settings of "LO:1" following the procedure for loading the desired settings. 2 Change the loaded settings as required. 3 Select "SA:2" following procedure for registering the settings. 4 Press the jog dial. The settings, changed in step 2, are registered as "SA:2" (No.2). Printing the Menu List You can make a printout of the current menu settings. 1 Press the jog dial. The menu item you changed last is displayed. 2 Display "MENU" by turning the jog dial, and then press the jog dial. 3 Display "ME:OK" by turning the jog dial and then press the jog dial. The unit starts printing the current menu settings. "MENU" is displayed on the LCD. 4 Display "BACK" by turning the jog dial, and then press the jog dial. The message "READY" is displayed on the LCD, and the unit returns to the normal printing mode. Printing Before Starting a Print Job Always check the following points: • unit connected correctly? (page 33) • Paper loaded correctly? (page 34) • Menu settings and menu adjustments done correctly? (page 36) • Video source being input? (page 33) Starting a Print Job You can set up the printing direction, image size, all sorts of settings for printing, using the menu. This section describes operations after completing all sorts of settings using the menu. 1 Press the power ON/OFF switch to turn the unit on. The back light on the LCD lights in green, and "READY" is displayed on the LCD. LCD 2 Start the video source. This operation is done using the controls of the video equipment which you are using as a source. 3 Press the PRINT button when the image you want to print is on the video monitor. The image displayed at the instant you press the PRINT button is captured into memory and is printed out immediately. Up to 10 captured images are stored in memory. When captured image exceeds 10, the oldest data is overwritten with the latest one in sequence. When the message is displayed on the LCD If a problem occurs, the back light on the LCD lights in umber and the error message stating the problem is displayed on the LCD. 42 Printing
-
 1
1 -
2
-
3
-
4
-
5
-
6
-
7
-
8
-
9
-
10
-
11
-
12
-
13
-
14
-
15
-
16
-
17
-
18
-
19
-
20
-
21
-
22
-
23
-
24
-
25
-
26
-
27
-
28
-
29
-
30
-
31
-
32
-
33
-
34
-
35
-
36
-
 37
37 -
 38
38 -
 39
39 -
 40
40 -
 41
41 -
 42
42 -
 43
43 -
 44
44 -
 45
45 -
 46
46 -
 47
47 -
48
-
49
-
50
-
51
-
52
-
53
-
54
-
55
-
56
-
57
-
58
-
59
-
60
-
61
-
62
-
63
-
64
-
65
-
66
-
67
-
68
-
69
-
70
-
71
-
72
-
73
-
74
-
75
-
76
-
77
-
78
-
79
-
80
-
81
-
82
-
83
-
84
-
85
-
86
-
87
-
88
-
89
-
90
-
91
-
92
-
93
-
94
-
95
-
96
-
97
-
98
-
99
-
100
-
101
-
102
-
103
-
104
-
105
-
106
-
107
-
108
-
109
-
110
-
111
-
112
-
113
-
114
-
115
-
116
-
117
-
118
-
119
-
120
-
121
-
122
-
123
-
124
-
125
-
126
-
127
-
128
-
129
-
130
-
131
-
132
-
133
-
134
-
135
-
136
-
137
-
138
-
139
-
140
-
141
-
142
-
143
-
144
-
145
-
146
-
147
-
148
-
149
-
150
-
151
-
152
-
153
-
154
-
155
-
156
-
157
-
158
-
159
-
160
 |
 |