TP-Link Archer D20 Archer D20 V1 User Guide - Page 13
Position Your Modem Router, 2. 2. Connect Your Modem Router
 |
View all TP-Link Archer D20 manuals
Add to My Manuals
Save this manual to your list of manuals |
Page 13 highlights
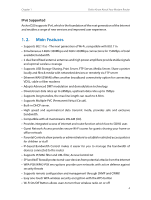
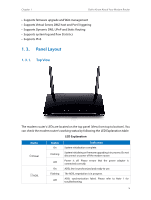
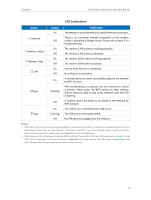
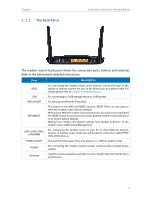
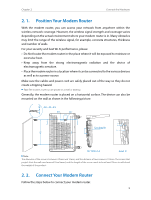
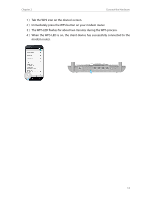
Chapter 2 Connect the Hardware 2. 1. Position Your Modem Router With the modem router, you can access your network from anywhere within the wireless network coverage. However, the wireless signal strength and coverage varies depending on the actual environment where your modem router is in. Many obstacles may limit the range of the wireless signal, for example, concrete structures, thickness and number of walls. For your security and best Wi-Fi performance, please: • Do Not locate the modem router in the place where it will be exposed to moisture or excessive heat. • Keep away from the strong electromagnetic radiation and the device of electromagnetic sensitive. • Place the modem router in a location where it can be connected to the various devices as well as to a power source. Make sure the cables and power cord are safely placed out of the way so they do not create a tripping hazard. Tips: The modem router can be placed on a shelf or desktop. Generally, the modem router is placed on a horizontal surface. The device can also be mounted on the wall as shown in the following picture. ØD Φ4.5 < ΦD < Φ10 Φ4.5 Φ10 18.5 A A 2 3 See detail B 1.5 132 132 SECTION A-A detail B Note: The diameter of the screw is between 4.5mm and 10mm, and the distance of two screws is 132mm. The screws that project from the wall need around 7mm based, and the length of the screw needs to be at least 25mm to withstand the weight of the product. 2. 2. Connect Your Modem Router Follow the steps below to connect your modem router. 9
-
 1
1 -
2
-
3
-
4
-
5
-
6
-
7
-
 8
8 -
 9
9 -
 10
10 -
 11
11 -
 12
12 -
 13
13 -
 14
14 -
 15
15 -
 16
16 -
 17
17 -
 18
18 -
19
-
20
-
21
-
22
-
23
-
24
-
25
-
26
-
27
-
28
-
29
-
30
-
31
-
32
-
33
-
34
-
35
-
36
-
37
-
38
-
39
-
40
-
41
-
42
-
43
-
44
-
45
-
46
-
47
-
48
-
49
-
50
-
51
-
52
-
53
-
54
-
55
-
56
-
57
-
58
-
59
-
60
-
61
-
62
-
63
-
64
-
65
-
66
-
67
-
68
-
69
-
70
-
71
-
72
-
73
-
74
-
75
-
76
-
77
-
78
-
79
-
80
-
81
-
82
-
83
-
84
-
85
-
86
-
87
-
88
-
89
-
90
-
91
-
92
-
93
-
94
-
95
-
96
-
97
-
98
-
99
-
100
-
101
-
102
-
103
-
104
-
105
-
106
-
107
-
108
-
109
-
110
-
111
-
112
-
113
-
114
-
115
-
116
-
117
-
118
 |
 |
