TP-Link TD-VG3511 TD-VG3511 V1 User Guide - Page 51
TD-VG3511, To add a, vendor class, Add New, To modify or delete an existing entry, Delete
 |
View all TP-Link TD-VG3511 manuals
Add to My Manuals
Save this manual to your list of manuals |
Page 51 highlights
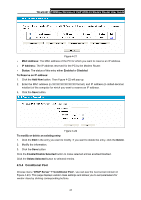
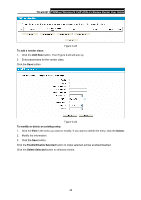
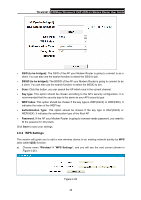
TD-VG3511 150Mbps Wireless N VoIP ADSL2+ Modem Router User Guide Figure 4-23 To add a vendor class: 1. Click the Add New button. Then Figure 4-24 will pop up. 2. Enter parameters for the vendor class. Click the Save button. Figure 4-24 To modify or delete an existing entry: 1. Click the Edit in the entry you want to modify. If you want to delete the entry, click the Delete. 2. Modify the information. 3. Click the Save button. Click the Enable/Disable Selected button to make selected entries enabled/disabled. Click the Delete Selected button to selected entries. 42
-
 1
1 -
2
-
3
-
4
-
5
-
6
-
7
-
8
-
9
-
10
-
11
-
12
-
13
-
14
-
15
-
16
-
17
-
18
-
19
-
20
-
21
-
22
-
23
-
24
-
25
-
26
-
27
-
28
-
29
-
30
-
31
-
32
-
33
-
34
-
35
-
36
-
37
-
38
-
39
-
40
-
41
-
42
-
43
-
44
-
45
-
 46
46 -
 47
47 -
 48
48 -
 49
49 -
 50
50 -
 51
51 -
 52
52 -
 53
53 -
 54
54 -
 55
55 -
 56
56 -
57
-
58
-
59
-
60
-
61
-
62
-
63
-
64
-
65
-
66
-
67
-
68
-
69
-
70
-
71
-
72
-
73
-
74
-
75
-
76
-
77
-
78
-
79
-
80
-
81
-
82
-
83
-
84
-
85
-
86
-
87
-
88
-
89
-
90
-
91
-
92
-
93
-
94
-
95
-
96
-
97
-
98
-
99
-
100
-
101
-
102
-
103
-
104
-
105
-
106
-
107
-
108
-
109
-
110
-
111
-
112
-
113
-
114
-
115
-
116
-
117
-
118
-
119
-
120
-
121
-
122
-
123
-
124
-
125
-
126
-
127
 |
 |

TD-VG3511
150Mbps Wireless N VoIP ADSL2+ Modem Router User Guide
42
Figure 4-23
To add a
vendor class:
1.
Click the
Add New
button. Then Figure 4-24 will pop up.
2.
Enter parameters for the vendor class.
Click the
Save
button.
Figure 4-24
To modify or delete an existing entry:
1.
Click the
Edit
in the entry you want to modify. If you want to delete the entry, click the
Delete
.
2.
Modify the information.
3.
Click the
Save
button.
Click the
Enable/Disable Selected
button to make selected entries enabled/disabled.
Click the
Delete Selected
button to selected entries.