TP-Link TL-R480T User Guide - Page 45
LAN IP Address
 |
UPC - 696726480020
View all TP-Link TL-R480T manuals
Add to My Manuals
Save this manual to your list of manuals |
Page 45 highlights
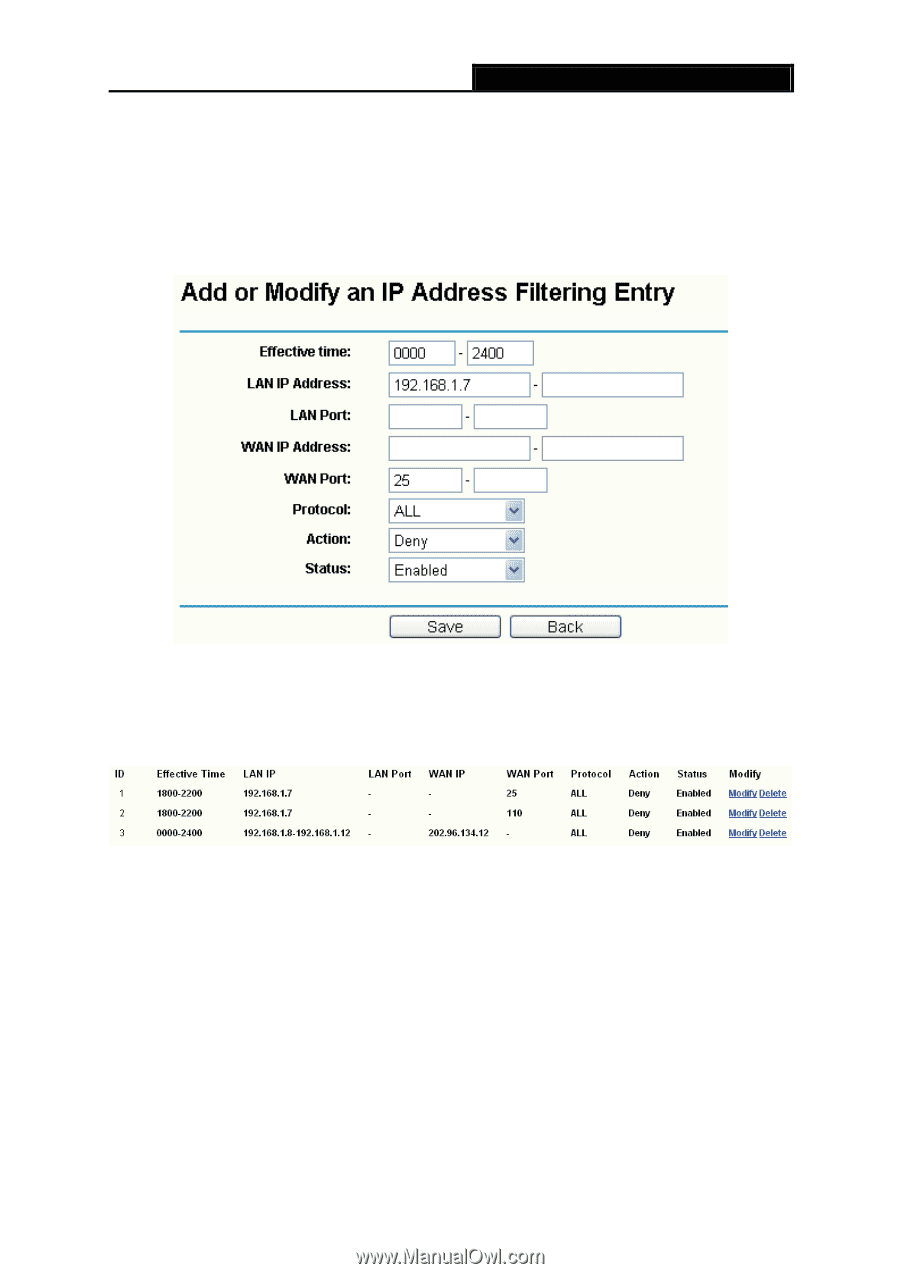
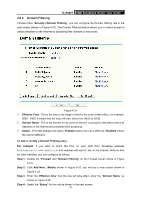
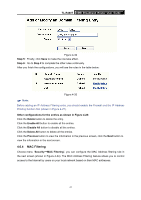
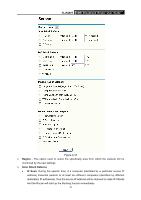
TL-R480T SMB Broadband Router User Guide Step 2: Click Add New.../Modify shown in Figure 4-28, you will see a new screen shown in Figure 4-29. Step 3: Enter the "Effective time" that the rule will take effect as shown in Figure 4-29. Step 4: Enter the "LAN IP Address", "LAN Port", "WAN IP Address" and "WAN Port" in the corresponding field as shown in Figure 4-29. Step 5: Select the "Protocol", "Action" and "Status" for the rule as shown in the next screen. Figure 4-29 Step 6: Click the Save button to save this entry. Step 7: Go to Step 2 to complete the other rules continually. After you finish the configurations, you will see the rules in the table below: Figure 4-30 ) Note: Before adding an IP Address Filtering entry, you should enable the Firewall and the IP Address Filtering function first (shown in Figure 4-27). Other configurations for the entries as shown in Figure 4-28: Click the Delete button to delete the entry. Click the Enable All button to enable all the entries. Click the Disable All button to disable all the entries. Click the Delete All button to delete all the entries. Click the Previous button to view the information in the previous screen, click the Next button to view the information in the next screen. 39
-
 1
1 -
2
-
3
-
4
-
5
-
6
-
7
-
8
-
9
-
10
-
11
-
12
-
13
-
14
-
15
-
16
-
17
-
18
-
19
-
20
-
21
-
22
-
23
-
24
-
25
-
26
-
27
-
28
-
29
-
30
-
31
-
32
-
33
-
34
-
35
-
36
-
37
-
38
-
39
-
 40
40 -
 41
41 -
 42
42 -
 43
43 -
 44
44 -
 45
45 -
 46
46 -
 47
47 -
 48
48 -
 49
49 -
 50
50 -
51
-
52
-
53
-
54
-
55
-
56
-
57
-
58
-
59
-
60
-
61
-
62
-
63
-
64
-
65
-
66
-
67
-
68
-
69
-
70
-
71
-
72
-
73
-
74
-
75
-
76
-
77
-
78
-
79
-
80
-
81
-
82
 |
 |