Tanaka TCS33EB16S Manual - Page 16
Spark, Oiler, Guide, Chain
 |
View all Tanaka TCS33EB16S manuals
Add to My Manuals
Save this manual to your list of manuals |
Page 16 highlights
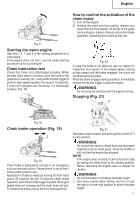
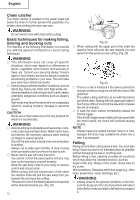
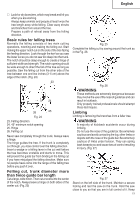
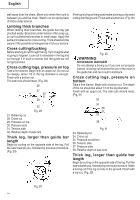
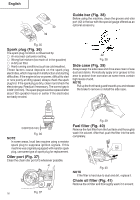
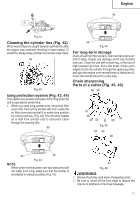
English 40 39 Guide bar (Fig. 38) Before using the machine, clean the groove and oiler port (42) in the bar with the special gauge offered as an optional accessory. Fig. 35 Spark plug (Fig. 36) The spark plug condition is influenced by: ○ An incorrect carburetor setting. ○ Wrong fuel mixture (too much oil in the gasoline) ○ A dirty air filter. ○ Hard running conditions (such as cold weather). These factors cause deposits on the spark plug electrodes, which may result in malfunction and starting difficulties. If the engine is low on power, difficult to start or runs poorly at idling speed, always check the spark plug first. If the spark plug is dirty, clean it and check the electrode gap. Readjust if necessary. The correct gap is 0.024" (0.6 mm). The spark plug should be replaced after about 100 operation hours or earlier if the electrodes are badly eroded. 4329 Fig. 38 Side case (Fig. 39) Always keep the side case and drive area clean of saw dust and debris. Periodically apply oil or grease to this area to protect from corrosion as some trees contain high levels of acid. NOTE Pull up the front hand guard towards you and release the brake to remove or install the side case. 0.024"(0.60.6mmmm) Fig. 36 NOTE In some areas, local law requires using a resistor spark plug to suppress ignition signals. If this machine was originally equipped with resistor spark plug, use same type of spark plug for replacement. Oiler port (Fig. 37) Clean the chain oiler port (41) whenever possible. 41 Fig. 39 Fuel filter (Fig. 40) Remove the fuel filter from the fuel tank and thoroughly wash it in solvent. After that, push the filter into the tank completely. Fig. 40 NOTE If the filter is hard due to dust and dirt, replace it. Chain oil filter (Fig. 41) Remove the oil filter and thoroughly wash it in solvent. 16 Fig. 37
-
 1
1 -
2
-
3
-
4
-
5
-
6
-
7
-
8
-
9
-
10
-
 11
11 -
 12
12 -
 13
13 -
 14
14 -
 15
15 -
 16
16 -
 17
17 -
 18
18 -
 19
19 -
 20
20 -
 21
21 -
22
-
23
-
24
-
25
-
26
-
27
-
28
-
29
-
30
-
31
-
32
-
33
-
34
-
35
-
36
-
37
-
38
-
39
-
40
-
41
-
42
-
43
-
44
-
45
-
46
-
47
-
48
-
49
-
50
-
51
-
52
-
53
-
54
-
55
-
56
-
57
-
58
-
59
-
60
-
61
-
62
-
63
-
64
-
65
-
66
-
67
-
68
 |
 |
