Toshiba 32PS10 Owners Manual - Page 20
Other features settings
 |
View all Toshiba 32PS10 manuals
Add to My Manuals
Save this manual to your list of manuals |
Page 20 highlights
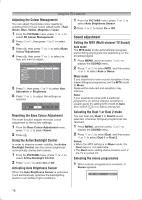
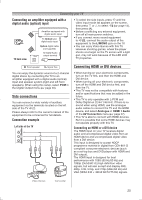
Using the TV's features Setting the Digital Audio Output 1 From the SETUP menu, press or to select AV Connection, and then press Q. 2 Press or to select Digital Audio Output. AV Connection PC/HDMI 1 Audio HDMI 1 Audio Digital Audio Output PC Digital Auto 3 Press or to select Auto or PCM Auto: This mode outputs Dolby Digital or PCM to the digital audio output socket providing it is being broadcast. PCM: Select this when a 2ch digital stereo amplifier is connected to the TV. When you select a Dolby Digital or MPEG audio track, the sound is converted to the PCM (2ch) format and output. Other features settings Selecting the TIMER menu The Timer is especially useful if you want the TV to turn itself on or off after a selected period of time. 1 Press MENU, and then press or to display the TIMER menu. 2 Press or to select the required timer mode (Sleep Timer (Turn off the TV) or On Timer). 3 Press the Number buttons (0-9), or to set the On or Off delay time. The timer display will set by 10 minutes, up to 12 hours and 50 minutes. 4 When setting the On timer, press or to select the On Timer Position and enter the program position number you want to watch. Press EXIT to exit the menu. Set the Standby mode by pressing on the remote control. Note: The TV will automatically turn itself off after approximately 2 hours if you do not operate the TV after turned on by on timer function. Using the Auto Format When the TV receives a true HDMI signal picture and the Auto Format is On, it will automatically be displayed in HDMI signal format, irrespective of the TV's previous setting. 1 Press MENU, then press or to display the FUNCTION menu. 2 Press or to select Auto Format, then press or to select On or Off. Activating Blue Screen With the Blue Screen function On, the screen will automatically turn blue and the sound will be muted (except for PC input) when no signal is being received. 1 From the FUNCTION menu, press or to select Blue Screen. 2 Press or to select On or Off. Note: In the PC input mode or Teletext mode, this function is not available. Setting the Automatic Power Down The TV will automatically turn itself off (standby) after approximately 4 hours, if you don't touch the control buttons on the remote control or on the TV control panel. 1 From the FUNCTION menu, press or to select Automatic Power Down. 2 Press or to select On or Off. Panel Lock Panel Lock disables the buttons on the TV. All buttons on the remote control can still be used. 1 From the FUNCTION menu, press or to select Panel Lock. 2 Press or to select On or Off. Note: When Panel Lock is On, a reminder will appear when the buttons on the TV are pressed. If the standby button is pressed, the TV will switch off and can only be brought out of standby by using the remote control. Activating the 4:3 Stretch When 4:3 Stretch is activated, this function will switch 4:3 format programmes into a full screen picture. 20
-
 1
1 -
2
-
3
-
4
-
5
-
6
-
7
-
8
-
9
-
10
-
11
-
12
-
13
-
14
-
 15
15 -
 16
16 -
 17
17 -
 18
18 -
 19
19 -
 20
20 -
 21
21 -
 22
22 -
 23
23 -
 24
24 -
 25
25 -
26
-
27
-
28
-
29
-
30
-
31
-
32
-
33
-
34
-
35
-
36
-
37
-
38
 |
 |
