Toshiba Satellite 2435-S255 User Guide - Page 64
Local, printer, attached to this computer, Network, or a printer attached to another computer
 |
View all Toshiba Satellite 2435-S255 manuals
Add to My Manuals
Save this manual to your list of manuals |
Page 64 highlights
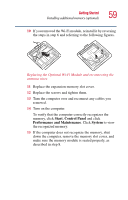
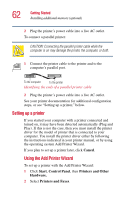
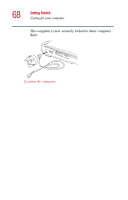
64 Getting Started Installing additional memory (optional) 4 Click Next. The Add Printer Wizard asks you to select your printer. TECHNICAL NOTE: If your printer is Plug and Play, the operating system recognizes it automatically. You can ignore the remainder of this section. See your printer manual. 5 If the printer you are setting up: ❖ Is not connected to a network, select Local printer attached to this computer. If you select Local printer, check "Automatically detect and install my Plug and Play printer." ❖ Is connected to a network, select Network printer, or a printer attached to another computer. 6 Click Next. The Add Printer Wizard prompts you to select your printer. 7 From the list of manufacturers and printers, select your printer, then click Next. 8 Select the port settings according to the instructions in your printer's documentation and the port to which your printer is connected, then click Next. The Add Printer Wizard prompts you to enter a printer name. 9 Enter a name for your printer. HINT: If you are using more than one printer, make sure the name is descriptive enough to help you tell the difference. 10 To set up the printer to be the default printer for the operating system, click Yes.
-
 1
1 -
2
-
3
-
4
-
5
-
6
-
7
-
8
-
9
-
10
-
11
-
12
-
13
-
14
-
15
-
16
-
17
-
18
-
19
-
20
-
21
-
22
-
23
-
24
-
25
-
26
-
27
-
28
-
29
-
30
-
31
-
32
-
33
-
34
-
35
-
36
-
37
-
38
-
39
-
40
-
41
-
42
-
43
-
44
-
45
-
46
-
47
-
48
-
49
-
50
-
51
-
52
-
53
-
54
-
55
-
56
-
57
-
58
-
 59
59 -
 60
60 -
 61
61 -
 62
62 -
 63
63 -
 64
64 -
 65
65 -
 66
66 -
 67
67 -
 68
68 -
 69
69 -
70
-
71
-
72
-
73
-
74
-
75
-
76
-
77
-
78
-
79
-
80
-
81
-
82
-
83
-
84
-
85
-
86
-
87
-
88
-
89
-
90
-
91
-
92
-
93
-
94
-
95
-
96
-
97
-
98
-
99
-
100
-
101
-
102
-
103
-
104
-
105
-
106
-
107
-
108
-
109
-
110
-
111
-
112
-
113
-
114
-
115
-
116
-
117
-
118
-
119
-
120
-
121
-
122
-
123
-
124
-
125
-
126
-
127
-
128
-
129
-
130
-
131
-
132
-
133
-
134
-
135
-
136
-
137
-
138
-
139
-
140
-
141
-
142
-
143
-
144
-
145
-
146
-
147
-
148
-
149
-
150
-
151
-
152
-
153
-
154
-
155
-
156
-
157
-
158
-
159
-
160
-
161
-
162
-
163
-
164
-
165
-
166
-
167
-
168
-
169
-
170
-
171
-
172
-
173
-
174
-
175
-
176
-
177
-
178
-
179
-
180
-
181
-
182
-
183
-
184
-
185
-
186
-
187
-
188
-
189
-
190
-
191
-
192
-
193
-
194
-
195
-
196
-
197
-
198
-
199
-
200
-
201
-
202
-
203
-
204
-
205
-
206
-
207
-
208
-
209
-
210
-
211
-
212
-
213
-
214
-
215
-
216
-
217
-
218
-
219
-
220
-
221
-
222
-
223
-
224
-
225
-
226
-
227
-
228
-
229
-
230
-
231
-
232
-
233
-
234
-
235
-
236
-
237
-
238
-
239
-
240
-
241
-
242
-
243
-
244
-
245
-
246
-
247
-
248
 |
 |
