Toshiba Satellite A110 Maintenance Manual - Page 132
Installing the Top Cover, Top Cover, Replacement Procedures,
 |
View all Toshiba Satellite A110 manuals
Add to My Manuals
Save this manual to your list of manuals |
Page 132 highlights
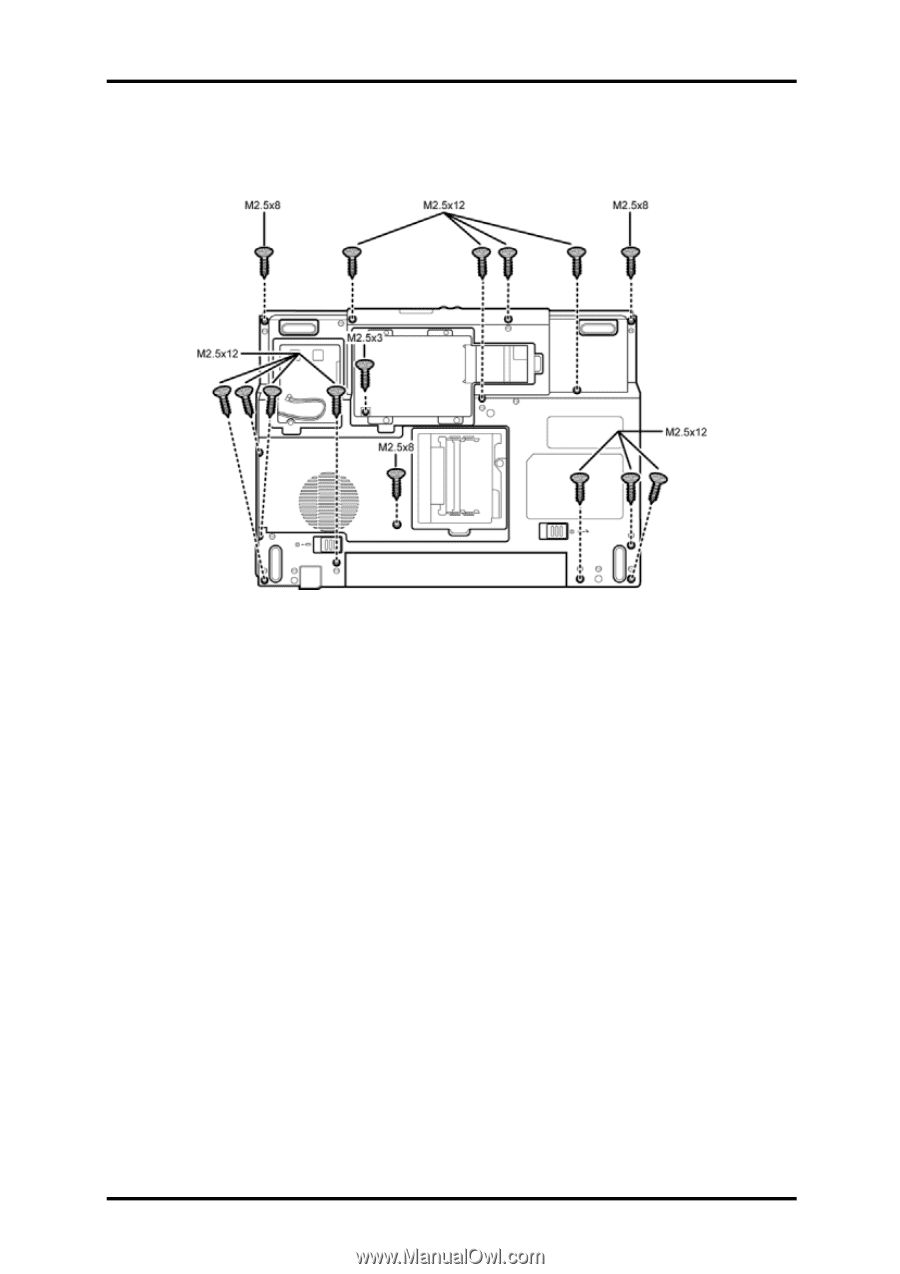
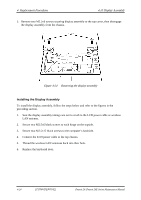
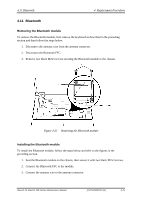
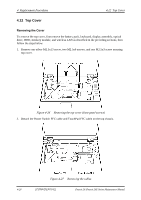
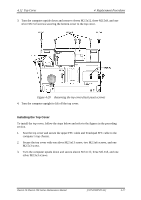
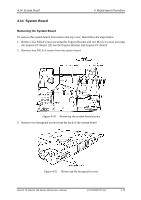
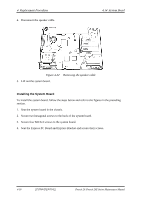
4.12 Top Cover 4 Replacement Procedures 3. Turn the computer upside down and remove eleven M2.5x12, three M2.5x8, and one silver M2.5x3 screws securing the bottom cover to the top cover. Figure 4-28 Removing the top cover (back panel screws) 4. Turn the computer upright to lift off the top cover. Installing the Top Cover To install the top cover, follow the steps below and refer to the figures in the preceding section. 1. Seat the top cover and secure the upper FFC cable and Touchpad FFC cable to the computer's top chassis. 2. Secure the top cover with one silver M2.5x13 screw, two M2.5x6 screws, and one M2.5x3 screw. 3. Turn the computer upside down and secure eleven M2.5x12, three M2.5x8, and one silver M2.5x3 screws. Detroit 20 /Detroit 20E Series Maintenance Manual [CONFIDENTIAL] 4-27
-
 1
1 -
2
-
3
-
4
-
5
-
6
-
7
-
8
-
9
-
10
-
11
-
12
-
13
-
14
-
15
-
16
-
17
-
18
-
19
-
20
-
21
-
22
-
23
-
24
-
25
-
26
-
27
-
28
-
29
-
30
-
31
-
32
-
33
-
34
-
35
-
36
-
37
-
38
-
39
-
40
-
41
-
42
-
43
-
44
-
45
-
46
-
47
-
48
-
49
-
50
-
51
-
52
-
53
-
54
-
55
-
56
-
57
-
58
-
59
-
60
-
61
-
62
-
63
-
64
-
65
-
66
-
67
-
68
-
69
-
70
-
71
-
72
-
73
-
74
-
75
-
76
-
77
-
78
-
79
-
80
-
81
-
82
-
83
-
84
-
85
-
86
-
87
-
88
-
89
-
90
-
91
-
92
-
93
-
94
-
95
-
96
-
97
-
98
-
99
-
100
-
101
-
102
-
103
-
104
-
105
-
106
-
107
-
108
-
109
-
110
-
111
-
112
-
113
-
114
-
115
-
116
-
117
-
118
-
119
-
120
-
121
-
122
-
123
-
124
-
125
-
126
-
 127
127 -
 128
128 -
 129
129 -
 130
130 -
 131
131 -
 132
132 -
 133
133 -
 134
134 -
 135
135 -
 136
136 -
 137
137 -
138
-
139
-
140
-
141
-
142
-
143
 |
 |