Toshiba Satellite P25-S526 User Guide - Page 53
Disabling or enabling the TouchPad, Start, Control Panel, Printers and Other Hardware, Mouse
 |
View all Toshiba Satellite P25-S526 manuals
Add to My Manuals
Save this manual to your list of manuals |
Page 53 highlights
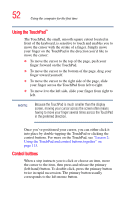
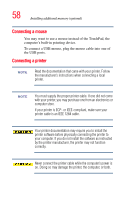
Using the computer for the first time 53 The function of the secondary (right-hand) button depends on the program you are using. It usually corresponds to the right mouse button. Check your program's documentation to find whether it uses the right mouse button. Disabling or enabling the TouchPad The TouchPad is enabled by default. To change the enable/ disable TouchPad setting: 1 Click Start, Control Panel. The Control Panel window appears. 2 Click Printers and Other Hardware. 3 Click Mouse or press the Fn + F9 hot keys. The Mouse Properties window appears. 4 Click the TouchPAD ON/OFF tab. The TouchPAD ON/OFF tab view window appears. 5 Select Disable or Enable, whichever is appropriate. 6 Click Apply. 7 Click OK. The Mouse Properties window closes. 8 Close the Printers and Other Hardware window. 9 Close the Control Panel window. NOTE The Fn + F9 shortcut can be used to enable or disable the TouchPad (see "Hot Keys" on page 194).
-
 1
1 -
2
-
3
-
4
-
5
-
6
-
7
-
8
-
9
-
10
-
11
-
12
-
13
-
14
-
15
-
16
-
17
-
18
-
19
-
20
-
21
-
22
-
23
-
24
-
25
-
26
-
27
-
28
-
29
-
30
-
31
-
32
-
33
-
34
-
35
-
36
-
37
-
38
-
39
-
40
-
41
-
42
-
43
-
44
-
45
-
46
-
47
-
 48
48 -
 49
49 -
 50
50 -
 51
51 -
 52
52 -
 53
53 -
 54
54 -
 55
55 -
 56
56 -
 57
57 -
 58
58 -
59
-
60
-
61
-
62
-
63
-
64
-
65
-
66
-
67
-
68
-
69
-
70
-
71
-
72
-
73
-
74
-
75
-
76
-
77
-
78
-
79
-
80
-
81
-
82
-
83
-
84
-
85
-
86
-
87
-
88
-
89
-
90
-
91
-
92
-
93
-
94
-
95
-
96
-
97
-
98
-
99
-
100
-
101
-
102
-
103
-
104
-
105
-
106
-
107
-
108
-
109
-
110
-
111
-
112
-
113
-
114
-
115
-
116
-
117
-
118
-
119
-
120
-
121
-
122
-
123
-
124
-
125
-
126
-
127
-
128
-
129
-
130
-
131
-
132
-
133
-
134
-
135
-
136
-
137
-
138
-
139
-
140
-
141
-
142
-
143
-
144
-
145
-
146
-
147
-
148
-
149
-
150
-
151
-
152
-
153
-
154
-
155
-
156
-
157
-
158
-
159
-
160
-
161
-
162
-
163
-
164
-
165
-
166
-
167
-
168
-
169
-
170
-
171
-
172
-
173
-
174
-
175
-
176
-
177
-
178
-
179
-
180
-
181
-
182
-
183
-
184
-
185
-
186
-
187
-
188
-
189
-
190
-
191
-
192
-
193
-
194
-
195
-
196
-
197
-
198
-
199
-
200
-
201
-
202
-
203
-
204
-
205
-
206
-
207
-
208
-
209
-
210
-
211
-
212
-
213
-
214
-
215
-
216
-
217
-
218
-
219
-
220
-
221
-
222
-
223
-
224
-
225
-
226
-
227
-
228
-
229
-
230
-
231
-
232
-
233
-
234
-
235
 |
 |