Uniden BC895XLT English Owners Manual - Page 39
Setting the Squelch, Programming Trunking Frequencies, SQUELCH, TRUNK
 |
View all Uniden BC895XLT manuals
Add to My Manuals
Save this manual to your list of manuals |
Page 39 highlights
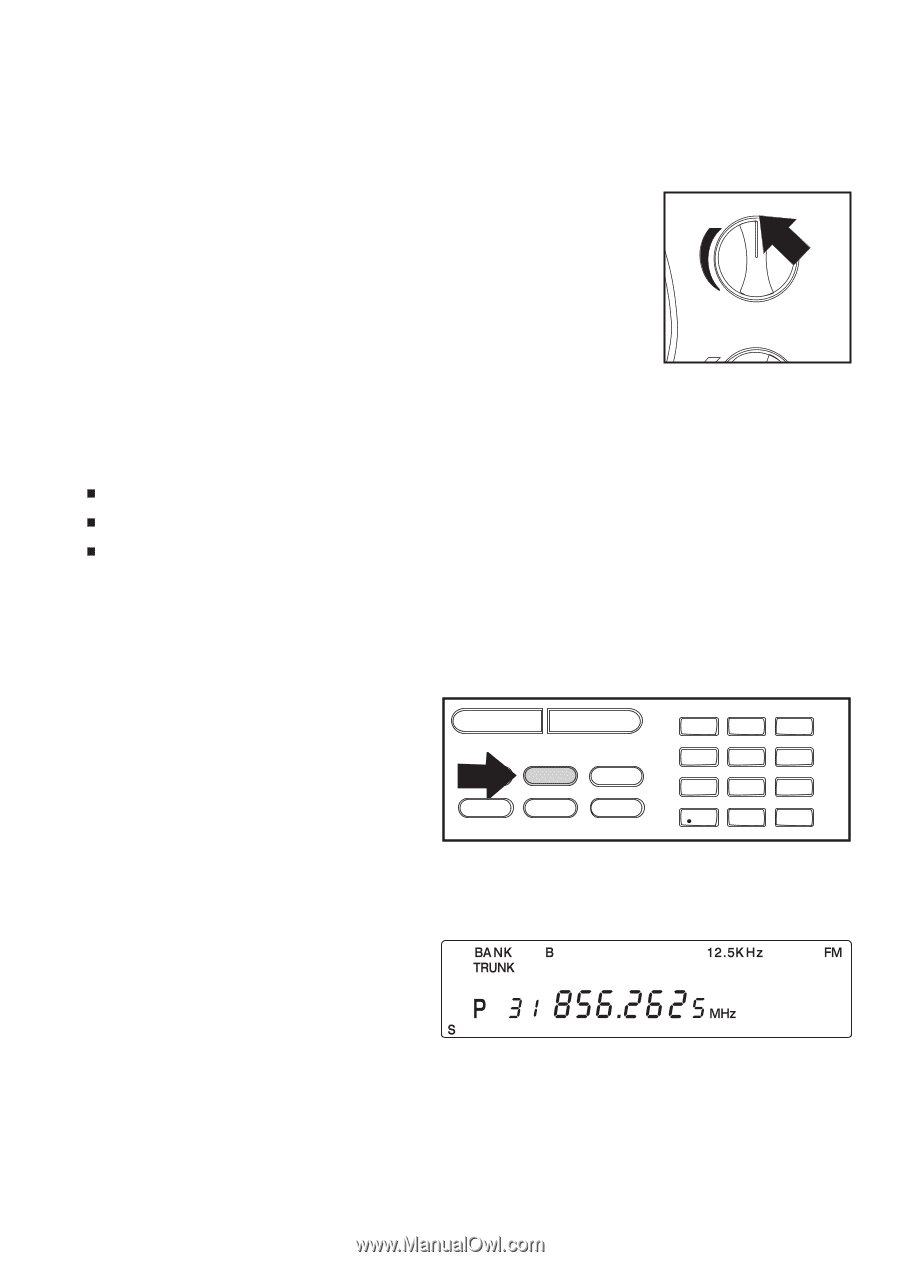
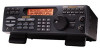
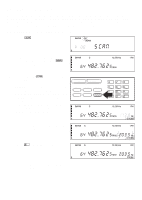
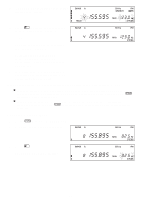
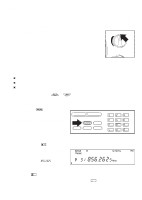
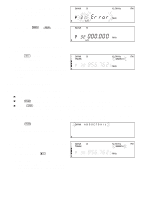
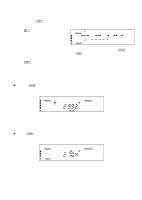
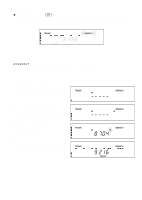
Setting the Squelch Since Squelch is automatically adjusted in trunking mode, it isn't necessary to manually adjust the squelch control while trunk tracking. However, the squelch setting you select before you begin trunk tracking can affect how fast your scanner acquires the data channel, and, in some instances, the squelch setting can prevent your scanner from acquiring the data channel at all. Set SQUELCH in this position before selecting a trunking bank. SQUELCH Note: You can change this recommended setting, if necessary, to provide better performance in your area. VOLUME Programming Trunking Frequencies Before you start programming your scanner to track a trunked system, consider the following: You can only program one trunking system in each bank of your scanner. Trunking frequencies must be entered while in the Trunking Programming mode. If you're in the Trunking Programming mode, you cannot select channels in other banks. For example, if you are programming Bank D, you can only select channels 91-120 with the Rotary Tuner or using the h or i keys. The first step in tracking a trunked system is storing the frequencies in one of the 10 available banks in your scanner. 1. Press and hold t. You will hear two beeps, and BANK and TRUNK will begin to flash in the display. SCAN MANUAL PRI TRUNK DATA L/O DELAY CTCSS 1 23 4 56 7 89 0E 2. Choose the bank you want to trunk track. For example, press B. 3. Use the keypad to enter a frequency for the trunked system. For example, enter 856.2625, or enter a frequency of the system you're going to track. Then press e. Note: To clear a mistake while entering a frequency, press . twice, and start over. 39
-
 1
1 -
2
-
3
-
4
-
5
-
6
-
7
-
8
-
9
-
10
-
11
-
12
-
13
-
14
-
15
-
16
-
17
-
18
-
19
-
20
-
21
-
22
-
23
-
24
-
25
-
26
-
27
-
28
-
29
-
30
-
31
-
32
-
33
-
 34
34 -
 35
35 -
 36
36 -
 37
37 -
 38
38 -
 39
39 -
 40
40 -
 41
41 -
 42
42 -
 43
43 -
 44
44 -
45
-
46
-
47
-
48
-
49
-
50
-
51
-
52
-
53
-
54
-
55
-
56
-
57
-
58
-
59
-
60
-
61
-
62
-
63
 |
 |