Uniden SDS100 Owner s Manual - Page 25
Set Up Gps, Edit Location
 |
View all Uniden SDS100 manuals
Add to My Manuals
Save this manual to your list of manuals |
Page 25 highlights
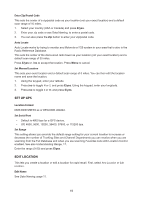
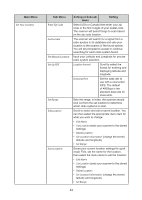
Enter Zip/Postal Code This sets the center of a zip/postal code as your location (not your exact location) and a default scan range of 10 miles. 1. Select your country (USA or Canada) and press E/yes. 2. Enter your zip code or see Data Naming, to enter a postal code. 3. You can also press the Zip button to enter your zip/postal code. Auto Locate Auto Locate works by trying to monitor any Motorola or P25 system in your area that is also in the Radio Reference Database. This sets the center of the discovered radio tower as your location (not your exact location) and a default scan range of 30 miles. Press E/yes or ./no to accept the location. Press Menu to cancel. Set Manual Location This sets your exact location and a default scan range of 0 miles. You can then edit the location name and save the location. 1. Using the keypad, enter your latitude. 2. Press./no to toggle N or S, and press E/yes. Using the keypad, enter your longitude. 3. Press./no to toggle E or W, and press E/yes. SET UP GPS Location Format DMS:DDD˚MM'SS.ss or DEG:DDD.dddddd. Set Serial Port • Default is 4800 bps for a GPS device. • Off, 4800, 9600, 19200, 38400, 57600, or 115200 bps. Set Range This setting allows you override the default range setting for your current location to increase or decrease the number of Trunking Sites and Channel Departments you can receive when you are scanning from the Full Database and when you are scanning Favorites Lists with Location Control enabled. See also Understanding Range, 17. Enter the range (0-50) and press E/yes. EDIT LOCATION This lets you create a location or edit a location for rapid recall. First, select New Location or Edit Location. Edit Name See Data Naming, page 11. 19
-
 1
1 -
2
-
3
-
4
-
5
-
6
-
7
-
8
-
9
-
10
-
11
-
12
-
13
-
14
-
15
-
16
-
17
-
18
-
19
-
 20
20 -
 21
21 -
 22
22 -
 23
23 -
 24
24 -
 25
25 -
 26
26 -
 27
27 -
 28
28 -
 29
29 -
 30
30 -
31
-
32
-
33
-
34
-
35
-
36
-
37
-
38
-
39
-
40
-
41
-
42
-
43
-
44
-
45
-
46
-
47
-
48
-
49
-
50
-
51
-
52
-
53
-
54
-
55
-
56
-
57
-
58
-
59
-
60
-
61
-
62
 |
 |