Uniden SDS100 Owner s Manual - Page 29
Menu Reference
 |
View all Uniden SDS100 manuals
Add to My Manuals
Save this manual to your list of manuals |
Page 29 highlights
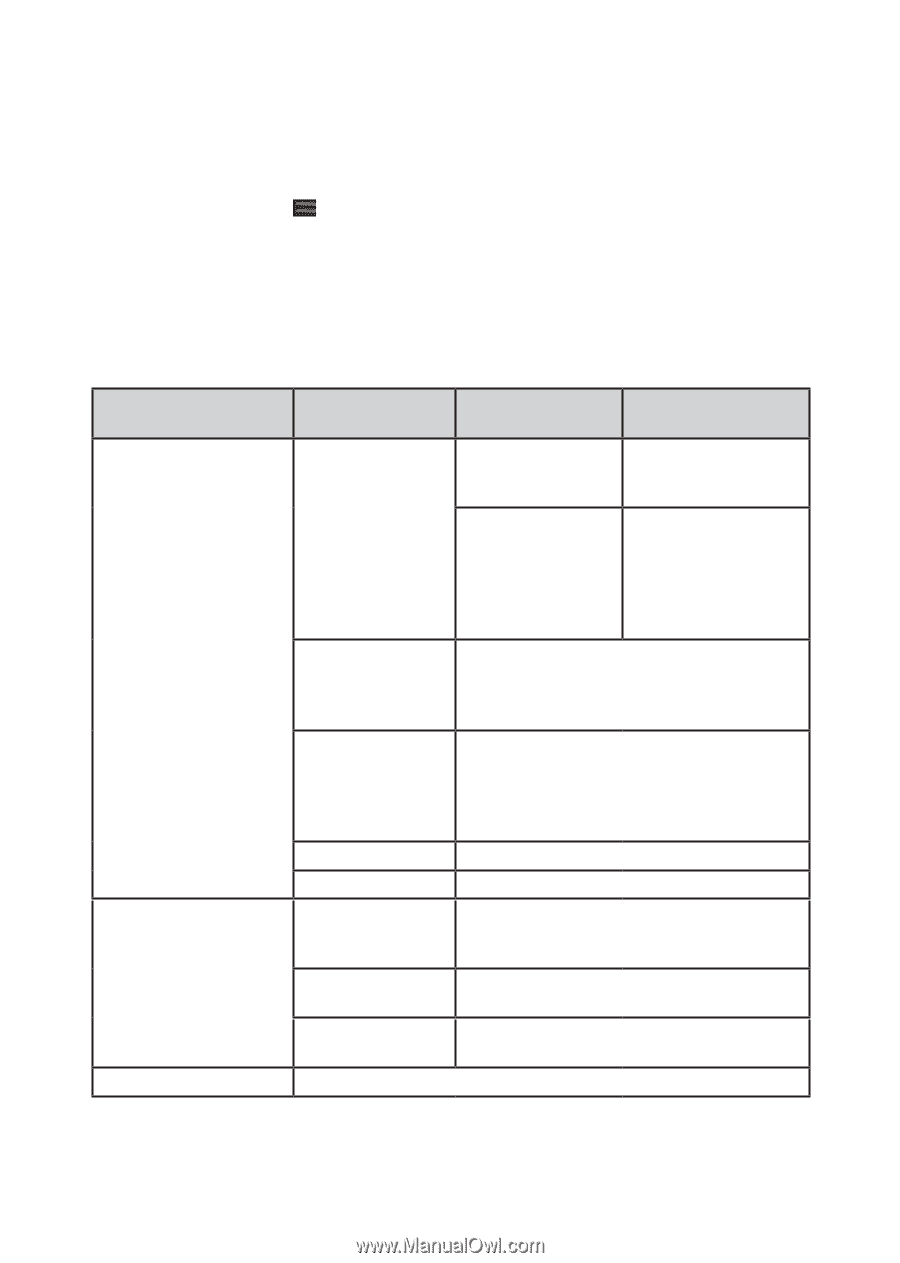
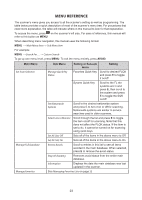
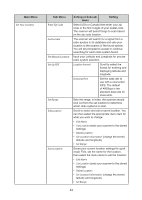
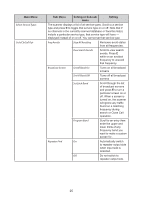
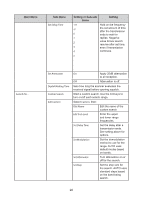
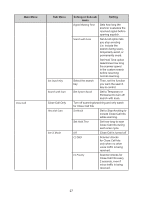
MENU REFERENCE The scanner's menu gives you access to all the scanner's setting as well as programming. The table below provides a quick description of most of the scanner's menu tree. For procedures that need more explanation, the table will indicate where in this manual to look for that explanation. To access the menu, press on the scanner's left side. For ease of reference, this manual will refer to this button as MENU. When describing menu navigation, this manual uses the following format: MENU → Main Menu Item → Sub Menu item For example: MENU → Search For... → Custom Search To go up one menu level, press MENU. To exit the menu entirely, press AVOID. Main Menu Set Scan Selection Sub Menu Manage Quick Key Status Set Nationwide Systems Select Lists to Monitor Set All Lists Off Setting or Sub-sub menu Setting Favorites Quick Key Scroll to desired FLQK and press E to toggle it on/off System Quick Key Scroll to the FL the systems are in and press E, then scroll to the system and press E to toggle the SQK on/off. Scroll to the desired nationwide system and press E to turn it on or off for scanning. Nationwide systems are similar to service searches used in older scanners. Scroll through the list and press E to toggle the item on/off for scanning. Note that this does not affect the FLQK status. If the item is set to No, it cannot be turned on for scanning using quick keys. Sets all of the items in the above menu to Off. Set All Lists On Sets all of the items in the above menu to On. Manage Full Database Review Avoids Stop All Avoiding Information Scroll to entries in this list to see all items avoided in the main database. When selected, press E to remove the avoid status. Removes avoid status from the entire main database. Displays the date the main database was last updated in the scanner. Manage Favorites See Managing Favorites Lists on page 23 23
-
 1
1 -
2
-
3
-
4
-
5
-
6
-
7
-
8
-
9
-
10
-
11
-
12
-
13
-
14
-
15
-
16
-
17
-
18
-
19
-
20
-
21
-
22
-
23
-
 24
24 -
 25
25 -
 26
26 -
 27
27 -
 28
28 -
 29
29 -
 30
30 -
 31
31 -
 32
32 -
 33
33 -
 34
34 -
35
-
36
-
37
-
38
-
39
-
40
-
41
-
42
-
43
-
44
-
45
-
46
-
47
-
48
-
49
-
50
-
51
-
52
-
53
-
54
-
55
-
56
-
57
-
58
-
59
-
60
-
61
-
62
 |
 |