Viper 5904 Owner Manual - Page 30
Smart Start
 |
View all Viper 5904 manuals
Add to My Manuals
Save this manual to your list of manuals |
Page 30 highlights
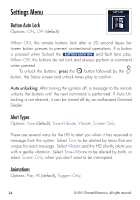
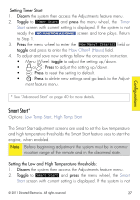
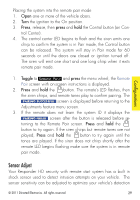
Setting Timer Start 1. Disarm the system then access the Adjustments feature menu. 2. Toggle to Timer Start and press the menu wheel, the Timer Start screen with current setting is displayed. If the system is not ready the NO FUNCTION ASSIGNED screen and tone plays. Return to Step 1. 3. Press the menu wheel to enter the How Many? (Starts) field or toggle and press to enter the How Often? (Hours) field. 4. To adjust and save new settings follow the on-screen instruction. s Menu Wheel: toggle to adjust the setting up/down. s or : Press to adjust the setting up/down. s AUX : Press to reset the setting to default. s : Press to delete new settings and go back to the Adjust- ment feature menu. Configurations * See "Advanced Start" on page 40 for more details. Smart Start* Options: Low Temp Start, High Temp Start The Smart Start adjustment screens are used to set the low temperature and high temperature thresholds the Smart Start feature uses to start the engine, when enabled. Note Before beginning adjustment the system must be in commu- nication range of the remote and in the disarmed state. Setting the Low and High Temperature thresholds: 1. Disarm the system then access the Adjustments feature menu. 2. Toggle to Smart Start and press the menu wheel, the Smart Start screen with current setting is displayed. If the system is not © 2011 Directed Electronics. All rights reserved. 27
-
 1
1 -
2
-
3
-
4
-
5
-
6
-
7
-
8
-
9
-
10
-
11
-
12
-
13
-
14
-
15
-
16
-
17
-
18
-
19
-
20
-
21
-
22
-
23
-
24
-
 25
25 -
 26
26 -
 27
27 -
 28
28 -
 29
29 -
 30
30 -
 31
31 -
 32
32 -
 33
33 -
 34
34 -
 35
35 -
36
-
37
-
38
-
39
-
40
-
41
-
42
-
43
-
44
-
45
-
46
-
47
-
48
-
49
-
50
-
51
-
52
-
53
-
54
-
55
-
56
-
57
-
58
-
59
-
60
-
61
-
62
-
63
-
64
-
65
-
66
-
67
-
68
-
69
 |
 |