Vizio VP505XVT User Manual - Page 45
Color Temperature, Advanced Video Features
 |
View all Vizio VP505XVT manuals
Add to My Manuals
Save this manual to your list of manuals |
Page 45 highlights
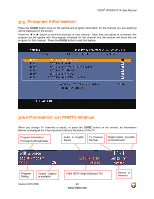
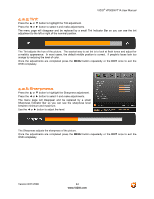
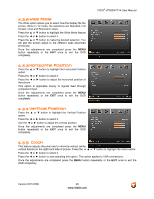
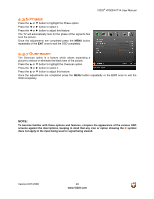
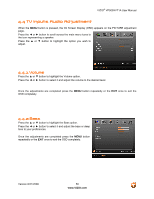
VIZIO® VP505XVT1A User Manual 4.2.7 Color Temperature Press the ▲ or ▼ button to highlight the Color Temperature adjustment. Press the ◄ or ► button to select it. The default is Cool. This is 9300K setting. Press the ◄ or ► button to choose Cool, Normal, Warm or Custom option. If you choose the Custom option, then the primary colors Red, Green and Blue can be adjusted to set a custom white point. Press the ▼ button to highlight the color you wish to adjust. Press the ► button to start adjusting the color and the menu page will disappear and be replaced by a small Color (Red, Green or Blue) Indicator Bar as before. Use the ◄ or ► button to adjust the color. Press the MENU button when finished. Repeat the procedure to adjust the other colors if desired. 4.2.8 Advanced Video Features Press the ▲ or ▼ button to highlight the Advanced Video feature. Press the ◄ or ► button to select it. A new menu will be displayed showing the advanced functions available for fine tuning of the picture. Noise Reduction (NR) - Temporal Press the ▼ button to highlight Noise Reduction (NR) - Temporal. Use this feature to diminish grain-like picture noise. Press the ◄ or ► button to choose from the Off, Low, Medium or Strong setting. Once the adjustments are completed press the MENU button repeatedly or the EXIT once to exit the OSD completely. Noise Reduction (NR) - MPEG Press the ▼ button to highlight Noise Reduction (NR) - MPEG. Use this feature to diminish picture noise caused by the digitizing of image motion content that may be present in the picture. Press the ◄ or ► button to choose from the Off, Low, Medium or Strong setting. Once the adjustments are completed press the MENU button repeatedly or the EXIT once to exit the OSD completely. Version 8/21/2008 45 www.VIZIO.com
-
 1
1 -
2
-
3
-
4
-
5
-
6
-
7
-
8
-
9
-
10
-
11
-
12
-
13
-
14
-
15
-
16
-
17
-
18
-
19
-
20
-
21
-
22
-
23
-
24
-
25
-
26
-
27
-
28
-
29
-
30
-
31
-
32
-
33
-
34
-
35
-
36
-
37
-
38
-
39
-
 40
40 -
 41
41 -
 42
42 -
 43
43 -
 44
44 -
 45
45 -
 46
46 -
 47
47 -
 48
48 -
 49
49 -
 50
50 -
51
-
52
-
53
-
54
-
55
-
56
-
57
-
58
-
59
-
60
-
61
-
62
-
63
-
64
-
65
-
66
-
67
-
68
-
69
-
70
-
71
-
72
-
73
-
74
-
75
-
76
-
77
-
78
-
79
-
80
-
81
-
82
-
83
-
84
-
85
-
86
-
87
-
88
-
89
-
90
-
91
-
92
-
93
 |
 |
