Weider 9000 Uk Manual - Page 16
Adjustments, Warning
 |
View all Weider 9000 manuals
Add to My Manuals
Save this manual to your list of manuals |
Page 16 highlights
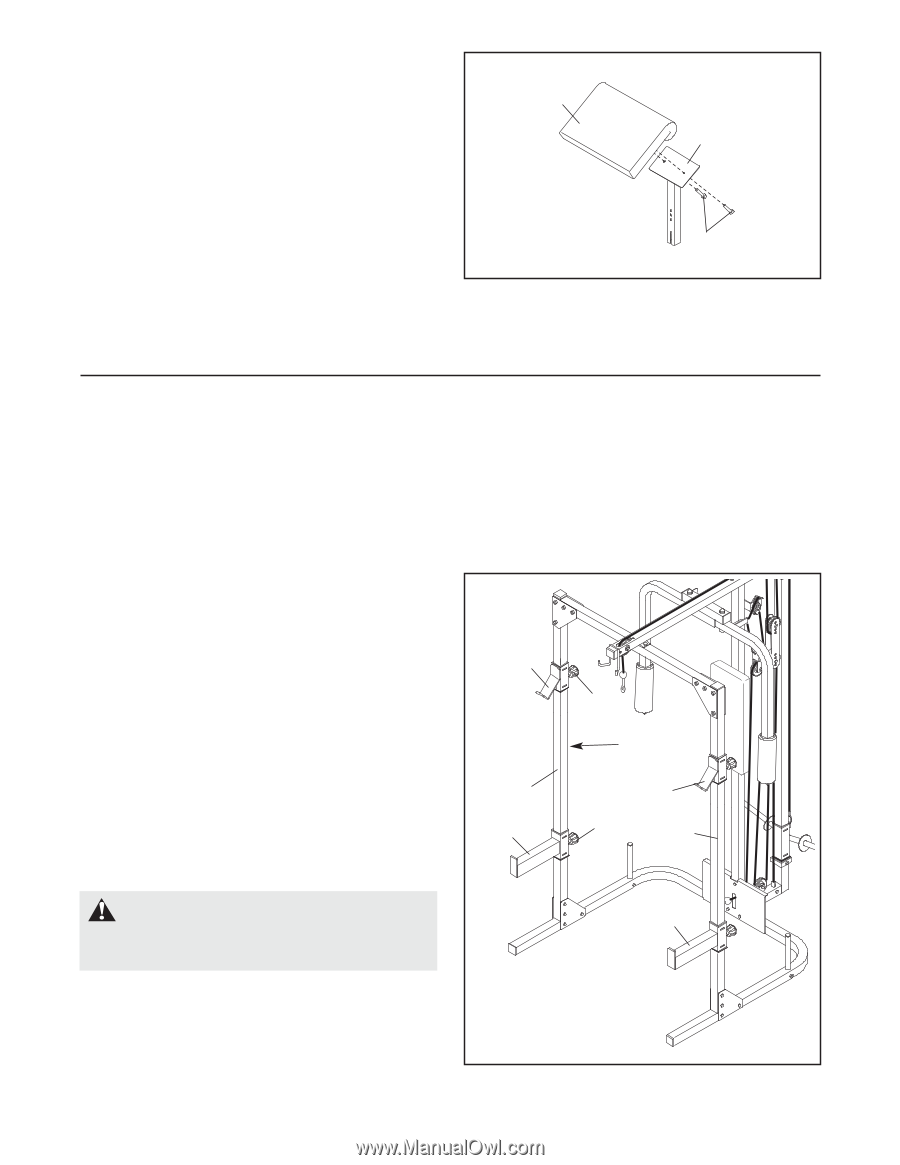
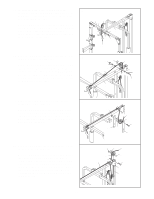
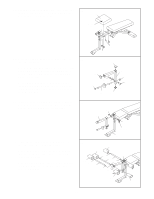
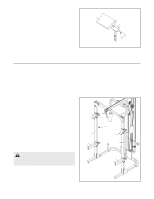
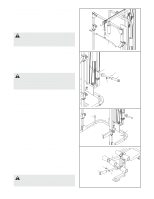
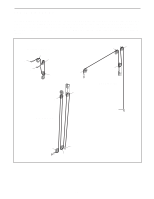
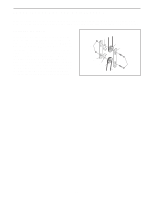
37. Attach the Curl Pad (84) to the Curl Post (83) with 37 two M6 x 16mm Bolts (80). 84 83 38. Make sure that all parts have been properly tight- 80 ened. The use of the remaining parts will be explained in ADJUSTMENTS, below. ADJUSTMENTS This section explains how to adjust the weight bench. See the EXERCISE GUIDELINES on page 22 for important information about how to get the most benefit from your exercise program. Also, refer to the accompanying exercise guide to see the correct form for each exercise. Make sure all parts are properly tightened each time you use the weight bench. Replace any worn parts immediately. The weight bench can be cleaned with a damp cloth and a mild, non-abrasive detergent. Do not use solvents. ADJUSTING THE WEIGHT RESTS AND SAFETY SPOTTERS Before beginning an exercise, move the Weight Rests (16) and the Safety Spotters (15) to sets of holes in the Uprights (3) that are best suited for that exercise. Turn the Knob (17) counterclockwise, and pull it out as far as it will go. Slide the Weight Rest or Safety Spotter to the desired height. Engage the Knob into an adjustment hole in the Upright. Turn the Knob clockwise until it is tight. The selected holes for the Safety Spotters (15) should represent the lowest point to which you want the barbell to go during the exercise. The selected holes for the Weight Rests (16) should be at a comfortable height for lifting and replacing the barbell. 16 3 15 17 Adjustment holes 16 17 3 WARNING: Always set both Weight 15 Rests (16) and both Safety Spotters (15) at the same height. 16
-
 1
1 -
2
-
3
-
4
-
5
-
6
-
7
-
8
-
9
-
10
-
 11
11 -
 12
12 -
 13
13 -
 14
14 -
 15
15 -
 16
16 -
 17
17 -
 18
18 -
 19
19 -
 20
20 -
 21
21 -
22
-
23
-
24
-
25
-
26
-
27
-
28
 |
 |