Weider 9000 Uk Manual - Page 18
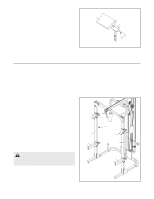
Front Leg 64. Secure the Curl Post with the Curl
 |
View all Weider 9000 manuals
Add to My Manuals
Save this manual to your list of manuals |
Page 18 highlights
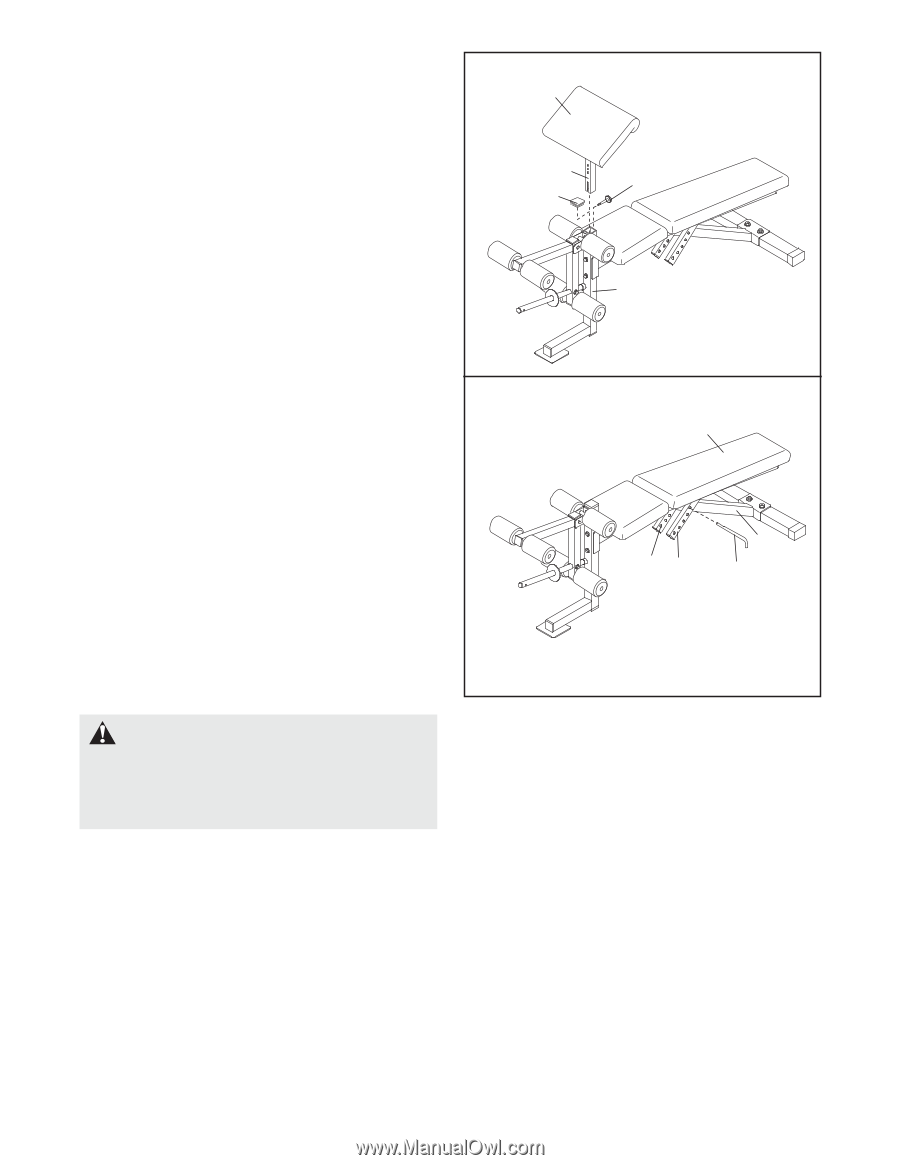
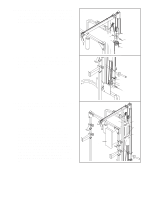
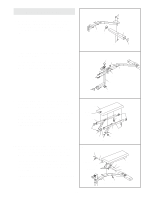
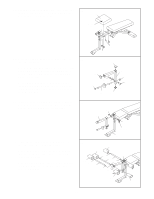
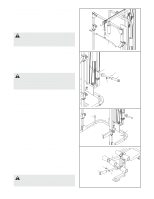
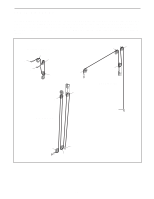
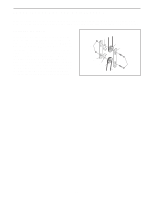
USING THE CURL PAD Remove the 50mm Square Inner Cap (43) from the Front Leg (64). Align a hole in the Curl Post (83) with the hole in the Front Leg (64). Secure the Curl Post with the Curl Knob (4). Be sure the Knob is fully tightened. Note: When not using the Curl Pad (84), store it away from the weight bench. ADJUSTING THE BACKREST The Bench Backrest (69) can be used in a decline position, a level position, or either of two incline positions. To adjust the Backrest to the decline position, remove the Bench Pin (74) and insert it through the top set of holes in the Backrest Frames (67, 68) and the Bench Frame (63). To adjust the Bench Backrest (69) to the level position, insert the Bench Pin (74) through the second set of holes from the top of the Backrest Frames (67, 68) and the Bench Frame (63). To adjust the Bench Backrest (69) to an incline position, insert the Bench Pin (74) through one of the lower two sets of holes in the Backrest Frames (67, 68) and the Bench Frame (63). WARNING: When adjusting the position of the Bench Backrest (69), make sure that the Bench Pin (74) is fully inserted through both Backrest Frames (67, 68) and the hole in the Bench Frame (63). 84 83 4 43 64 69 67 68 63 74 18
-
 1
1 -
2
-
3
-
4
-
5
-
6
-
7
-
8
-
9
-
10
-
11
-
12
-
 13
13 -
 14
14 -
 15
15 -
 16
16 -
 17
17 -
 18
18 -
 19
19 -
 20
20 -
 21
21 -
 22
22 -
 23
23 -
24
-
25
-
26
-
27
-
28
 |
 |