Weider 9000 Uk Manual - Page 7
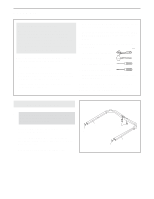
Plates 14, and four M10 Nylon Locknuts 49.
 |
View all Weider 9000 manuals
Add to My Manuals
Save this manual to your list of manuals |
Page 7 highlights
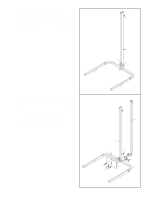
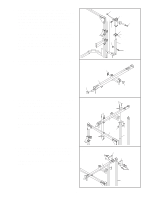
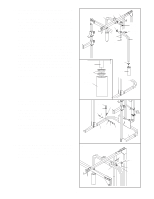
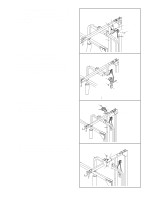
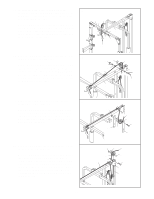
4. Attach one of the Uprights (3) to the Right Base 4 (1) with four M10 x 68mm Bolts (46), two Support Plates (14), and four M10 Nylon Locknuts (49). Do not tighten the Nylon Locknuts yet. Repeat this step with the other Upright (not shown) and the Left Base (not shown). 3 5. Press a 50mm Square Inner Cap (43) into the top 5 of the right Upright (3). Slide a Safety Spotter (15) onto the right Upright (3) and engage the Knob (17) into the lowest adjustment hole in the Upright. Turn the Knob clockwise until it is tight. Slide a Weight Rest (16) onto the right Upright (3) and engage the Knob (17) into an adjustment hole in the Upright. Turn the Knob clockwise until it is tight. Repeat this step with the left Upright (not shown). 6. Attach the Crossbar (7), with the decal on the 6 side shown, to the right Upright (3) with four M10 x 68mm Bolts (46), two Support Plates (14), and four M10 Nylon Locknuts (49). Do not tighten the Nylon Locknuts yet. Attach the Crossbar (7) to the left Upright (not shown) in the same manner. 49 49 14 1 14 46 16 17 15 43 3 Adjustment Holes 49 14 46 14 7 3 Decal 7
-
 1
1 -
 2
2 -
 3
3 -
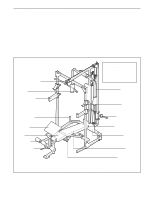 4
4 -
 5
5 -
 6
6 -
 7
7 -
 8
8 -
 9
9 -
 10
10 -
 11
11 -
 12
12 -
13
-
14
-
15
-
16
-
17
-
18
-
19
-
20
-
21
-
22
-
23
-
24
-
25
-
26
-
27
-
28
 |
 |
