Western Digital WDBAAB3200ACH-NESN User Manual (pdf) - Page 11
Installing on a Mac OS X Tiger/Leopard/Snow Leopard
 |
UPC - 718037755038
View all Western Digital WDBAAB3200ACH-NESN manuals
Add to My Manuals
Save this manual to your list of manuals |
Page 11 highlights
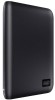
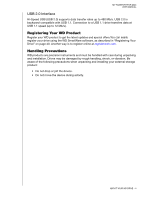
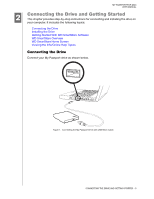
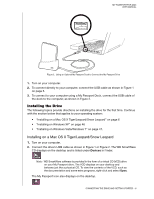
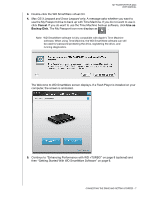
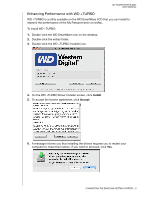
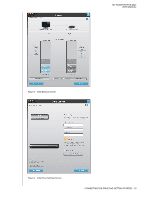
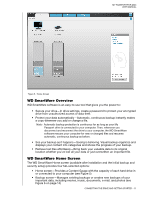
MY PASSPORT FOR MAC USER MANUAL Figure 2. Using an Optional My Passport Dock to Connect the My Passport Drive 1. Turn on your computer. 2. To connect directly to your computer, connect the USB cable as shown in Figure 1 on page 5. 3. To connect to your computer using a My Passport Dock, connect the USB cable of the dock to the computer, as shown in Figure 2. Installing the Drive The following topics provide directions on installing the drive for the first time. Continue with the section below that applies to your operating system: • "Installing on a Mac OS X Tiger/Leopard/Snow Leopard" on page 6 • "Installing on Windows XP" on page 46 • "Installing on Windows Vista/Windows 7" on page 47. Installing on a Mac OS X Tiger/Leopard/Snow Leopard 1. Turn on your computer. 2. Connect the drive's USB cable as shown in Figure 1 or Figure 2. The WD SmartWare CD displays on the desktop and is listed under Devices in Finder. Note: WD SmartWare software is provided in the form of a virtual CD (VCD) drive on your My Passport drive. The VCD displays on your desktop and behaves just like a physical CD. To view the contents of the VCD, such as the documentation and some extra programs, right-click and select Open. The My Passport icon also displays on the desktop. CONNECTING THE DRIVE AND GETTING STARTED - 6
-
 1
1 -
2
-
3
-
4
-
5
-
 6
6 -
 7
7 -
 8
8 -
 9
9 -
 10
10 -
 11
11 -
 12
12 -
 13
13 -
 14
14 -
 15
15 -
 16
16 -
17
-
18
-
19
-
20
-
21
-
22
-
23
-
24
-
25
-
26
-
27
-
28
-
29
-
30
-
31
-
32
-
33
-
34
-
35
-
36
-
37
-
38
-
39
-
40
-
41
-
42
-
43
-
44
-
45
-
46
-
47
-
48
-
49
-
50
-
51
-
52
-
53
-
54
-
55
-
56
-
57
-
58
-
59
-
60
-
61
-
62
-
63
 |
 |
