Whirlpool ECKMF94 Installation Guide - Page 15
ing tabs are flat against the side of - wiring diagram
 |
UPC - 050946418711
View all Whirlpool ECKMF94 manuals
Add to My Manuals
Save this manual to your list of manuals |
Page 15 highlights
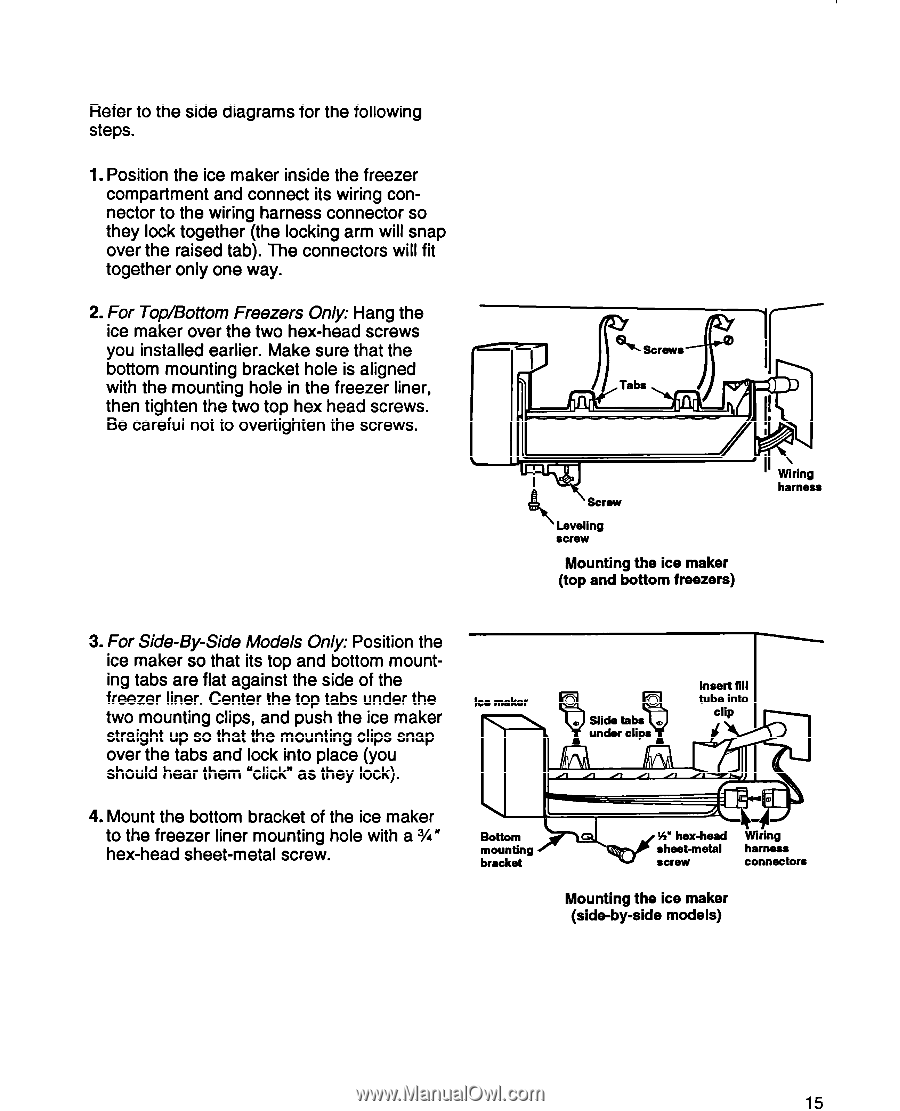
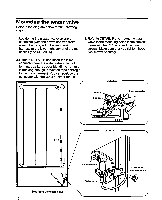
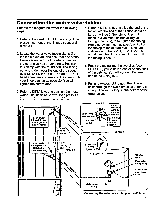
Refer to the side diagrams for the following steps. 1. Position the ice maker inside the freezer compartment and connect its wiring connector to the wiring harness connector so they lock together (the locking arm will snap over the raised tab). The connectors will fit together only one way. 2. For Top/Bottom Freezers Only: Hang the ice maker over the two hex-head screws you installed earlier. Make sure that the bottom mounting bracket hole is aligned with the mounting hole in the freezer liner, then tighten the two top hex head screws. Be careful not to over-tighten the screws. screw Mounting the ice maker (top and bottom freezers) 3. For Side-By-Side Models Only: Position the ice maker so that its top and bottom mounting tabs are flat against the side of the freezer liner. Center the top tabs under the two mounting clips, and push the ice maker straight up so that the mounting clips snap over the tabs and lock into place (you should hear them 'click" as they lock). 4. Mount the bottom bracket of the ice maker to the freezer liner mounting hole with a %" hex-head sheet-metal screw. bracket connectors Mounting the ice maker (sideby-side models) 15
-
 1
1 -
2
-
3
-
4
-
5
-
6
-
7
-
8
-
9
-
 10
10 -
 11
11 -
 12
12 -
 13
13 -
 14
14 -
 15
15 -
 16
16 -
 17
17 -
 18
18 -
 19
19 -
 20
20 -
21
-
22
-
23
-
24
-
25
-
26
-
27
-
28
 |
 |