Whirlpool ECKMF94 Installation Guide - Page 19
Connecting, the copper, tubing, to the shut-off, valve
 |
UPC - 050946418711
View all Whirlpool ECKMF94 manuals
Add to My Manuals
Save this manual to your list of manuals |
Page 19 highlights
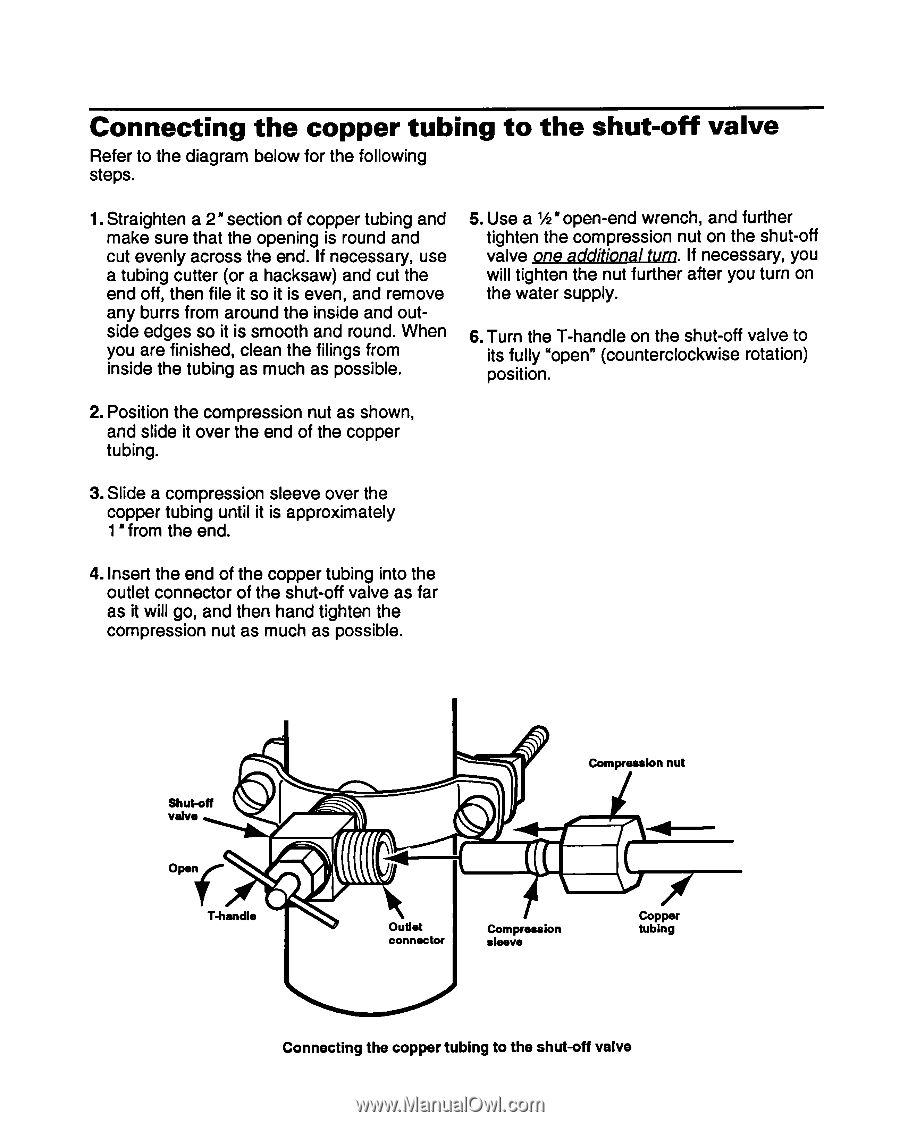
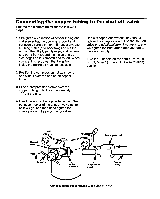
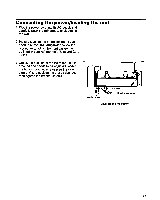
Connecting the copper tubing Refer to the diagram below for the following steps. to the shut-off valve 1. Straighten a 2" section of copper tubing and make sure that the opening is round and cut evenly across the end. If necessary, use a tubing cutter (or a hacksaw) and cut the end off, then file it so it is even, and remove any burrs from around the inside and out- side edges so it is smooth and round. When you are finished, clean the filings from inside the tubing as much as possible. 5. Use a l/2" open-end wrench, and further tighten the compression nut on the shut-off valve one additional turn. If necessary, you will tighten the nut further after you turn on the water supply. 6.Turn the T-handle on the shut-off valve to its fully "open" (counterclockwise rotation) position. 2. Position the compression nut as shown, and slide it over the end of the copper tubing. 3. Slide a compression sleeve over the copper tubing until it is approximately 1 'from the end. 4. Insert the end of the copper tubing into the outlet connector of the shut-off valve as far as it will go, and then hand tighten the compression nut as much as possible. Compression nut J r\+ )t .I Outlet I Compression Wv=r tubing Connecting the copper tubing to the shut-off valve
-
 1
1 -
2
-
3
-
4
-
5
-
6
-
7
-
8
-
9
-
10
-
11
-
12
-
13
-
 14
14 -
 15
15 -
 16
16 -
 17
17 -
 18
18 -
 19
19 -
 20
20 -
 21
21 -
 22
22 -
 23
23 -
 24
24 -
25
-
26
-
27
-
28
 |
 |