Whirlpool ECKMF94 Installation Guide - Page 16
Installing, the Water Line - parts
 |
UPC - 050946418711
View all Whirlpool ECKMF94 manuals
Add to My Manuals
Save this manual to your list of manuals |
Page 16 highlights
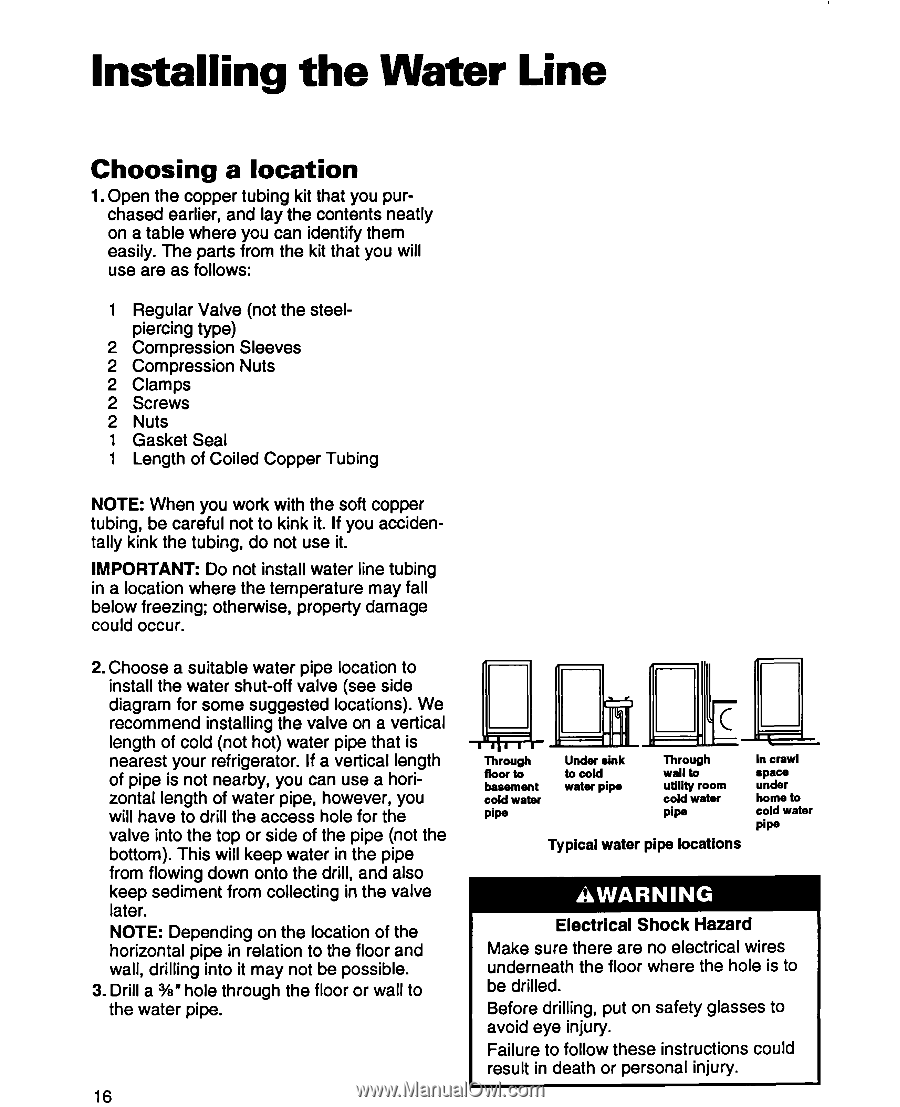
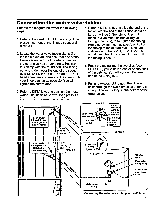
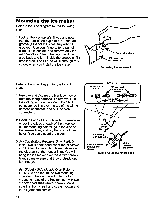
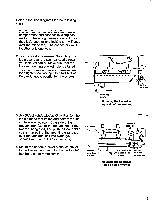
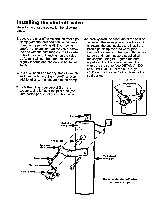
Installing the Water Line Choosing a location 1. Open the copper tubing kit that you purchased earlier, and lay the contents neatly on a table where you can identify them easily. The parts from the kit that you will use are as follows: 1 Regular Valve (not the steelpiercing type) 2 Compression Sleeves 2 Compression Nuts 2 Clamps 2 Screws 2 Nuts 1 Gasket Seal 1 Length of Coiled Copper Tubing NOTE: When you work with the soft copper tubing, be careful not to kink it. If you accidentally kink the tubing, do not use it. IMPORTANT: Do not install water line tubing in a location where the temperature may fall below freezing; otherwise, property damage could occur. 2. Choose a suitable water pipe location to install the water shut-off valve (see side diagram for some suggested locations). We recommend installing the valve on a vertical length of cold (not hot) water pipe that is nearest your refrigerator. If a vertical length of pipe is not nearby, you can use a horizontal length of water pipe, however, you will have to drill the access hole for the valve into the top or side of the pipe (not the bottom). This will keep water in the pipe from flowing down onto the drill, and also keep sediment from collecting in the valve later. NOTE: Depending on the location of the horizontal pipe in relation to the floor and wall, drilling into it may not be possible. 3. Drill a %'hole through the floor or wall to the water pipe. 16 Through floor to basement cold water Pii= Under rink tocold water pipe Through wall to utility room cold water Pipe Typical water pipe locations In crawl space under home to cold water Pipe Electrical Shock Hazard Make sure there are no electrical wires underneath the floor where the hole is to be drilled. Before drilling, put on safety glasses to avoid eye injury. Failure to follow these instructions could result in death or personal injury.
-
 1
1 -
2
-
3
-
4
-
5
-
6
-
7
-
8
-
9
-
10
-
 11
11 -
 12
12 -
 13
13 -
 14
14 -
 15
15 -
 16
16 -
 17
17 -
 18
18 -
 19
19 -
 20
20 -
 21
21 -
22
-
23
-
24
-
25
-
26
-
27
-
28
 |
 |