Xerox 3200MFPN User Guide - Page 137
Scanning using a network connection, Phaser 3200MFP/N only, Preparing for network scanning - network scanners
 |
UPC - 095205731958
View all Xerox 3200MFPN manuals
Add to My Manuals
Save this manual to your list of manuals |
Page 137 highlights
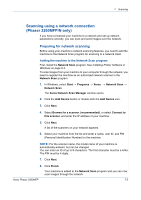
7 Scanning Scanning using a network connection (Phaser 3200MFP/N only) If you have connected your machine to a network and set up network parameters correctly, you can scan and send images over the network. Preparing for network scanning Before using your machine's network scanning features, you need to add the machine to the Network Scan program for scanning to a network client. Adding the machine to the Network Scan program First, install the Network Scan program. See Installing Printer Software in Windows on page 6-2. To scan images from your machine to your computer through the network, you need to register the machine as an authorized network scanner in the Network Scan program. 1. In Windows, select Start Programs Xerox Network Scan. Network Scan The Xerox Network Scan Manager window opens. 2. Click the Add Device button or double-click the Add Device icon. 3. Click Next. 4. Select Browse for a scanner. (recommended), or select Connect to this scanner. and enter the IP address of your machine. 5. Click Next. A list of the scanners on your network appears. 6. Select your machine from the list and enter a name, user ID, and PIN (Personal Identification Number) for the machine. NOTE: For the scanner name, the model name of your machine is automatically entered, but can be changed. You can enter an ID of up to 8 characters. The first character must be a letter. The PIN must be 4 digits. 7. Click Next. 8. Click Finish. Your machine is added to the Network Scan program and you can now scan images through the network. Xerox Phaser 3200MFP 7-5
-
 1
1 -
2
-
3
-
4
-
5
-
6
-
7
-
8
-
9
-
10
-
11
-
12
-
13
-
14
-
15
-
16
-
17
-
18
-
19
-
20
-
21
-
22
-
23
-
24
-
25
-
26
-
27
-
28
-
29
-
30
-
31
-
32
-
33
-
34
-
35
-
36
-
37
-
38
-
39
-
40
-
41
-
42
-
43
-
44
-
45
-
46
-
47
-
48
-
49
-
50
-
51
-
52
-
53
-
54
-
55
-
56
-
57
-
58
-
59
-
60
-
61
-
62
-
63
-
64
-
65
-
66
-
67
-
68
-
69
-
70
-
71
-
72
-
73
-
74
-
75
-
76
-
77
-
78
-
79
-
80
-
81
-
82
-
83
-
84
-
85
-
86
-
87
-
88
-
89
-
90
-
91
-
92
-
93
-
94
-
95
-
96
-
97
-
98
-
99
-
100
-
101
-
102
-
103
-
104
-
105
-
106
-
107
-
108
-
109
-
110
-
111
-
112
-
113
-
114
-
115
-
116
-
117
-
118
-
119
-
120
-
121
-
122
-
123
-
124
-
125
-
126
-
127
-
128
-
129
-
130
-
131
-
 132
132 -
 133
133 -
 134
134 -
 135
135 -
 136
136 -
 137
137 -
 138
138 -
 139
139 -
 140
140 -
 141
141 -
 142
142 -
143
-
144
-
145
-
146
-
147
-
148
-
149
-
150
-
151
-
152
-
153
-
154
-
155
-
156
-
157
-
158
-
159
-
160
-
161
-
162
-
163
-
164
-
165
-
166
-
167
-
168
-
169
-
170
-
171
-
172
-
173
-
174
-
175
-
176
-
177
-
178
-
179
-
180
-
181
-
182
-
183
-
184
-
185
-
186
-
187
-
188
-
189
-
190
-
191
-
192
-
193
-
194
-
195
-
196
-
197
-
198
-
199
-
200
-
201
-
202
-
203
-
204
-
205
-
206
-
207
-
208
-
209
-
210
-
211
-
212
-
213
-
214
-
215
-
216
-
217
-
218
-
219
-
220
-
221
-
222
-
223
-
224
-
225
-
226
-
227
-
228
-
229
-
230
-
231
-
232
-
233
-
234
-
235
-
236
 |
 |
