Yamaha CVP-600 Owner's Manual - Page 69
Enter the chord type., Enter the chord., Rotate the fingering as desired., Stop the Auto
 |
View all Yamaha CVP-600 manuals
Add to My Manuals
Save this manual to your list of manuals |
Page 69 highlights
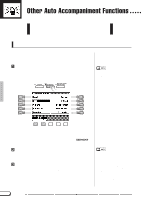
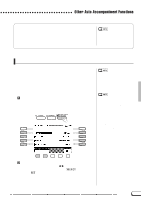
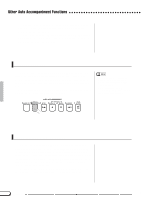
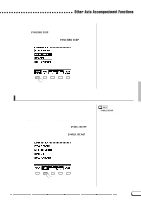
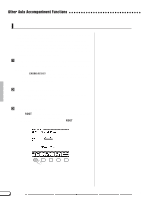
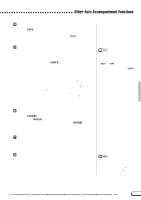
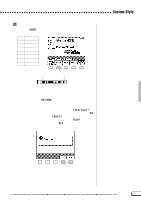
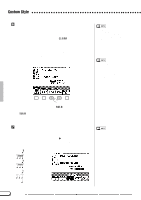
Other Auto Accompaniment Functions VEnter the chord type Press TYPE w or v (it is highlighted), then use the data dial or [-/+] buttons to select the desired chord type. You can also select the chord type by pressing TYPE. BEnter the chord The fingering for the selected chord appears on the keyboard guide lamps. And the selected chord is also indicated in notation form in the center of the LCD display. At this point you can either play the indicated chord on the keyboard or press ENTER to actually enter the specified chord, at which the specified chord accompaniment will sound. The following chord types can be specified from the LCD display. Major [Maj] Augmented [aug] Minor [m] Minor flatted fifth [m (b5)] Seventh [7] Seventh suspended fourth [7sus4] Minor seventh [m7] Seventh augmented [7 (#5)] Minor seventh flatted fifth [m7 (b5)] Diminished seventh [dim7] Sixth [6] Flatted fifth [(b5)] Minor sixth [m6] Seventh flatted fifth [7 (b5)] Major seventh [M7] Minor major seventh [mM7] Suspended fourth [sus4] • All the Fingered chords can be entered from the keyboard. • The root and type of the chord name entered from the LCD appears in the ROOT and TYPE parameter locations, while the chord name recognized from the keyboard (or entered by the ENTER button) appears at the side of the keyboard icon located at the left of the LCD. • A flashing keyboard guide lamp indicates a note which may be omitted. NRotate the fingering as desired Press INVERT in the LCD to shift the fingering down the keyboard. Each time the INVERT button is pressed the next viable fingering for the chord appears. The inversion number appears in the INVERT section of the display. MStop the Auto Accompaniment Use [START/STOP] or [ENDING] to stop the accompaniment.
-
 1
1 -
2
-
3
-
4
-
5
-
6
-
7
-
8
-
9
-
10
-
11
-
12
-
13
-
14
-
15
-
16
-
17
-
18
-
19
-
20
-
21
-
22
-
23
-
24
-
25
-
26
-
27
-
28
-
29
-
30
-
31
-
32
-
33
-
34
-
35
-
36
-
37
-
38
-
39
-
40
-
41
-
42
-
43
-
44
-
45
-
46
-
47
-
48
-
49
-
50
-
51
-
52
-
53
-
54
-
55
-
56
-
57
-
58
-
59
-
60
-
61
-
62
-
63
-
 64
64 -
 65
65 -
 66
66 -
 67
67 -
 68
68 -
 69
69 -
 70
70 -
 71
71 -
 72
72 -
 73
73 -
 74
74 -
75
-
76
-
77
-
78
-
79
-
80
-
81
-
82
-
83
-
84
-
85
-
86
-
87
-
88
-
89
-
90
-
91
-
92
-
93
-
94
-
95
-
96
-
97
-
98
-
99
-
100
-
101
-
102
-
103
-
104
-
105
-
106
-
107
-
108
-
109
-
110
-
111
-
112
-
113
-
114
-
115
-
116
-
117
-
118
-
119
-
120
-
121
-
122
-
123
-
124
-
125
-
126
-
127
-
128
-
129
-
130
-
131
-
132
-
133
-
134
-
135
-
136
-
137
-
138
-
139
-
140
-
141
-
142
-
143
-
144
-
145
-
146
-
147
-
148
-
149
-
150
-
151
-
152
-
153
-
154
-
155
-
156
-
157
-
158
-
159
-
160
-
161
-
162
-
163
-
164
 |
 |
