Yamaha PSR-I500 PSR-I500 Owners Manual - Page 33
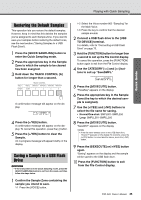
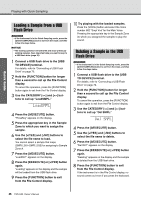
Sampling External Audio Sound, enter the Quick Samplin
 |
View all Yamaha PSR-I500 manuals
Add to My Manuals
Save this manual to your list of manuals |
Page 33 highlights
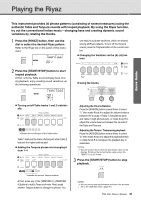
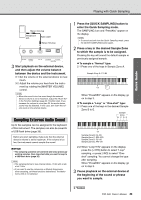
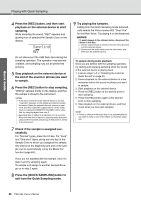
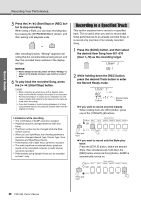
Playing with Quick Sampling Quick Guide Stereo mini plug Headphone jack Audio cable Stereo mini plug 3 Start playback on the external device, and then adjust the volume balance between the device and the instrument. 3-1 Set the volume of the external device to maximum. 3-2 Adjust the volume you hear from the instrument by rotating the [MASTER VOLUME] control. NOTE • When the sound is too low even though the external device's volume is set to maximum, adjust the "AuxIn Vol" in the Function Settings (page 66, Function 004). If you increase the volume to more than 50, the audio device sound may be distorted. In this case, turn down the volume level on the external device. Sampling External Audio Sound Up to five samples can be assigned to the keyboard of this instrument. The samples can also be saved to a USB flash drive (page 35). Before you start sampling, make sure that the external device's volume is set to maximum. If the volume is too low, the instrument cannot sample the sound. NOTICE • The sampling operation will overwrite and erase previously existing samples. Save important data you want to keep to a USB flash drive (page 35). NOTE • The sampling format is two-channel stereo, 16-bit with a rate of 44.1 kHz. • If you want to use the metronome or Melody Suppressor when sampling, set these functions beforehand. The Metronome click is not sampled. 1 Press the [QUICK SAMPLING] button to enter the Quick Sampling mode. The SAMPLING icon and "PressKey" appear on the display. NOTE • To cancel and exit from the Quick Sampling mode, press the [QUICK SAMPLING] button again. 2 Press a key in the desired Sample Zone to which the sample is to be assigned. Pressing the key will sound the default sample or previously assigned sample. To sample a "Normal" type: 2-1 Press one of the keys in Sample Zone A. Sample Zone A: C1-B4 C3 When "PressREC" appears on the display, go on to step 3. To sample a "Loop" or "One-shot" type: 2-1 Press one of the keys in the desired Sample Zone B to E. Sample Zone B CDE C3 Sample Zone B: C5-D5 Sample Zone C: D#5-F#5 Sample Zone D: G5-A5 Sample Zone E: A#5-C6 2-2 When "Loop?Y/N" appears on the display, press the [+/YES] button to select "Loop" sampling, or press [-/NO] to select "Oneshot" sampling. You cannot change the type after sampling. When "PressREC" appears on the display, go on to step 3. 3 Pause playback on the external device at the beginning of the sound or phrase you want to sample. NEXT PAGE PSR-I500 Owner's Manual 33
-
 1
1 -
2
-
3
-
4
-
5
-
6
-
7
-
8
-
9
-
10
-
11
-
12
-
13
-
14
-
15
-
16
-
17
-
18
-
19
-
20
-
21
-
22
-
23
-
24
-
25
-
26
-
27
-
 28
28 -
 29
29 -
 30
30 -
 31
31 -
 32
32 -
 33
33 -
 34
34 -
 35
35 -
 36
36 -
 37
37 -
 38
38 -
39
-
40
-
41
-
42
-
43
-
44
-
45
-
46
-
47
-
48
-
49
-
50
-
51
-
52
-
53
-
54
-
55
-
56
-
57
-
58
-
59
-
60
-
61
-
62
-
63
-
64
-
65
-
66
-
67
-
68
-
69
-
70
-
71
-
72
-
73
-
74
-
75
-
76
-
77
-
78
-
79
-
80
-
81
-
82
-
83
-
84
-
85
-
86
-
87
-
88
 |
 |
