2007 Suzuki Grand Vitara Owner's Manual - Page 170
2007 Suzuki Grand Vitara Manual
Page 170 highlights
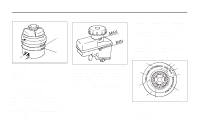
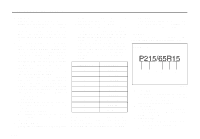
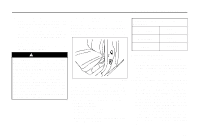
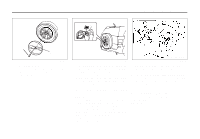
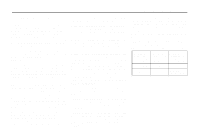
INSPECTION AND MAINTENANCE Motor Vehicle Safety Standard No. 109. Grades B and A represent higher levels of performance on the laboratory test wheel than the minimum required by law. schedule. After rotation, adjust front and rear tire pressures to the specification listed on your vehicle's Tire and Loading Information Label. Changing Wheels To change a wheel, use the following procedure: 1) Remove the jack, tools and spare wheel from the vehicle. NOTE: How to remove the spare wheel: (A) WARNING The temperature grade for this tire is established for a tire that is properly inflated and not overloaded. Excessive speed, underinflation or excessive loading, either separately or in combination, can cause heat buildup and possible tire failure. WARNING Rust or dirt on a wheel, or on the parts to which it is fastened, can make wheel nuts become loose after a time. The wheel could come off and cause an accident. When you change a wheel, remove any rust or dirt from places where the wheel attaches to the vehicle. In an emergency, you can use a cloth or a paper towel to do this; but be sure to use a scraper or wire brush later, if you need to, to get all the rust or dirt off. Tire Rotation 4-tire rotation 64J178 1. (Full cover type) Release the lock at the underneath of the spare wheel full cover (A) as shown in the illustration, then remove the outer cover of the spare wheel full cover. 65D459 To avoid uneven wear of your tires and to prolong their life, rotate the tires as illustrated. Tires should be rotated as recommended in the periodic maintenance 9-29
-
 1
1 -
2
-
3
-
4
-
5
-
6
-
7
-
8
-
9
-
10
-
11
-
12
-
13
-
14
-
15
-
16
-
17
-
18
-
19
-
20
-
21
-
22
-
23
-
24
-
25
-
26
-
27
-
28
-
29
-
30
-
31
-
32
-
33
-
34
-
35
-
36
-
37
-
38
-
39
-
40
-
41
-
42
-
43
-
44
-
45
-
46
-
47
-
48
-
49
-
50
-
51
-
52
-
53
-
54
-
55
-
56
-
57
-
58
-
59
-
60
-
61
-
62
-
63
-
64
-
65
-
66
-
67
-
68
-
69
-
70
-
71
-
72
-
73
-
74
-
75
-
76
-
77
-
78
-
79
-
80
-
81
-
82
-
83
-
84
-
85
-
86
-
87
-
88
-
89
-
90
-
91
-
92
-
93
-
94
-
95
-
96
-
97
-
98
-
99
-
100
-
101
-
102
-
103
-
104
-
105
-
106
-
107
-
108
-
109
-
110
-
111
-
112
-
113
-
114
-
115
-
116
-
117
-
118
-
119
-
120
-
121
-
122
-
123
-
124
-
125
-
126
-
127
-
128
-
129
-
130
-
131
-
132
-
133
-
134
-
135
-
136
-
137
-
138
-
139
-
140
-
141
-
142
-
143
-
144
-
145
-
146
-
147
-
148
-
149
-
150
-
151
-
152
-
153
-
154
-
155
-
156
-
157
-
158
-
159
-
160
-
161
-
162
-
163
-
164
-
 165
165 -
 166
166 -
 167
167 -
 168
168 -
 169
169 -
 170
170 -
 171
171 -
 172
172 -
 173
173 -
 174
174 -
 175
175 -
176
-
177
-
178
-
179
-
180
-
181
-
182
-
183
-
184
-
185
-
186
-
187
-
188
-
189
-
190
-
191
-
192
-
193
-
194
-
195
-
196
-
197
-
198
-
199
-
200
-
201
-
202
-
203
-
204
-
205
-
206
-
207
-
208
-
209
-
210
-
211
-
212
-
213
-
214
-
215
-
216
 |
 |
