3Com 3CRWE554G72T User Guide - Page 16
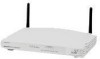
Rear Panel, Cable/DSL Status LED, Wireless Antennae, Power Adapter Socket, Ethernet Cable/DSL port
 |
UPC - 662705481685
View all 3Com 3CRWE554G72T manuals
Add to My Manuals
Save this manual to your list of manuals |
Page 16 highlights
16 CHAPTER 1: INTRODUCING THE ROUTER Rear Panel 6 5 Cable/DSL Status LED Green (100 Mbps link) / yellow (10 Mbps link) If the LED is on, the link between the Router and the cable or DSL modem is OK. If the LED is flashing, the link is OK and data is being transmitted or received. If the LED is off, nothing is connected, the modem is switched off or there is a problem (refer to Chapter 6 "Troubleshooting"). The rear panel (Figure 4) of the Router contains four LAN ports, one Ethernet Cable/DSL port, a power adapter OK LED, and a power adapter socket. Figure 4 Router - Rear Panel 6 Wireless Antennae 6 10 9 78 4 3 2 1 LAN Cable/DSL 12VDC 1.25A MAX POWER OK The antennae on the product should be placed in a 'V' position when initially installed. CAUTION: Do not force the antennae beyond their mechanical stops. Rotating the antennae further may cause damage. 7 Power Adapter Socket Only use the power adapter supplied with this Router. Do not use any other adapter. 8 Power Adapter OK LED Green Indicates that the power adapter is supplying power to the Router. If the LED is off, there may be a problem with the power adapter or adapter cable. 9 Ethernet Cable/DSL port Use the supplied patch cable to connect the Router to the Ethernet port on your cable or DSL modem. The port will automatically adjust to the
-
 1
1 -
2
-
3
-
4
-
5
-
6
-
7
-
8
-
9
-
10
-
 11
11 -
 12
12 -
 13
13 -
 14
14 -
 15
15 -
 16
16 -
 17
17 -
 18
18 -
 19
19 -
 20
20 -
 21
21 -
22
-
23
-
24
-
25
-
26
-
27
-
28
-
29
-
30
-
31
-
32
-
33
-
34
-
35
-
36
-
37
-
38
-
39
-
40
-
41
-
42
-
43
-
44
-
45
-
46
-
47
-
48
-
49
-
50
-
51
-
52
-
53
-
54
-
55
-
56
-
57
-
58
-
59
-
60
-
61
-
62
-
63
-
64
-
65
-
66
-
67
-
68
-
69
-
70
-
71
-
72
-
73
-
74
-
75
-
76
-
77
-
78
-
79
-
80
-
81
-
82
-
83
-
84
-
85
-
86
-
87
-
88
-
89
-
90
-
91
-
92
-
93
-
94
-
95
-
96
-
97
-
98
-
99
-
100
-
101
-
102
-
103
-
104
-
105
-
106
-
107
-
108
-
109
-
110
-
111
-
112
-
113
-
114
-
115
-
116
-
117
-
118
-
119
-
120
-
121
-
122
-
123
-
124
-
125
-
126
-
127
-
128
-
129
-
130
-
131
-
132
-
133
-
134
-
135
-
136
-
137
-
138
-
139
-
140
-
141
-
142
-
143
-
144
-
145
-
146
 |
 |
