Apple MB417LL User Guide - Page 37
WARNING, Remember to replace the memory access door after you install memory.
 |
UPC - 885909220168
View all Apple MB417LL manuals
Add to My Manuals
Save this manual to your list of manuals |
Page 37 highlights
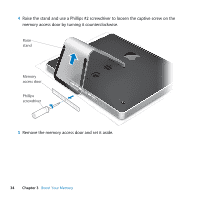
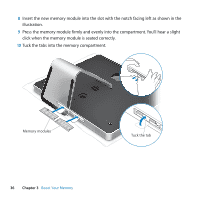
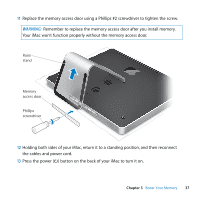
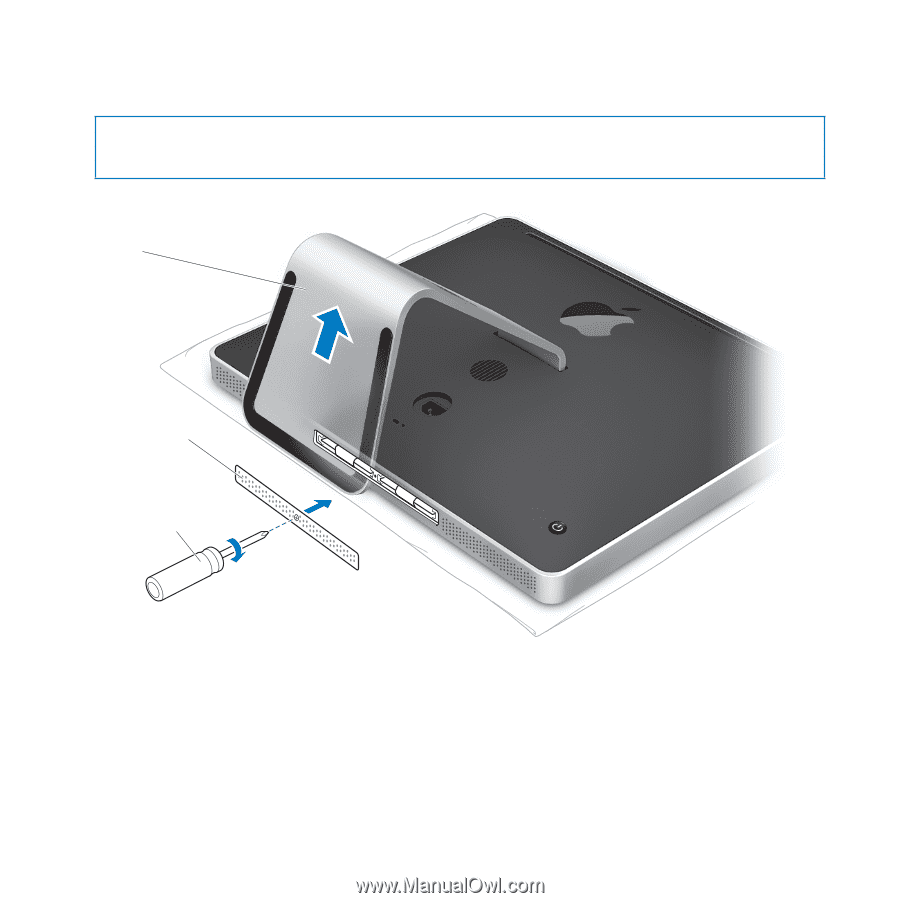
11 Replace the memory access door using a Phillips #2 screwdriver to tighten the screw. WARNING: Remember to replace the memory access door after you install memory. Your iMac won't function properly without the memory access door. Raise stand Memory access door Phillips screwdriver 12 Holding both sides of your iMac, return it to a standing position, and then reconnect the cables and power cord. 13 Press the power (®) button on the back of your iMac to turn it on. Chapter 3 Boost Your Memory 37
-
 1
1 -
2
-
3
-
4
-
5
-
6
-
7
-
8
-
9
-
10
-
11
-
12
-
13
-
14
-
15
-
16
-
17
-
18
-
19
-
20
-
21
-
22
-
23
-
24
-
25
-
26
-
27
-
28
-
29
-
30
-
31
-
 32
32 -
 33
33 -
 34
34 -
 35
35 -
 36
36 -
 37
37 -
 38
38 -
 39
39 -
 40
40 -
 41
41 -
 42
42 -
43
-
44
-
45
-
46
-
47
-
48
-
49
-
50
-
51
-
52
-
53
-
54
-
55
-
56
-
57
-
58
-
59
-
60
-
61
-
62
-
63
-
64
-
65
-
66
-
67
-
68
-
69
-
70
-
71
-
72
-
73
-
74
-
75
-
76
 |
 |
Chapter 3
Boost Your Memory
37
11
Replace the memory access door using a Phillips #2 screwdriver to tighten the screw.
12
Holding both sides of your iMac, return it to a standing position, and then reconnect
the cables and power cord.
13
Press the power (
®
) button on the back of your iMac to turn it on.
WARNING:
Remember to replace the memory access door after you install memory.
Your iMac won’t function properly without the memory access door.
Raise
stand
Memory
access door
Phillips
screwdriver