Asus MeMO Pad 8 User Manual - Page 33
Connecting your MeMO Pad to a Bluetooth device, Unpairing and configuring a Bluetooth device
 |
View all Asus MeMO Pad 8 manuals
Add to My Manuals
Save this manual to your list of manuals |
Page 33 highlights
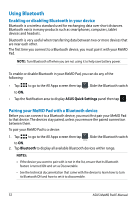
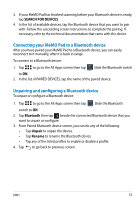
3. If your MeMO Pad has finished scanning before your Bluetooth device is ready, tap SEARCH FOR DEVICES. 4. In the list of available devices, tap the Bluetooth device that you want to pair with. Follow the succeeding screen instructions to complete the pairing. If necessary, refer to the technical documentation that came with the device. Connecting your MeMO Pad to a Bluetooth device After you have paired your MeMO Pad to a Bluetooth device, you can easily reconnect to it manually, after it is back in range. To connect to a Bluetooth device: File Manager 1. Tap Settings to ON. to go to the All Apps screen then tap . Slide the Bluetooth switch Play Store File Manager Settings Play Store 2. In the list of PAIRED DEVICES, tap the name of the paired device. Gallery Polaris Office My Library Lite Camera Play Music Maps Gallery Polaris Office My Library Lite Camera Play Music Maps Unpairing and configurinEmgail a Bluetooth device Email To unpair or configure a Bluetooth device: Gmail 1. Tap File Manager Settings Gmail Play Store SuperNote MyNet SuperNote MyNet to go to the All Apps screen then tap . Slide the Bluetooth File Manager MyCloud Settings Play Store switch to ON. App Locker asus@vibe App Backup Gallery Polaris Office File Manager MMyyLCilboruadry Lite Settings App Locker Camera asus@vibe Play Music Play Store App Backup Maps 2. Tap Bluetooth then tap Gallery Polaris Office My Library Lite Camera Play Music beside the connected Bluetooth device that you Maps Gallery Polaris Office My Library Lite Camera Play Music Maps want to unpair or configure. Email 3. From Paired Bluetooth devicEmeail screen, you can do any of the following: Email Gmail • Tap Unpair to unpair the device. SuperNote MyNet Gmail • Tap Rename to renamSupeerNtothe e Bluetooth MyNet Gmail device. MyCloud App Locker asus@vibe App Backup • Tap any of the listed profiles to enable or disable a profile. MyCloud 4. Tap to go back to previous screen. App Locker asus@vibe App Backup MyCloud App Locker asus@vibe App Backup SuperNote MyNe Play Store ice My Library Lite Camera Play Music Maps Email asus@vibe App Backup K001 SuperNote MyNet 33
-
 1
1 -
2
-
3
-
4
-
5
-
6
-
7
-
8
-
9
-
10
-
11
-
12
-
13
-
14
-
15
-
16
-
17
-
18
-
19
-
20
-
21
-
22
-
23
-
24
-
25
-
26
-
27
-
 28
28 -
 29
29 -
 30
30 -
 31
31 -
 32
32 -
 33
33 -
 34
34 -
 35
35 -
 36
36 -
 37
37 -
 38
38 -
39
-
40
-
41
-
42
-
43
-
44
-
45
-
46
-
47
-
48
-
49
-
50
-
51
-
52
-
53
-
54
-
55
-
56
-
57
-
58
-
59
-
60
-
61
-
62
-
63
-
64
-
65
-
66
-
67
-
68
-
69
-
70
-
71
-
72
-
73
-
74
-
75
-
76
-
77
-
78
-
79
-
80
-
81
-
82
-
83
-
84
-
85
-
86
-
87
-
88
-
89
-
90
-
91
-
92
 |
 |