Asus P4T533 P4T533 User Manual - Page 124
Creating a RAID 0 Array
 |
View all Asus P4T533 manuals
Add to My Manuals
Save this manual to your list of manuals |
Page 124 highlights
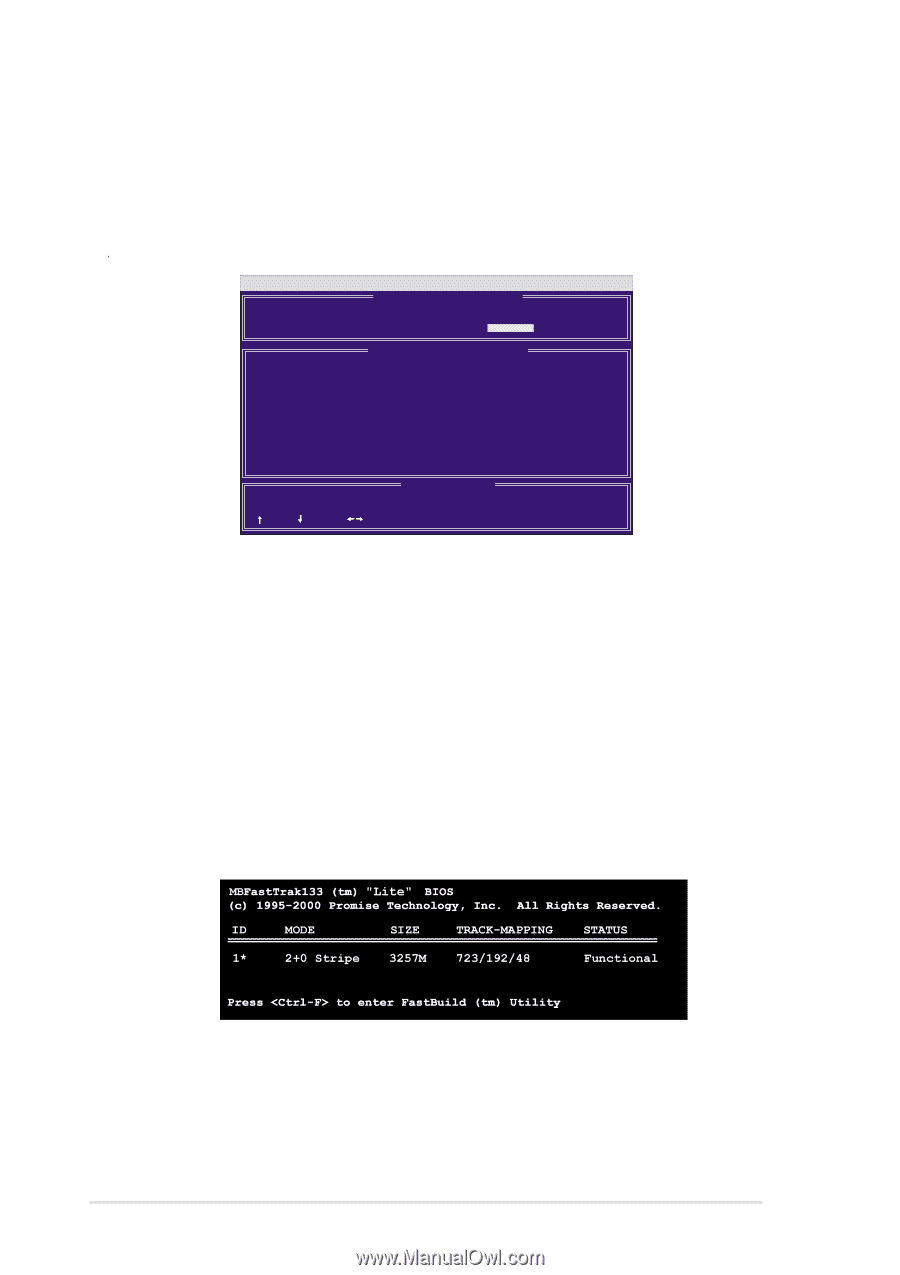
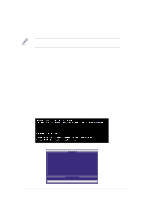
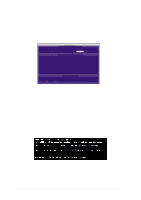
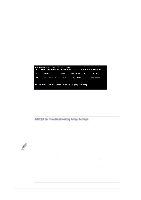
5.10.3 Creating a RAID 0 Array 1. In the FastBuild™ Utility Main Menu, select Auto Setup [1]. The screen below is displayed. The Auto Setup Options Menu configures hard disks for RAID 0 and RAID 1 arrays. These selections assign all available drives that are appropriate for the new array and configures data formats and the IDE channels. FastBuild (tm) Utility 1.31 (c) 1996-2000 Promise Technology, Inc. [ Auto Setup Options Menu ] Optimize Array for: Performance Typical Application to use: DESKTOP [ Array Setup Configuration ] Mode Stripe Spare Drive 0 Drive(s) Used in Array 2 Array Disk Capacity (size in MB 29299 [ Keys Available ] [ ] Up [ ] Down [ , ,Space] Change Option [ESC] Exit [CTRL-Y] Save 2. Go to the field Optimize Array for: and select Performance using the arrow and space keys. The Mode field displays Stripe. 3. Then go to the Typical Application Menu. Three options are available: A/V Editing, DESKTOP, or Server. These selections determine how data blocks are managed to enhance performance. A/V Editing is intended for audio/video applications, or similar programs that require larger file transfers; Desktop combines large and small file sizes; Server is for numerous file transfers. 4. After making the selection, use to save it. FastBuild™ automatically constructs the RAID 0 array. 5. Then the command appears: "Press Any Key to Reboot." Reboot the system and the MBFastTrak133™ "Lite" BIOS checks and displays the status of the new array: 6. To finish installation of your new Operating System to the RAID 0 array, reboot with a floppy disk to format the hard disks with the FDISK command and then install the OS from a CD; alternatively, with a bootable OS CD, you may install the new OS automatically. As you install the OS, the system always treats the RAID 0 array of hard disks as if they are a single drive unit. 104 Chapter 5: Software reference
-
 1
1 -
2
-
3
-
4
-
5
-
6
-
7
-
8
-
9
-
10
-
11
-
12
-
13
-
14
-
15
-
16
-
17
-
18
-
19
-
20
-
21
-
22
-
23
-
24
-
25
-
26
-
27
-
28
-
29
-
30
-
31
-
32
-
33
-
34
-
35
-
36
-
37
-
38
-
39
-
40
-
41
-
42
-
43
-
44
-
45
-
46
-
47
-
48
-
49
-
50
-
51
-
52
-
53
-
54
-
55
-
56
-
57
-
58
-
59
-
60
-
61
-
62
-
63
-
64
-
65
-
66
-
67
-
68
-
69
-
70
-
71
-
72
-
73
-
74
-
75
-
76
-
77
-
78
-
79
-
80
-
81
-
82
-
83
-
84
-
85
-
86
-
87
-
88
-
89
-
90
-
91
-
92
-
93
-
94
-
95
-
96
-
97
-
98
-
99
-
100
-
101
-
102
-
103
-
104
-
105
-
106
-
107
-
108
-
109
-
110
-
111
-
112
-
113
-
114
-
115
-
116
-
117
-
118
-
 119
119 -
 120
120 -
 121
121 -
 122
122 -
 123
123 -
 124
124 -
 125
125 -
 126
126 -
 127
127 -
 128
128 -
 129
129 -
130
-
131
-
132
-
133
-
134
-
135
-
136
 |
 |