Brother International BES Monogramming Suite Instruction Manual - English
Brother International BES Monogramming Suite Manual
 |
View all Brother International BES Monogramming Suite manuals
Add to My Manuals
Save this manual to your list of manuals |
Brother International BES Monogramming Suite manual content summary:
- Brother International BES Monogramming Suite | Instruction Manual - English - Page 1
Pacesetter BES Monogramming Suite Instruction Manual - Brother International BES Monogramming Suite | Instruction Manual - English - Page 2
ii Pacesetter BES Monogramming Suite Instruction Manual Copyright © Copyright 2011 Pulse Microsystems Ltd. All rights reserved. This instruction manual and software are copyrighted by the developer of the software, Pulse Microsystems Ltd. All rights reserved. US Patent Nos. 5 270 939; 5 343 401; 5 - Brother International BES Monogramming Suite | Instruction Manual - English - Page 3
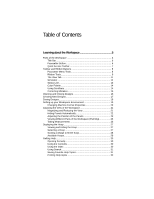
Table of Contents Learning about the Workspace 5 Parts of the Workspace 6 Title Bar 6 Pacesetter Button 6 Quick Access Toolbar 7 Toolbar and Ribbon Buttons 8 Pacesetter Menu Tools 8 Ribbon Tools 9 The View Tab 11 Simulator 12 Status Line 13 Color Palette 14 Using Scrollbars 14 - Brother International BES Monogramming Suite | Instruction Manual - English - Page 4
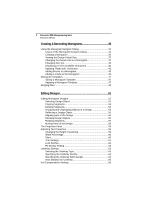
2 Pacesetter BES Monogramming Suite Instruction Manual Creating & Decorating Monograms 33 Using the Monogram Designer Dialog 34 Layout of the Monogram Designer Dialog 34 Creating a Monogram 35 Viewing the Design Actual Size 37 Changing the thread color in a Monogram 37 Changing the Font 39 - Brother International BES Monogramming Suite | Instruction Manual - English - Page 5
3 Working with the Color Palette 67 Selecting a Thread Chart 67 Searching for a Specific Color 67 Changing a Thread Color 68 Working with Sequence View 69 Changing Thread Colors in Sequence View 70 Sequencing Color Groups 70 Show/Hide and Lock Color Groups 71 Using Color Sort 72 Printing - Brother International BES Monogramming Suite | Instruction Manual - English - Page 6
4 Pacesetter BES Monogramming Suite Instruction Manual - Brother International BES Monogramming Suite | Instruction Manual - English - Page 7
CHAPTER 1: Learning about the Workspace Before you start using the software, we recommend that you understand the Pacesetter BES Monogramming Suite design workspace and learn a few of the basic components outlined in this section. Topics covered in this chapter: • Setting up the design workspace - Brother International BES Monogramming Suite | Instruction Manual - English - Page 8
6 Pacesetter BES Monogramming Suite Instruction Manual Parts of the Workspace The Pacesetter BES Monogramming Suite workspace contains a number of different areas which have distinct functions. The sections that follow give an overview of what each of these areas does, and - Brother International BES Monogramming Suite | Instruction Manual - English - Page 9
see displayed a list of recent files that you have been using. Just double-click on the file name to open it. Tools available on the Pacesetter Menu. Quick Access Toolbar The Quick Access Toolbar is located right along the top of your workspace, to the left of the Title Bar. This - Brother International BES Monogramming Suite | Instruction Manual - English - Page 10
8 Pacesetter BES Monogramming Suite Instruction Manual Toolbar and Ribbon Buttons You can access the tools available in Pacesetter BES Monogramming Suite through the Pacesetter Button and the various toolbars. The tables below show the buttons, grouped by location (i.e. whether they are on the - Brother International BES Monogramming Suite | Instruction Manual - English - Page 11
Learning about the Workspace 9 Tool What it means Exit: Closes all open files and shuts down Pacesetter BES Monogramming Suite; you will be prompted to save any open files. Undo: Reverses your last action. Redo: Reverses the action of the Undo command. Ribbon Tools The - Brother International BES Monogramming Suite | Instruction Manual - English - Page 12
10 Pacesetter BES Monogramming Suite Instruction Manual Tool What it means 3D: Realistically renders your design onscreen. Grid: Displays a background grid, which helps with alignment. This grid can be used for the - Brother International BES Monogramming Suite | Instruction Manual - English - Page 13
Learning about the Workspace 11 Tools on the Arrange Tab Tool What it means Select: Selects objects in the design window. Horizontal Center: Takes all selected objects and centers them in the selection box. The objects are moved so that they are centered left-to-right with each other, but they - Brother International BES Monogramming Suite | Instruction Manual - English - Page 14
12 Pacesetter BES Monogramming Suite Instruction Manual Program Preferences Click on the Program Preferences screen how your design will sew out. You can use the Simulator to eliminate potential sewing problems. When you select Simulator from the View tab of the Ribbon, the Simulator (scrollbar - Brother International BES Monogramming Suite | Instruction Manual - English - Page 15
the design. Speed: Slide the speed control to vary the rate of sewing. Status Line The Status Line appears at the bottom of the BES Monogramming Suite window. To show or hide the Status Line, go to the Windows area of the View Tab and check or uncheck Status. As you move - Brother International BES Monogramming Suite | Instruction Manual - English - Page 16
14 Pacesetter BES Monogramming Suite Instruction Manual areas of the status bar; it shows the total number of segments in the design, the number of segments currently selected, the machine format, the - Brother International BES Monogramming Suite | Instruction Manual - English - Page 17
Learning about the Workspace 15 Correcting Mistakes Undo and Redo are two significant features that allow you to correct mistakes. If you make a mistake and change your mind about an action you just made, Undo reverses the action. Redo puts back the change. If Undo or Redo are grayed out, you - Brother International BES Monogramming Suite | Instruction Manual - English - Page 18
16 Pacesetter BES Monogramming Suite Instruction Manual Opening and Closing Designs When you open a *.BRF file in Pacesetter BES Monogramming Suite, this file will contain both outline and stitch information. Note however, that when you open other file types, they will open as stitch segments only. - Brother International BES Monogramming Suite | Instruction Manual - English - Page 19
Learning about the Workspace 17 Creating New Designs When you open Pacesetter BES Monogramming Suite, you can immediately begin creating a new, untitled design in the design window. The design window automatically opens using the default recipe and machine format settings - Brother International BES Monogramming Suite | Instruction Manual - English - Page 20
18 Pacesetter BES Monogramming Suite Instruction Manual Saving Designs Use the Save As command to save designs. The Save As command lets you save an alternative version of the design with a different - Brother International BES Monogramming Suite | Instruction Manual - English - Page 21
that can be used for designs opened in Pacesetter BES Monogramming Suite. Metric The dimensions in Pacesetter BES Monogramming Suite can be displayed in metric values. This is the default setting, which will appear each time you run the software. It is generally preferable for embroiderers to use - Brother International BES Monogramming Suite | Instruction Manual - English - Page 22
20 Pacesetter BES Monogramming Suite Instruction Manual To set up your workspace environment: 1 On the View tab of or English. 4 Click OK. Changing Machine Format Properties All designs in Pacesetter BES Monogramming Suite have a machine format. Machine formats have their own profile settings that - Brother International BES Monogramming Suite | Instruction Manual - English - Page 23
Learning about the Workspace 21 Adjusting the View of the Workspace Magnifying and Reducing the View Use Zoom to magnify or reduce parts of your design. With Zoom you can either left-click to enlarge your design or right-click to make your design smaller. When you select Zoom, the cursor changes to - Brother International BES Monogramming Suite | Instruction Manual - English - Page 24
22 Pacesetter BES Monogramming Suite Instruction Manual 4 Do one of the following: To increase the zoom, continue clicking and dragging the flexible box. From the Zoom toolbar, click on the down arrow - Brother International BES Monogramming Suite | Instruction Manual - English - Page 25
Learning about the Workspace 23 Adjusting the Position of the Panels By default, when you first open the software, the Properties and Sequence View panels appear "docked" in your workspace. However, there are ways to move any of the panels around into different positions; - Brother International BES Monogramming Suite | Instruction Manual - English - Page 26
24 Pacesetter BES Monogramming Suite Instruction Manual The panel will no longer be visible; to show the panel again, go to the Tools tab of the ribbon, and in the Windows area - Brother International BES Monogramming Suite | Instruction Manual - English - Page 27
Learning about the Workspace 25 To dock to the top, bottom, left or right sides of the overall workspace window, drag the cursor over the corresponding isolated arrow button. To make the selected panel into a tab of another panel, move the cursor over the tab button in center of the "cross". 3 - Brother International BES Monogramming Suite | Instruction Manual - English - Page 28
26 Pacesetter BES Monogramming Suite Instruction Manual Using the Pan Tool Use the Pan tool to move the view of the design around in the workspace by clicking and dragging. While you - Brother International BES Monogramming Suite | Instruction Manual - English - Page 29
lets you ensure that your design fits properly when you run it on the machine. The hoop serves as a guide to help size and position your design in the design window. Pacesetter BES Monogramming Suite comes with many pre-loaded hoop sizes. Viewing and Hiding the Hoop Use the Hoop tool to show and - Brother International BES Monogramming Suite | Instruction Manual - English - Page 30
28 Pacesetter BES Monogramming Suite Instruction Manual 3 Select the machine format from the drop-down list at the top of the dialog. If you choose the PES format, you will see that - Brother International BES Monogramming Suite | Instruction Manual - English - Page 31
From the menu that appears, click on Fit Hoop. The current design will automatically be resized to fill the current hoop. Available Hoops Pacesetter Monogramming comes pre-loaded with a number of different hoops. The hoop sizes available for each file type are listed in the following table. Format - Brother International BES Monogramming Suite | Instruction Manual - English - Page 32
30 Pacesetter BES Monogramming Suite Instruction Manual Getting Help The Pacesetter BES Monogramming Suite Help is a quick way to find answers to your questions and see step-by-step instructions. Because a large number of topics exists, the Help allows you to search for topics in various ways. You - Brother International BES Monogramming Suite | Instruction Manual - English - Page 33
the right window pane. Using Search The Search tab lets you search using keywords or phrases in a database of all the words found in the Pacesetter BES Monogramming Suite Help. To use Search: 1 Click the Help tool. You see the Help. 2 Select the Search tab. 3 In the "Keyword" box, enter the word or - Brother International BES Monogramming Suite | Instruction Manual - English - Page 34
32 Pacesetter BES Monogramming Suite Instruction Manual 2 Double-click the book you want to open. 3 Click the topic you want to save as your favorite. You see the topic in the right - Brother International BES Monogramming Suite | Instruction Manual - English - Page 35
Designer dialog is the main creative tool of Pacesetter BES Monogramming Suite. It allows you to quickly create complete monogram embroidery designs, with decorations and frames. You can also determine the color and font of the letters in the monogram. Topics covered in this chapter: • How to create - Brother International BES Monogramming Suite | Instruction Manual - English - Page 36
34 Pacesetter BES Monogramming Suite Instruction Manual Using the Monogram Designer Dialog You create your Monogram designs using the Monogram Designer dialog. Open this dialog by clicking the Monogram Designer button on the Home tab of the ribbon. To close the Monogram Designer dialog, click the OK - Brother International BES Monogramming Suite | Instruction Manual - English - Page 37
& Decorating Monograms 35 Creating a Monogram Creating a simple monogram design is very easy with Pacesetter BES Monogramming Suite. Simply select one of the monogram layouts, type in the letters you want, choose a font and thread color, and click the OK button. The basic monogram will appear - Brother International BES Monogramming Suite | Instruction Manual - English - Page 38
36 Pacesetter BES Monogramming Suite Instruction Manual 4 If desired, change the height of the font by typing a new value into the Font Height field of the dialog. For "Name Template" monogram styles, there will be two Height fields - 'Font 1 Height' to change the height of the monogram lettering, - Brother International BES Monogramming Suite | Instruction Manual - English - Page 39
out with. Using the Import Color function, you can change this color to whatever suits you, based on a list of manufacturers' thread color tables. The Import color function can be applied to each letter in the monogram separately, should you want to have your letters sewn in different colors. To - Brother International BES Monogramming Suite | Instruction Manual - English - Page 40
38 Pacesetter BES Monogramming Suite Instruction Manual 2 Select a new color palette (if desired) by clicking the down arrow , and the swatch changes to the color you have selected 5 On the Monogram Designer dialog, click Apply. In the Preview panel, the letter will change to the color you chose. - Brother International BES Monogramming Suite | Instruction Manual - English - Page 41
39 Changing the Font You can also change the font of the monogram lettering in the Monogram Designer dialog. Use any one of a large selection of digitized embroidery fonts that come with the Pacesetter BES Monogramming Suite embroidery software. To change the font: 1 In the Font area, click on - Brother International BES Monogramming Suite | Instruction Manual - English - Page 42
40 Pacesetter BES Monogramming Suite Instruction Manual Also, in the case of the Name Template monograms, two different Letter height boxes will be active, so that the font height for the "name" part may be set separately from the font height for the monogram itself. Similarly, there will be two - Brother International BES Monogramming Suite | Instruction Manual - English - Page 43
displays all the available keystrokes that you can enter for the selected font. 4 Click the OK button to dismiss the available characters dialog. Applying "Right-side" characters A few of the Pacesetter BES Monogramming Suite fonts contain special characters, which have been digitized to fit on the - Brother International BES Monogramming Suite | Instruction Manual - English - Page 44
42 Pacesetter BES Monogramming Suite Instruction Manual For example, in the Decor Style font, the letter A will look like this: While, in contrast, the letter a looks like this: Therefore, to make a "balanced" two-letter monogram, you would type the upper-case letter in the Text 1 field, and the - Brother International BES Monogramming Suite | Instruction Manual - English - Page 45
right of the dialog changes to show a list of available decors. 2 Click on the decor you want to add. The selected decor appears in the monogram preview panel. 3 Adjust the decor by doing the following (these are optional): Change the size of the decor by typing a percentage into the scale box - Brother International BES Monogramming Suite | Instruction Manual - English - Page 46
44 Pacesetter BES Monogramming Suite Instruction Manual Check the Flip horizontal box. Check the Flip vertical box. You can also make these changes - that is, flip or scale the individual decors - after you have added all the desired decors to the preview of the monogram. Do this by selecting - Brother International BES Monogramming Suite | Instruction Manual - English - Page 47
a the preview of a design with the "Decors" box checked; below, the same design with the box unchecked. Note how the letters in the monogram have shifted up and to the right (relative to the frame), because the decors placeholders have been removed. This correctly reflects the actual arrangement of - Brother International BES Monogramming Suite | Instruction Manual - English - Page 48
46 Pacesetter BES Monogramming Suite Instruction Manual Adding a Frame to the Monogram You can enhance your monogram design by adding a decorative frame to it. Select the frame from a long list of embroidery designs that are included with the Pacesetter BES Monogramming Suite software. You will see - Brother International BES Monogramming Suite | Instruction Manual - English - Page 49
Monogram, with the selected Frame added, will now appear in the Pacesetter BES Monogramming Suite design workspace. Monogram Templates Saving a Monogram Template people's initials in the middle. You can select the monogram style, font, decors, and frame, and then save this pattern as a template, for - Brother International BES Monogramming Suite | Instruction Manual - English - Page 50
48 Pacesetter BES Monogramming Suite Instruction Manual 3 In the "Look in" field, navigate to the folder containing your saved templates. 4 Choose a template, and click "Open" The template opens in the Monogram Designer dialog. 5 Make any necessary alterations to the design, for example, the - Brother International BES Monogramming Suite | Instruction Manual - English - Page 51
Creating & Decorating Monograms 49 6 To view a preview of the selected design, click the "Preview" checkbox, if not already selected. You see a preview image of the selected design appear on the right-hand side of the dialog. 7 Click Open. The merged design file will appear in the design workspace. - Brother International BES Monogramming Suite | Instruction Manual - English - Page 52
50 Pacesetter BES Monogramming Suite Instruction Manual - Brother International BES Monogramming Suite | Instruction Manual - English - Page 53
CHAPTER 3: Editing Designs Topics covered in this chapter: • Selecting objects (lettering, frames, or decors) • Copying, cutting and pasting objects in the design. • Grouping and ungrouping objects in the workspace. • Using the selection handles of an object to resize or rotate it. • Selection of - Brother International BES Monogramming Suite | Instruction Manual - English - Page 54
52 Pacesetter BES Monogramming Suite Instruction Manual Editing Monogram Designs Once you have finished placing your Monogram design in the design workspace, you may want to change or rearrange it in various ways. You may, for example, wish to move parts of - Brother International BES Monogramming Suite | Instruction Manual - English - Page 55
Editing Designs 53 Copying Segments In the Pacesetter BES Monogramming Suite design workspace, you can use the copy (or cut) method to place segments of your design onto the end of the sequence, and therefore will sew out last. The pasted segment (or segments) can be re-ordered in the Sequence View. - Brother International BES Monogramming Suite | Instruction Manual - English - Page 56
54 Pacesetter BES Monogramming Suite Instruction Manual Deleting Segments Deleting an object group as a whole, while leaving other parts of the design unchanged. Segments must be selected in order to group them. To group segments: 1 In the design workspace or Sequence View, select the segments - Brother International BES Monogramming Suite | Instruction Manual - English - Page 57
Editing Designs 55 Reflecting a Design Object Reflecting an object flips the object across an invisible axis. You can choose either a vertical or horizontal axis to reflect across. To reflect segments: 1 Select the segment(s) you want to reflect. 2 From the arrange tool bar, click one of the - Brother International BES Monogramming Suite | Instruction Manual - English - Page 58
56 Pacesetter BES Monogramming Suite Instruction Manual Vertical Center: Takes all selected objects and centers them in the selection box. The objects are moved so that they are centered top-to-bottom - Brother International BES Monogramming Suite | Instruction Manual - English - Page 59
, click and drag the handles located at the top or bottom corners of the selection box. Rotating Segments You can rotate a design object manually by clicking and dragging the selection's rotation handle. Rotating a segment To rotate segments: 1 Select one or more segments you want to rotate. The - Brother International BES Monogramming Suite | Instruction Manual - English - Page 60
58 Pacesetter BES Monogramming Suite Instruction Manual 3 Click and drag the rotation bead to adjust the box your design by dragging them to another location. To move an object or a copy of an object manually: 1 On the Ribbon, click the Select tool. 2 Select the objects, or group of objects. The - Brother International BES Monogramming Suite | Instruction Manual - English - Page 61
a panel on the right side of the Pacesetter BES Monogramming Suite workspace. When a monogram is selected, you will be able to change monogram, the width percentage and the slant. You can also determine how lock stitches and trims will be applied to the segment, for those machine formats that support - Brother International BES Monogramming Suite | Instruction Manual - English - Page 62
60 Pacesetter BES Monogramming Suite Instruction Manual To change the height of lettering: 1 Select the to save your changes. You see your text's width percentage altered accordingly. Slant Pacesetter BES Monogramming Suite allows you to use the Slant setting to create a slanted effect in lettering. - Brother International BES Monogramming Suite | Instruction Manual - English - Page 63
field of the Properties Panel to control how trims are applied to lettering segments. Note that not all machine format support trims. If you save your design in a format that does not support trims, the trim will not occur on your machine during sew-out. You can choose from the following options - Brother International BES Monogramming Suite | Instruction Manual - English - Page 64
Pacesetter BES Monogramming Suite Instruction Manual Lock Stitches You can choose to add lock stitches to the lettering using the Lock Type field in the properties panel. The options are: • Always • Never • Around trim Fill Density Setting The density of monogram exceeded the font's size - Brother International BES Monogramming Suite | Instruction Manual - English - Page 65
the following image gives a schematic view of how the different types of underlay are sewn. Note that, in Pacesetter BES Monogramming Suite, Underlay can only be added to monogram lettering; it cannot be applied to other embroidery objects, such as Decors and Frames. Selecting the Underlay Type You - Brother International BES Monogramming Suite | Instruction Manual - English - Page 66
64 Pacesetter BES Monogramming Suite Instruction Manual When you select underlay types, you will be able the density for underlay stitches in the Properties Panel. To set the underlay density: 1 Select the monogram segment. 2 In the Properties Panel, scroll down to the Underlay area. 3 Select one or - Brother International BES Monogramming Suite | Instruction Manual - English - Page 67
Inset Distance for Underlay You can change the inset distance. Pacesetter calculates the inset distance (the distance the underlay stitches are the more coverage you have. To change the inset distance: 1 Select the monogram segment. 2 In the Properties Panel, scroll down to the Underlay area. - Brother International BES Monogramming Suite | Instruction Manual - English - Page 68
66 Pacesetter BES Monogramming Suite Instruction Manual Pull Compensation Settings Pacesetter BES Monogramming Suite allows you to adjust the pull compensation in your design. In the Properties panel, you can use the settings available in the Pull Compensation area - Brother International BES Monogramming Suite | Instruction Manual - English - Page 69
Editing Designs 67 Working with the Color Palette In Pacesetter BES Monogramming Suite, you can change the color of any component of your design, whether it is the letters in a monogram, part of a frame, or one of the decor segments. Essentially, if you can select it, you can change its color. The - Brother International BES Monogramming Suite | Instruction Manual - English - Page 70
68 Pacesetter BES Monogramming Suite Instruction Manual 2 Type in all or part of the color you were looking for will now be the selected color in the palette. Changing a Thread Color Pacesetter Monogramming allows you to adjust the colors of the lettering you create, or indeed any component of the - Brother International BES Monogramming Suite | Instruction Manual - English - Page 71
Sequence View panel You can also use the sequence view to change the order of the sewing of color groups in a design. You do this by sequence view panel (corresponding to earlier and later, respectively, in the sewing order). Another function of the sequence view is to show and hide the different - Brother International BES Monogramming Suite | Instruction Manual - English - Page 72
70 Pacesetter BES Monogramming Suite Instruction Manual Changing Thread Colors in Sequence View As well the selected color. Sequencing Color Groups The sequence view shows the groups of your design in the order in which they will be sewn. Sequence is important, because you want color groups that are - Brother International BES Monogramming Suite | Instruction Manual - English - Page 73
dropping: 1 Select one or more color groups you want to resequence. 2 In the Sequence View area, drag the group(s) to the location in the sewing order that you want. 3 Release the mouse button. The color group will be inserted in the new location. To resequence color groups by cutting and pasting - Brother International BES Monogramming Suite | Instruction Manual - English - Page 74
72 Pacesetter BES Monogramming Suite Instruction Manual To hide all other color groups: 1 Select a color group tool that helps you reduce the number of thread color changes in a design. Sometimes, your monogram design may end up having many more color changes than is necessary, for example, if you - Brother International BES Monogramming Suite | Instruction Manual - English - Page 75
Editing Designs 73 colors can be combined into a single layer. If not, the color layers are left intact. To use color sort: 1 Select the design, or part of the design, that you want to apply color sort to. Note: If you want to apply color sort only to some of the segments of the design, these - Brother International BES Monogramming Suite | Instruction Manual - English - Page 76
74 Pacesetter BES Monogramming Suite Instruction Manual 3 Do any of the following: In the Margins area, enter the size of margins you want for your design worksheet. Select Print Actual Size to - Brother International BES Monogramming Suite | Instruction Manual - English - Page 77
Editing Designs 75 2 To zoom in and out of the previewed worksheet, do the following: To zoom in on the worksheet, click Zoom In and scroll to view specific parts of the design. To zoom out on the worksheet, click Zoom Out and scroll to view specific parts of the design. 3 To change the settings - Brother International BES Monogramming Suite | Instruction Manual - English - Page 78
76 Pacesetter BES Monogramming Suite Instruction Manual Printing Design Worksheets You can print worksheets for design files. When you print a worksheet for a design file, the worksheet information depends on the selected settings - Brother International BES Monogramming Suite | Instruction Manual - English - Page 79
Absolute pull-compensation 66 Adding Decors to a Monogram 43 Align tools 55 Aligning segments 55 Applying a Monogram Template 47 B Background Color tool 10 C types 63 Fit to Hoop 10 Flip Horizontal tool 11 Flip Vertical tool 11 Font, selecting 39 Frame 46 G Grid tool 10 Grouping objects 54 H Help 30 - Brother International BES Monogramming Suite | Instruction Manual - English - Page 80
78 Pacesetter BES Monogramming Suite Instruction Manual I Import Color dialog 37 Insert 9 Inset distance 65 K Keystrokes 40 L Locking a color group 72 M Machine Formats 20 Magnifying views 21 Measuring designs 26 Merge Design tool 8 Merging designs 48 Metric units 19 Modify Tools 11 Monogram - Brother International BES Monogramming Suite | Instruction Manual - English - Page 81
79 Sequencing segments 70 Showing a color segment 71 Slant setting 60 Slow Draw Bar Scrollbar slider 12, 13 Speed Control 13 Speed Control, drawing 13 Status Line 13 T Thread Colors 68 Thread colors 14 changing 68, 70 Title Bar 6 Tools Edit 8 Modify 11 Tools, Draw Bar 12, 13 U Underlay stitch
-
 1
1 -
 2
2 -
 3
3 -
 4
4 -
 5
5 -
 6
6 -
 7
7 -
8
-
9
-
10
-
11
-
12
-
13
-
14
-
15
-
16
-
17
-
18
-
19
-
20
-
21
-
22
-
23
-
24
-
25
-
26
-
27
-
28
-
29
-
30
-
31
-
32
-
33
-
34
-
35
-
36
-
37
-
38
-
39
-
40
-
41
-
42
-
43
-
44
-
45
-
46
-
47
-
48
-
49
-
50
-
51
-
52
-
53
-
54
-
55
-
56
-
57
-
58
-
59
-
60
-
61
-
62
-
63
-
64
-
65
-
66
-
67
-
68
-
69
-
70
-
71
-
72
-
73
-
74
-
75
-
76
-
77
-
78
-
79
-
80
-
81
 |
 |

Pacesetter BES
Monogramming Suite
Instruction Manual