Brother International MFC-J4510DW Quick Setup Guide - English - Page 15
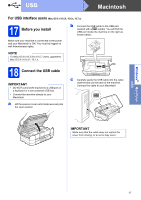
Connect the USB cable
 |
View all Brother International MFC-J4510DW manuals
Add to My Manuals
Save this manual to your list of manuals |
Page 15 highlights
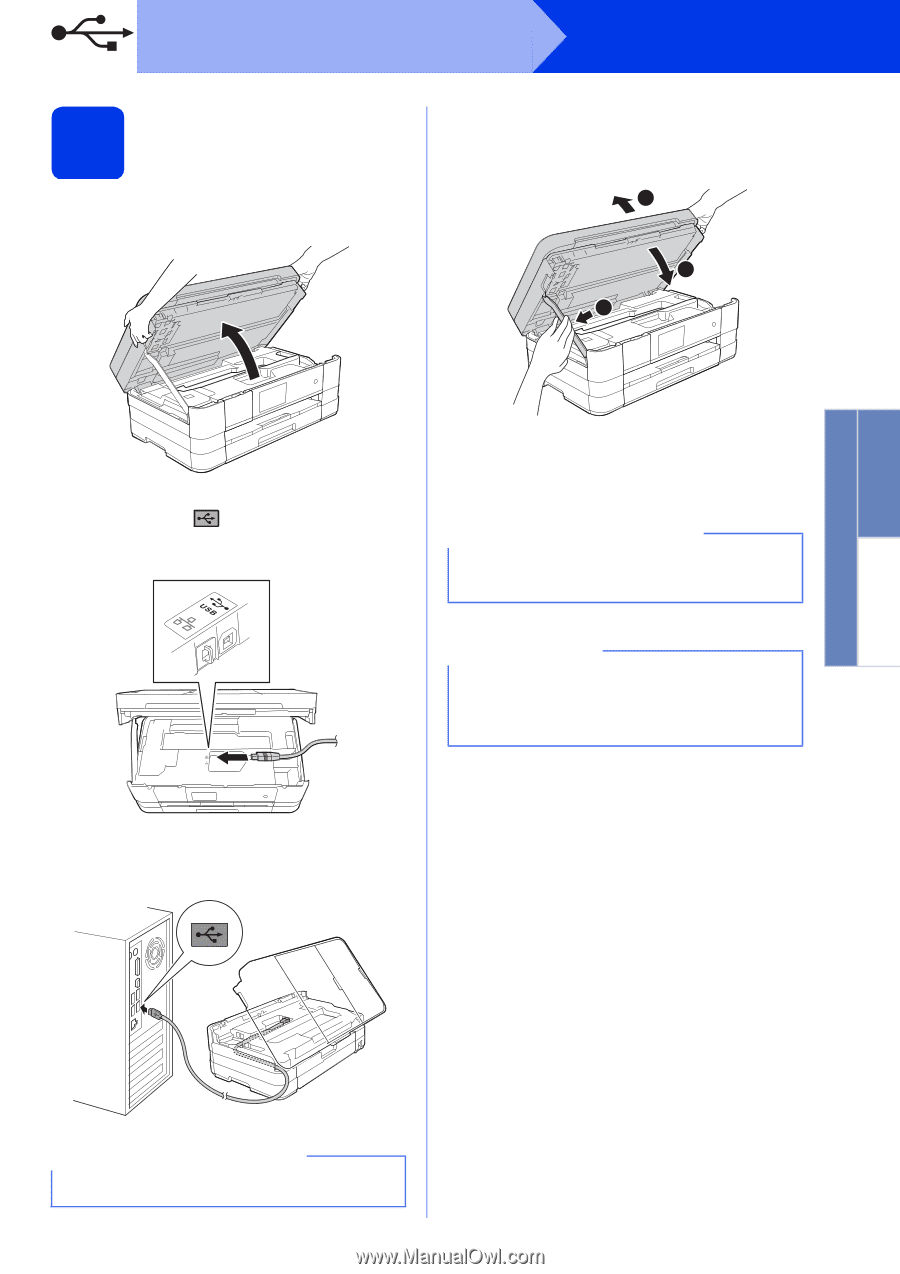
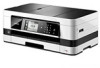
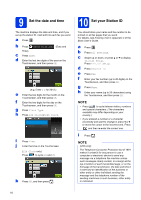
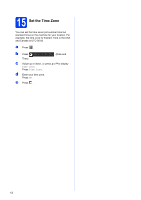
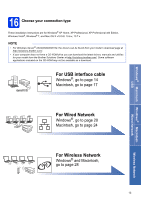
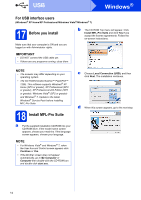
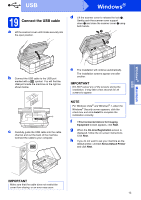
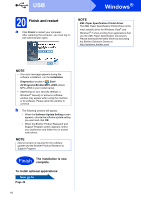
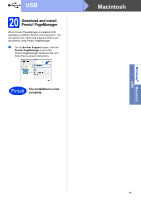
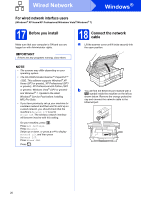
Windows® Macintosh USB USB Windows® 19 Connect the USB cable a Lift the scanner cover until it locks securely into the open position. d Lift the scanner cover to release the lock a. Gently push the scanner cover support down b and close the scanner cover c using both hands. 1 3 2 b Connect the USB cable to the USB port marked with a symbol. You will find the USB port inside the machine on the right as shown below. c Carefully guide the USB cable into the cable channel and out the back of the machine. Connect the cable to your computer. e The installation will continue automatically. The installation screens appear one after another. IMPORTANT DO NOT cancel any of the screens during the installation. It may take a few seconds for all screens to appear. NOTE For Windows Vista® and Windows® 7, when the Windows® Security screen appears, click the check box and click Install to complete the installation correctly. f If Environmental Advice for Imaging Equipment screen appears, click Next. g When the On-Line Registration screen is displayed, follow the on-screen instructions. Click Next. h If you do not want to set your machine as the default printer, uncheck Set as Default Printer and click Next. IMPORTANT Make sure that the cable does not restrict the cover from closing, or an error may occur. 15
-
 1
1 -
2
-
3
-
4
-
5
-
6
-
7
-
8
-
9
-
 10
10 -
 11
11 -
 12
12 -
 13
13 -
 14
14 -
 15
15 -
 16
16 -
 17
17 -
 18
18 -
 19
19 -
 20
20 -
21
-
22
-
23
-
24
-
25
-
26
-
27
-
28
-
29
-
30
-
31
-
32
-
33
-
34
-
35
-
36
-
37
-
38
-
39
-
40
-
41
-
42
-
43
-
44
-
45
-
46
 |
 |