Brother International PE-DESIGN Ver.5 Users Manual - English - Page 55
Step 15 Setting Hole Sewing
 |
View all Brother International PE-DESIGN Ver.5 manuals
Add to My Manuals
Save this manual to your list of manuals |
Page 55 highlights
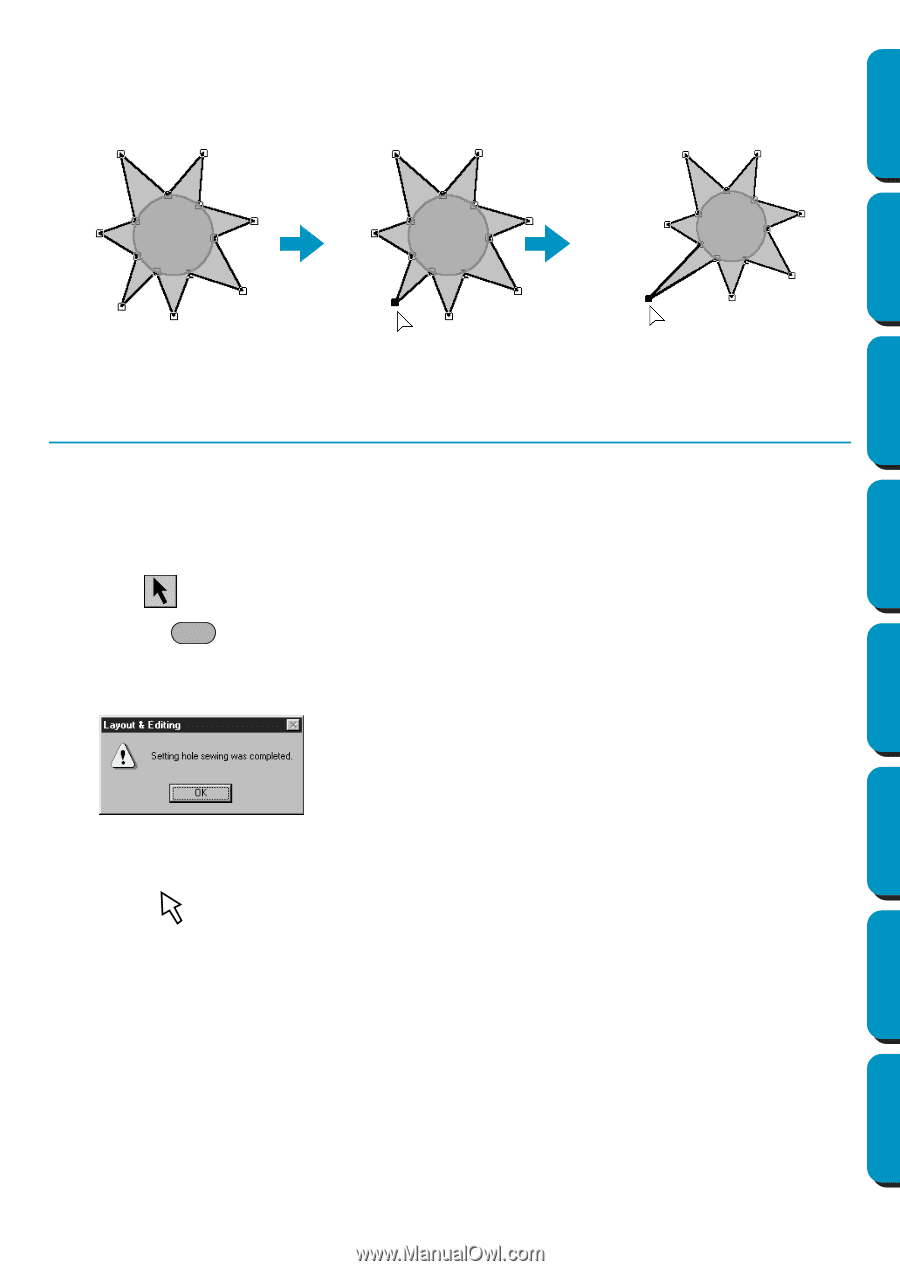
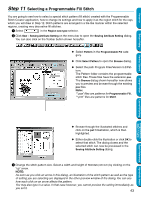
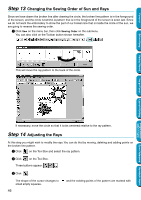
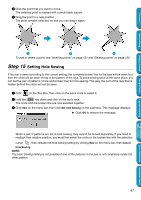
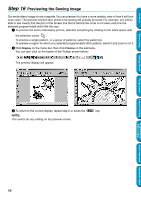
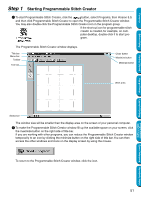
Contents 4 Click the point that you want to move. The selected point is marked with a small black square. 5 Drag the point to a new position. The point remains selected, so that you can drag it again. Before Using Getting Started Design Center Layout & Editing 3 4 5 To add or delete a point, see "Inserting points" on page 121 and "Deleting points" on page 122. Step 15 Setting Hole Sewing If the sun is sewn according to the current setting, the complete broken line for the rays will be sewn first, then the circle will be sewn on top of the pattern of the rays. To avoid sewing twice at the same place, you can set the pair of patterns (circle and broken line) for hole sewing. This way, the part of the rays that is hidden behind the circle will not be sewn. 1 Click on the Tool Box, then click on the sun's circle to select it. 2 Hold the Ctrl key down and click on the sun's rays. The circle and the broken line are now selected together. 3 Click Sew on the menu bar, then click Set Hole Sewing on the submenu. This message displays: N Click OK to remove the message. When a pair of patterns are set to hole sewing, they cannot be moved separately. If you need to readjust their relative position, you must first select the circle or the broken line with the selection cursor , then release the hole sewing setting by clicking Sew on the menu bar, then Cancel Hole Sewing. NOTE: The Hole Sewing setting is not possible if one of the patterns in the pair is not completely inside the other pattern. Programmable Stitch Creator Quick Reference Alphabetic Index 47
-
 1
1 -
2
-
3
-
4
-
5
-
6
-
7
-
8
-
9
-
10
-
11
-
12
-
13
-
14
-
15
-
16
-
17
-
18
-
19
-
20
-
21
-
22
-
23
-
24
-
25
-
26
-
27
-
28
-
29
-
30
-
31
-
32
-
33
-
34
-
35
-
36
-
37
-
38
-
39
-
40
-
41
-
42
-
43
-
44
-
45
-
46
-
47
-
48
-
49
-
 50
50 -
 51
51 -
 52
52 -
 53
53 -
 54
54 -
 55
55 -
 56
56 -
 57
57 -
 58
58 -
 59
59 -
 60
60 -
61
-
62
-
63
-
64
-
65
-
66
-
67
-
68
-
69
-
70
-
71
-
72
-
73
-
74
-
75
-
76
-
77
-
78
-
79
-
80
-
81
-
82
-
83
-
84
-
85
-
86
-
87
-
88
-
89
-
90
-
91
-
92
-
93
-
94
-
95
-
96
-
97
-
98
-
99
-
100
-
101
-
102
-
103
-
104
-
105
-
106
-
107
-
108
-
109
-
110
-
111
-
112
-
113
-
114
-
115
-
116
-
117
-
118
-
119
-
120
-
121
-
122
-
123
-
124
-
125
-
126
-
127
-
128
-
129
-
130
-
131
-
132
-
133
-
134
-
135
-
136
-
137
-
138
-
139
-
140
-
141
-
142
-
143
-
144
-
145
-
146
-
147
-
148
-
149
-
150
-
151
-
152
-
153
-
154
-
155
-
156
-
157
-
158
-
159
-
160
-
161
-
162
-
163
-
164
-
165
-
166
-
167
-
168
-
169
-
170
-
171
-
172
-
173
-
174
-
175
-
176
-
177
-
178
-
179
-
180
-
181
-
182
-
183
-
184
-
185
-
186
-
187
-
188
-
189
-
190
-
191
-
192
-
193
-
194
-
195
-
196
-
197
-
198
-
199
-
200
-
201
-
202
-
203
-
204
-
205
-
206
-
207
-
208
-
209
-
210
-
211
-
212
-
213
-
214
-
215
-
216
-
217
-
218
-
219
-
220
-
221
-
222
-
223
-
224
-
225
-
226
-
227
-
228
-
229
-
230
-
231
-
232
-
233
-
234
-
235
-
236
-
237
-
238
-
239
-
240
-
241
-
242
-
243
-
244
-
245
-
246
-
247
-
248
-
249
-
250
-
251
-
252
-
253
-
254
-
255
-
256
-
257
-
258
-
259
-
260
-
261
-
262
-
263
-
264
-
265
-
266
-
267
-
268
-
269
-
270
-
271
-
272
-
273
-
274
 |
 |