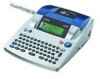
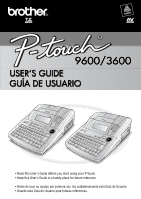
Brother International PT-3600 Users Manual - English and Spanish - Page 5
Using an Auto Format template, Printing text, ROTATE, PRINT, EDIT MORE, CHANGE STYLE - tape
 |
UPC - 012502602804
View all Brother International PT-3600 manuals
Add to My Manuals
Save this manual to your list of manuals |
Page 5 highlights
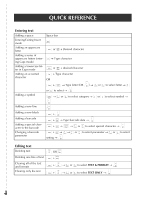
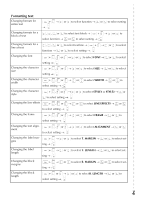
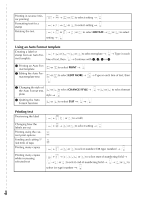
Printing in reverse (mirror printing) Formatting text for a stamp Rotating the text d + p → m or g to select setting → n d + S → m or g to select setting → n d + 1 or 2 → j or k to select ROTATE → m or g to select setting → n Using an Auto Format template Creating a label or stamp from an Auto For- d + 6 or 7 → m or g to select template → n → Type in each mat template line of text, then n → Continue with 1, 2, 3 or 4 1 Printing an Auto Format template m or g to select PRINT → n 2 Editing the Auto Format template text m or g to select EDIT MORE → n → Type in each line of text, then n 3 Changing the style of the Auto Format tem- m or g to select CHANGE STYLE → n → m or g to select format plate style → n 4 Quitting the Auto Format function m or g to select EXIT → n → n Printing text Previewing the label Changing how the labels are cut Printing using the current print options Feeding and cutting 1" (24 mm) of tape Printing many copies Printing many copies while increasing selected text d + 9 (j or k to scroll) d + f → m or g to select setting → n p f d + 4 → m or g to select number (OR type number) → n d + 5 → j, k, m or g to select start of numbering field → n → j or k to select end of numbering field → n → m or g to select (or type) number → n
-
 1
1 -
 2
2 -
 3
3 -
 4
4 -
 5
5 -
 6
6 -
 7
7 -
 8
8 -
 9
9 -
 10
10 -
 11
11 -
12
-
13
-
14
-
15
-
16
-
17
-
18
-
19
-
20
-
21
-
22
-
23
-
24
-
25
-
26
-
27
-
28
-
29
-
30
-
31
-
32
-
33
-
34
-
35
-
36
-
37
-
38
-
39
-
40
-
41
-
42
-
43
-
44
-
45
-
46
-
47
-
48
-
49
-
50
-
51
-
52
-
53
-
54
-
55
-
56
-
57
-
58
-
59
-
60
-
61
-
62
-
63
-
64
-
65
-
66
-
67
-
68
-
69
-
70
-
71
-
72
-
73
-
74
-
75
-
76
-
77
-
78
-
79
-
80
-
81
-
82
-
83
-
84
-
85
-
86
-
87
-
88
-
89
-
90
-
91
-
92
-
93
-
94
-
95
-
96
-
97
-
98
-
99
-
100
-
101
-
102
-
103
-
104
-
105
-
106
-
107
-
108
-
109
-
110
-
111
-
112
-
113
-
114
-
115
-
116
-
117
-
118
-
119
-
120
-
121
-
122
-
123
-
124
-
125
-
126
-
127
-
128
-
129
-
130
-
131
-
132
-
133
-
134
-
135
-
136
-
137
-
138
-
139
-
140
-
141
-
142
-
143
-
144
-
145
-
146
-
147
-
148
-
149
-
150
-
151
-
152
-
153
-
154
-
155
-
156
-
157
-
158
-
159
-
160
-
161
-
162
-
163
-
164
-
165
-
166
-
167
-
168
-
169
-
170
-
171
-
172
-
173
-
174
-
175
-
176
-
177
-
178
-
179
-
180
-
181
-
182
-
183
-
184
-
185
-
186
-
187
-
188
-
189
-
190
-
191
-
192
-
193
-
194
-
195
-
196
-
197
-
198
-
199
-
200
-
201
-
202
-
203
-
204
-
205
-
206
-
207
-
208
-
209
-
210
-
211
-
212
 |
 |
