Canon 40MC Elura Instruction Manual - Page 36
Setting the Date and Time
 |
UPC - 013803014938
View all Canon 40MC manuals
Add to My Manuals
Save this manual to your list of manuals |
Page 36 highlights
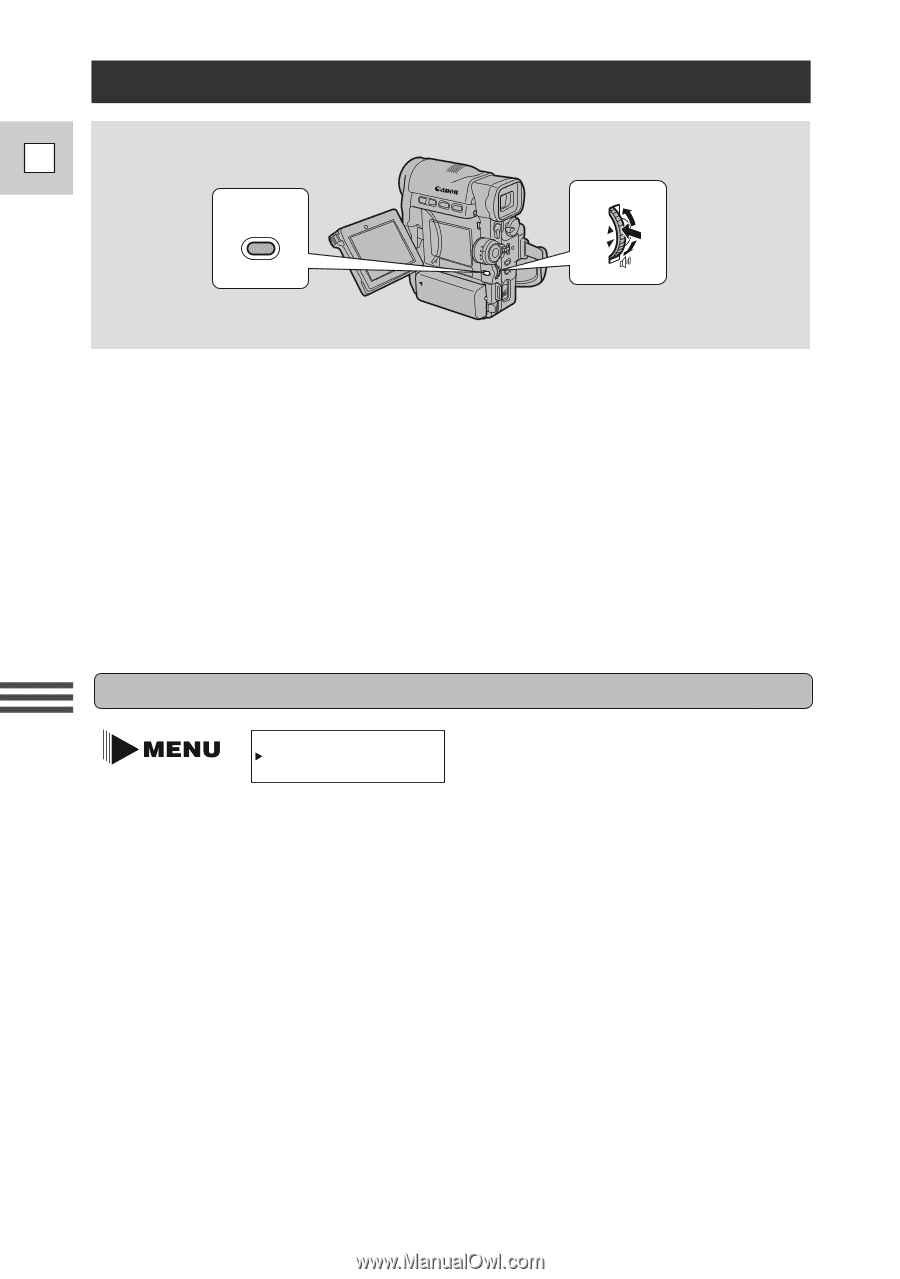
Setting the Date and Time E MENU Using the Full Range of Features The date and/or time display forms part of the data code. You can choose to display or hide it during playback (see p. 63). Set the date and time display when you first start using your camera. Charge the backup battery before you begin (see p. 87). • Before you start setting the date and time, select your home time zone from the menu. • If you are on daylight saving time now, you should set the camera to daylight saving time. You can do this at the same time you select your home time zone. • After you set the date and time, the date/time and home time zone will be displayed for about four seconds each time you turn the power on. • The camera automatically accounts for the number of days in a month and leap year. Setting the time zone/daylight saving time (see p. 30) T.ZONE/DST••N.Y. 1. Set the camera to record pause mode. • PAUSE appears in the display. 2. Open the menu and select T. ZONE/DST. 3. Press the selector dial in. • The time zone display appears on the screen. • Your camcorder's time zone is factory-preset to New York. If you are at another time zone, select your time zone first and daylight saving time (DST) setting if necessary. 4. Move up or down the list of time zones by turning the selector dial. Press the selector dial in to select the option that represents your time zone. • If you are now in daylight saving time, select the time zone with the daylight saving time mark C next to the area. 5. Press the MENU button. 36
-
 1
1 -
2
-
3
-
4
-
5
-
6
-
7
-
8
-
9
-
10
-
11
-
12
-
13
-
14
-
15
-
16
-
17
-
18
-
19
-
20
-
21
-
22
-
23
-
24
-
25
-
26
-
27
-
28
-
29
-
30
-
 31
31 -
 32
32 -
 33
33 -
 34
34 -
 35
35 -
 36
36 -
 37
37 -
 38
38 -
 39
39 -
 40
40 -
 41
41 -
42
-
43
-
44
-
45
-
46
-
47
-
48
-
49
-
50
-
51
-
52
-
53
-
54
-
55
-
56
-
57
-
58
-
59
-
60
-
61
-
62
-
63
-
64
-
65
-
66
-
67
-
68
-
69
-
70
-
71
-
72
-
73
-
74
-
75
-
76
-
77
-
78
-
79
-
80
-
81
-
82
-
83
-
84
-
85
-
86
-
87
-
88
-
89
-
90
-
91
-
92
-
93
-
94
-
95
-
96
-
97
-
98
-
99
-
100
-
101
-
102
-
103
-
104
-
105
-
106
-
107
-
108
-
109
-
110
-
111
-
112
-
113
-
114
-
115
-
116
-
117
 |
 |