Canon PowerShot A510 ZoomBrowser EX 5.0 Software User Guide - Page 92
Editing Images 5/5
 |
View all Canon PowerShot A510 manuals
Add to My Manuals
Save this manual to your list of manuals |
Page 92 highlights
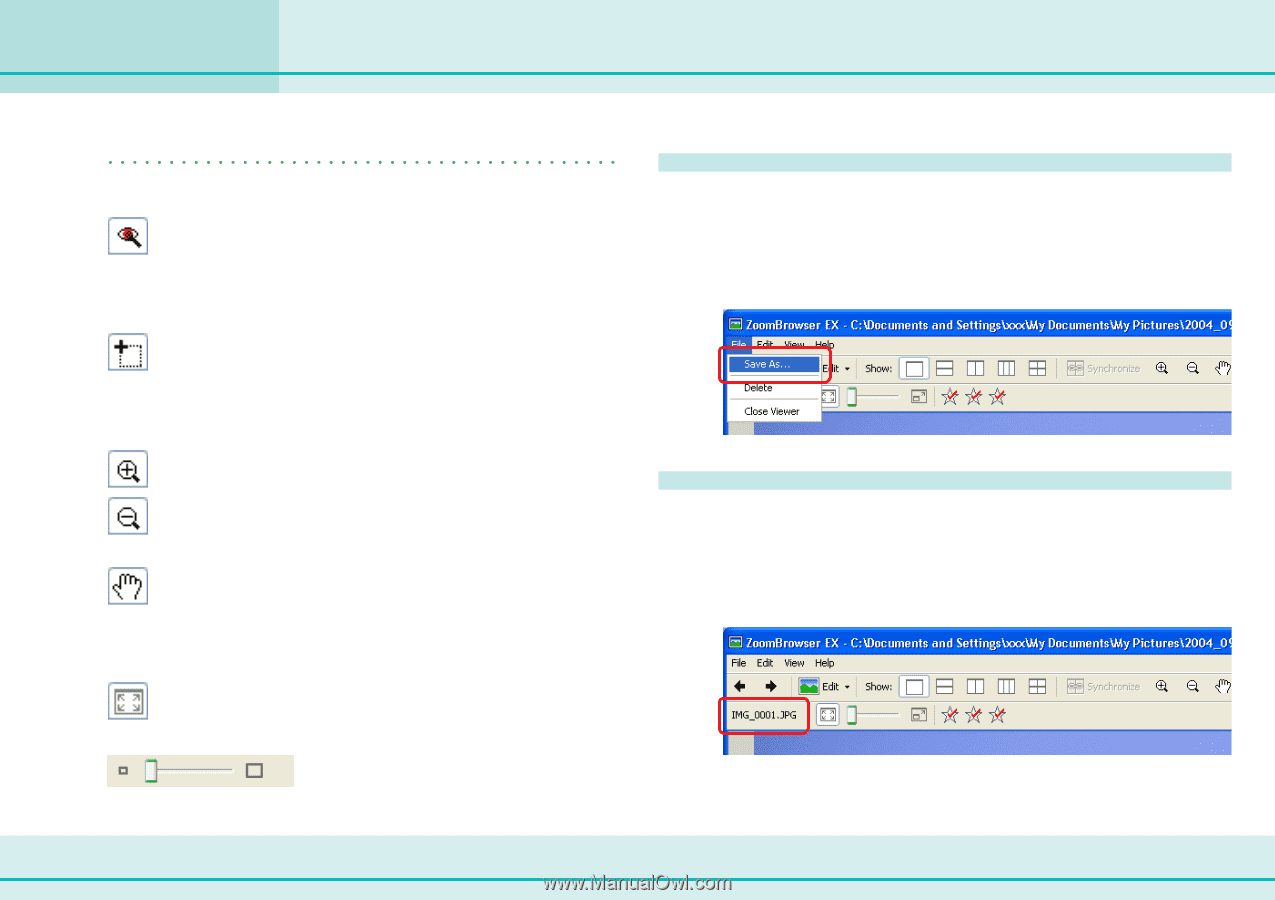
Editing Images (5/5) Chapter 6 Using Supplementary Features REFERENCE • You can use the following tools when editing. Red Eye Correction Button (Only available in the manual red eye correction mode) Restores the red eye correction mode when the Zoom In, Zoom Out or Grab button is in use. Crop Button (Only available when cropping) Restores the cropping mode when the Zoom In, Zoom Out or Grab button is in use. Zoom In/Zoom Out Button Zooms in or out (makes a portion of the image appear larger or smaller). The Navigator window appears when the image is zoomed in. Grab Button (Only available when the image is zoomed in) Clicking and dragging changes the position of the zoomed-in area of the image. Window Size Button Sets the image display size to the window size. Display Size Changes the image display magnification. 92 ZoomBrowser EX Software User Guide Saving under a Different Name You can leave the original image file untouched and save the edited image in a new file under a different name. After editing the original, click the [File] menu in the Viewer Window and select [Save As] to open the Save dialog. Set the file name, format and image quality and click [Save]. Overwriting the Image To overwrite the original image file with the edited image data, use the Save dialog from the Saving under a Different Name procedure and save the file leaving the file name the same as the original. (The original file name is displayed in the Viewer Window.)
-
 1
1 -
2
-
3
-
4
-
5
-
6
-
7
-
8
-
9
-
10
-
11
-
12
-
13
-
14
-
15
-
16
-
17
-
18
-
19
-
20
-
21
-
22
-
23
-
24
-
25
-
26
-
27
-
28
-
29
-
30
-
31
-
32
-
33
-
34
-
35
-
36
-
37
-
38
-
39
-
40
-
41
-
42
-
43
-
44
-
45
-
46
-
47
-
48
-
49
-
50
-
51
-
52
-
53
-
54
-
55
-
56
-
57
-
58
-
59
-
60
-
61
-
62
-
63
-
64
-
65
-
66
-
67
-
68
-
69
-
70
-
71
-
72
-
73
-
74
-
75
-
76
-
77
-
78
-
79
-
80
-
81
-
82
-
83
-
84
-
85
-
86
-
 87
87 -
 88
88 -
 89
89 -
 90
90 -
 91
91 -
 92
92 -
 93
93 -
 94
94 -
 95
95 -
 96
96 -
 97
97 -
98
-
99
-
100
-
101
-
102
-
103
-
104
-
105
-
106
-
107
-
108
-
109
-
110
-
111
-
112
-
113
-
114
-
115
-
116
-
117
-
118
-
119
-
120
-
121
-
122
-
123
-
124
-
125
-
126
-
127
-
128
-
129
-
130
 |
 |